Today I’ve got three birthday crown DIY ideas for you in my new video for HGTV Handmade, to give yourself an extra-special accessory on your big day. The one above is what I made to wear to my actual birthday party, because crowns shouldn’t be just for kids anymore!
I tried something new with this video, by just using text on the screen rather than doing a voiceover of the instructions. I hope you like it!
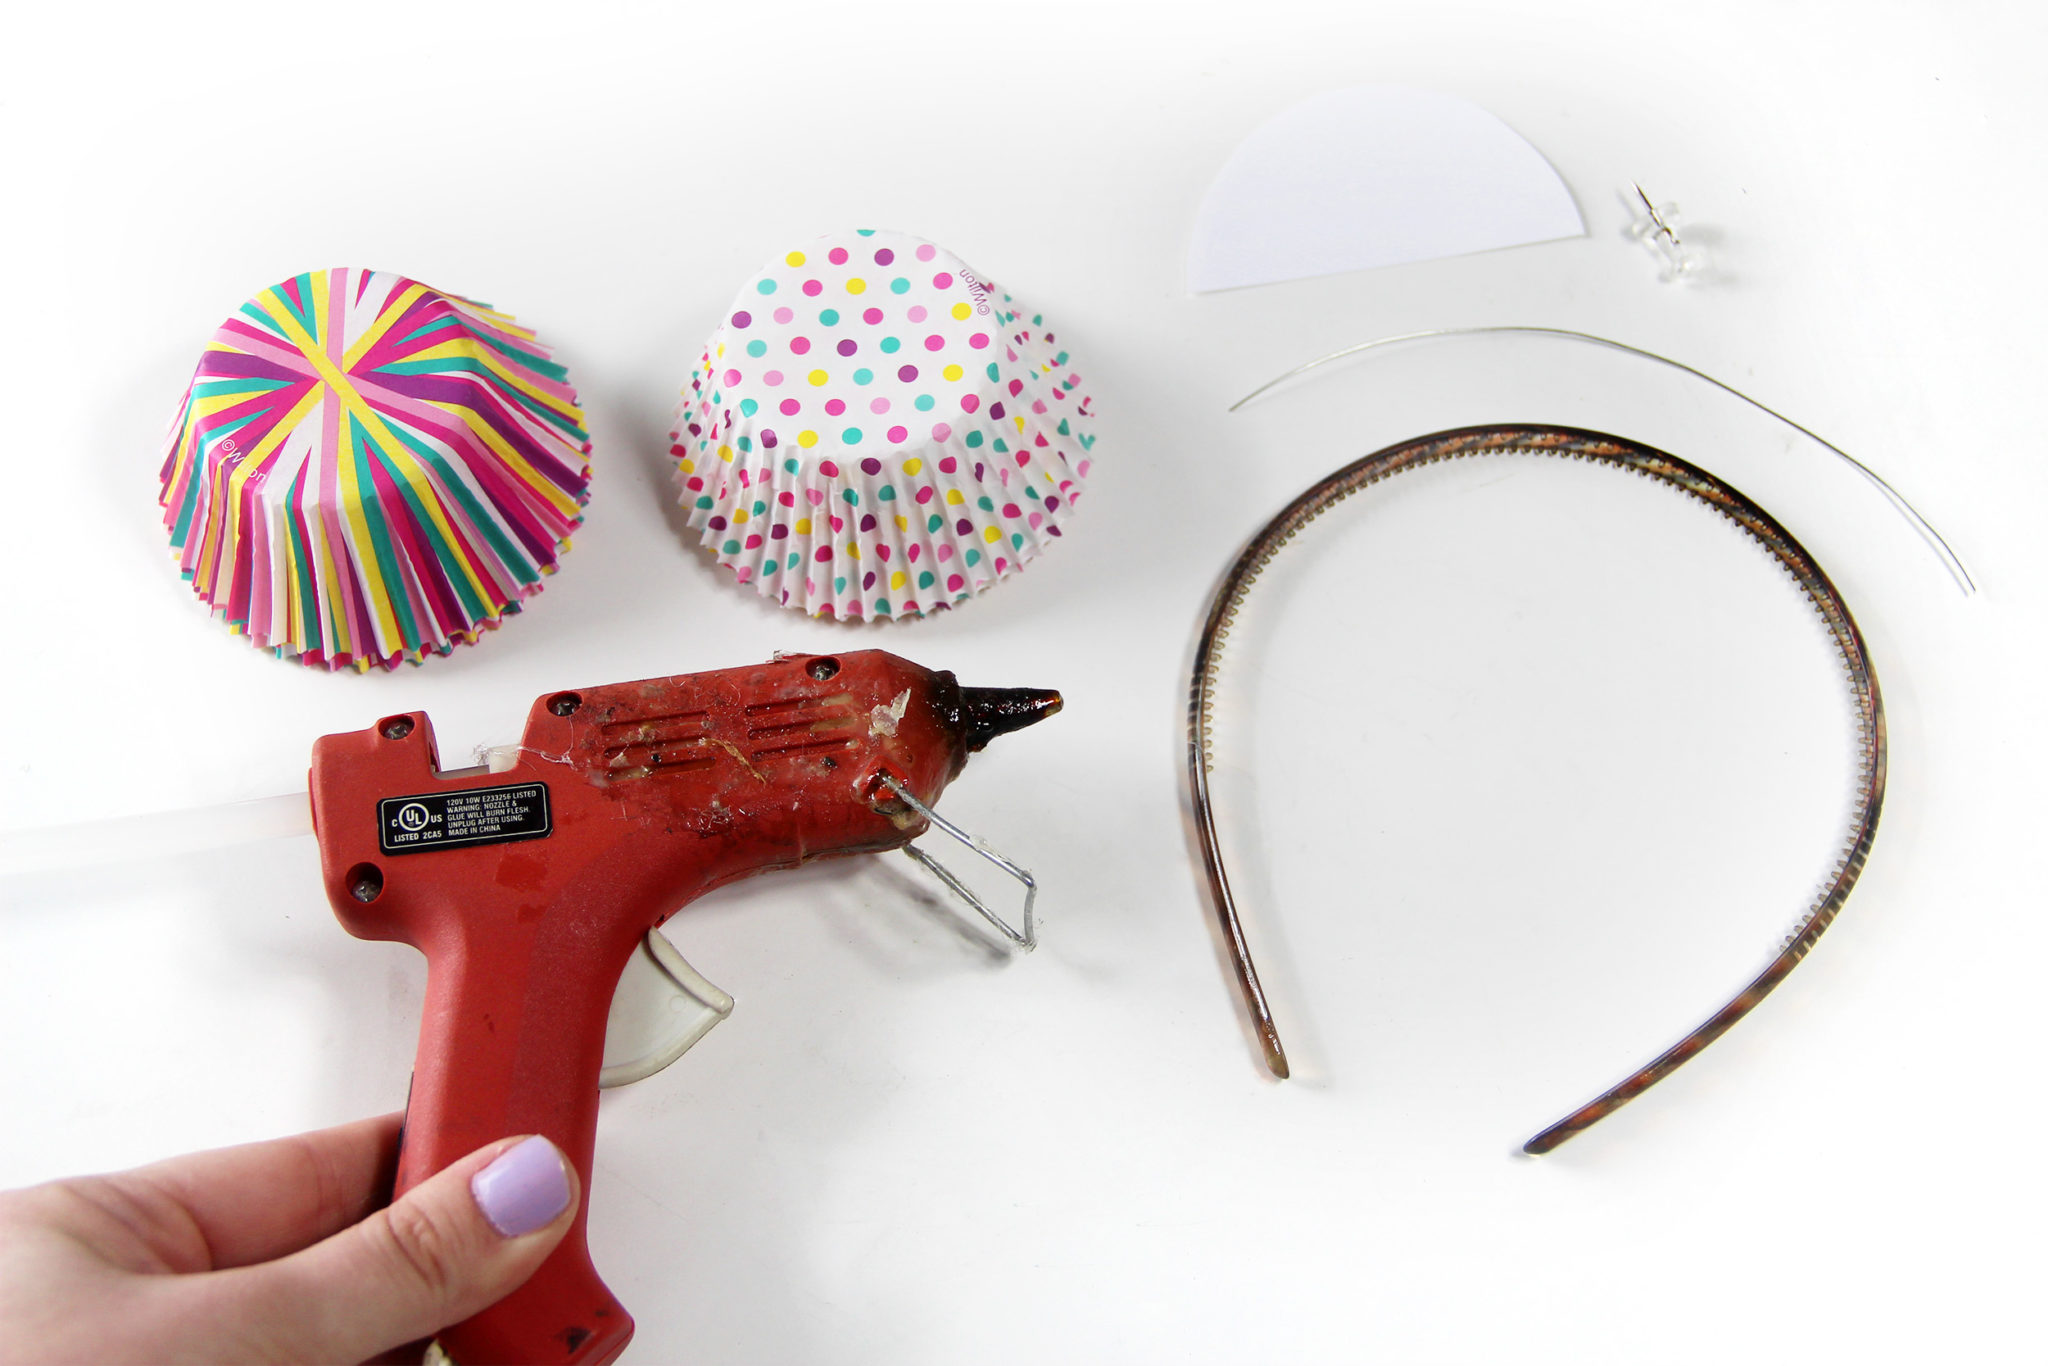
Our first crown basically makes you looks like a cupcake. You’ll need 8 cupcake liners, a piece of cardstock cut into a half-circle, a piece of wire, a thumbtack, a headband, and a hot glue gun.
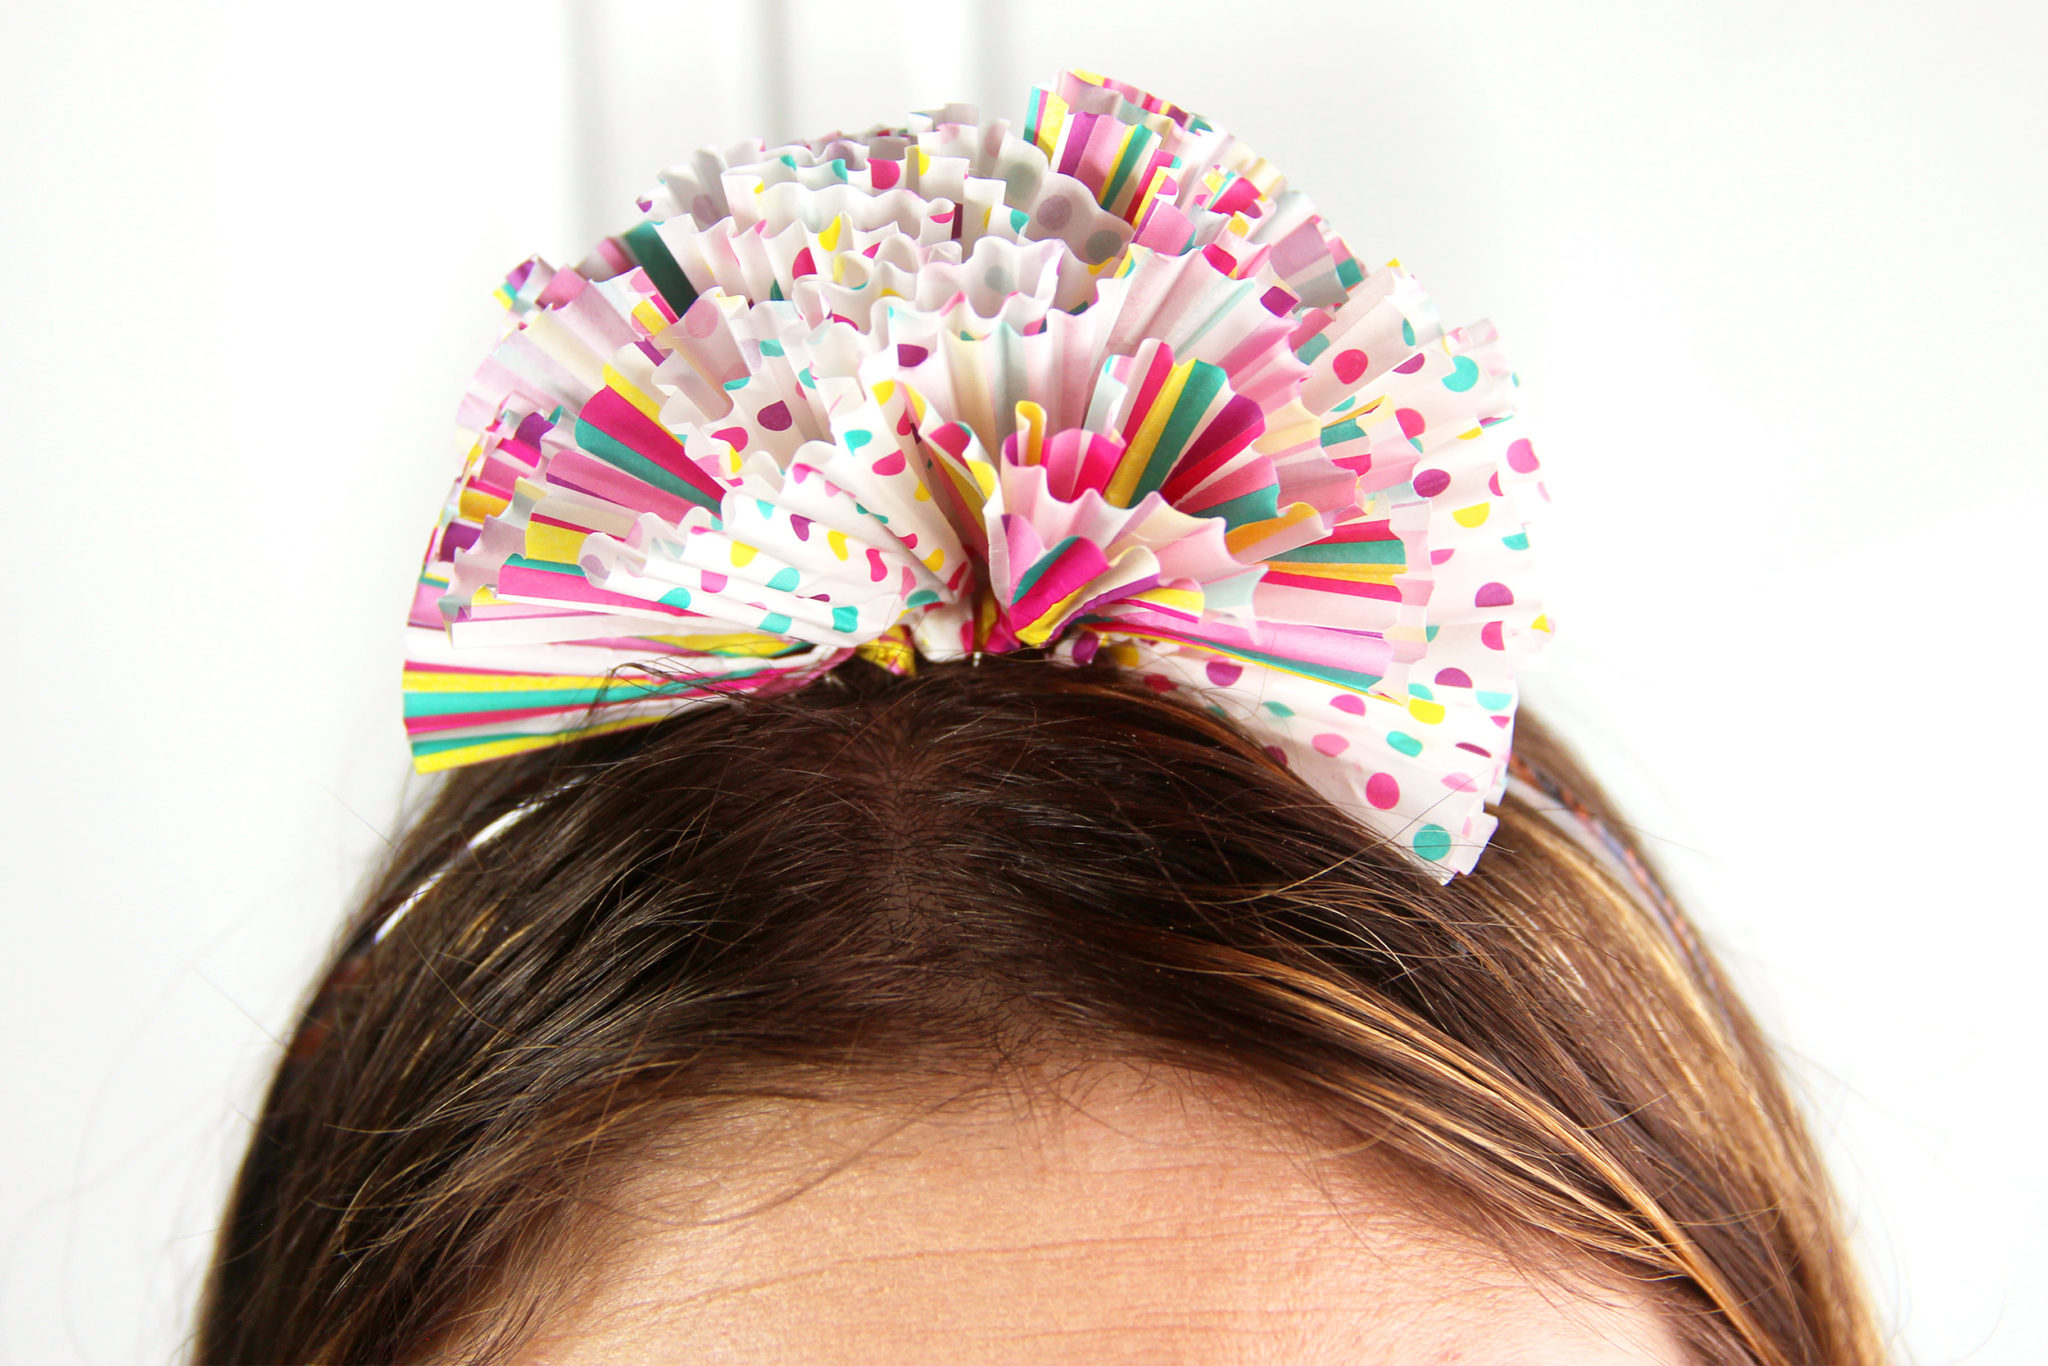
You’re just going to scrunch up the cupcake liners like I showed in the video and hot glue them to the paper half-circle. Then use the thumbtack to make a hole for the wire and use the wire to attach it onto the headband. And that’s it! It literally only takes about 10 minutes to make.
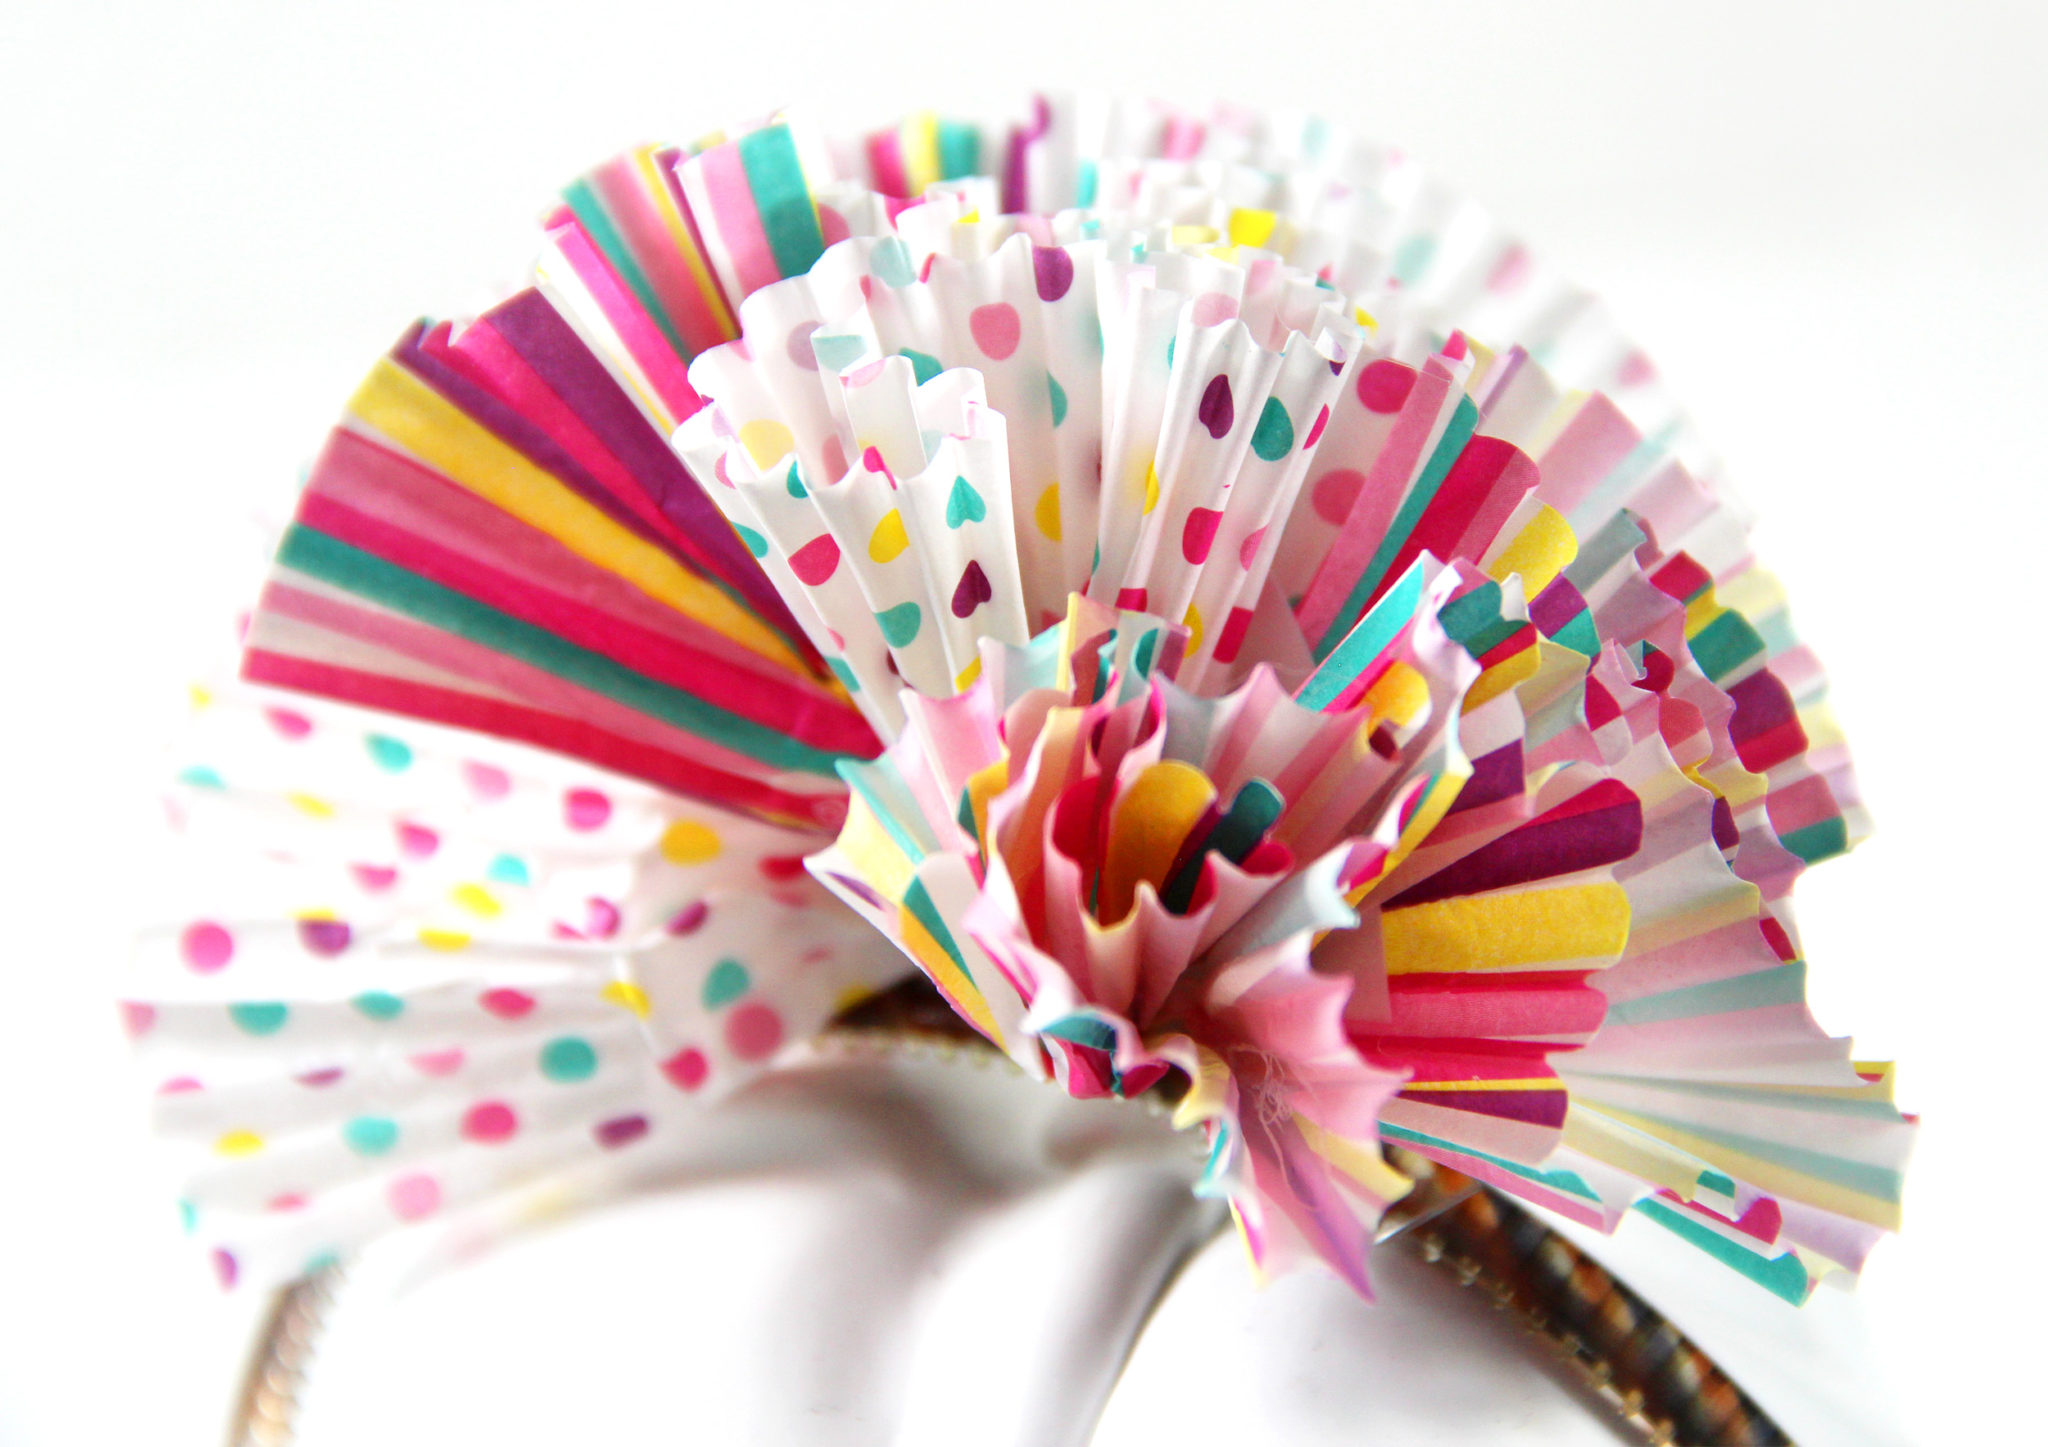
I love how fluffy and colorful it is! If you wanted to, you could keep building the cupcake liners out to make a full sphere on top of your head, but I thought just the eight were fine on their own.
And now we move into the photoshoot portion of our blog post…

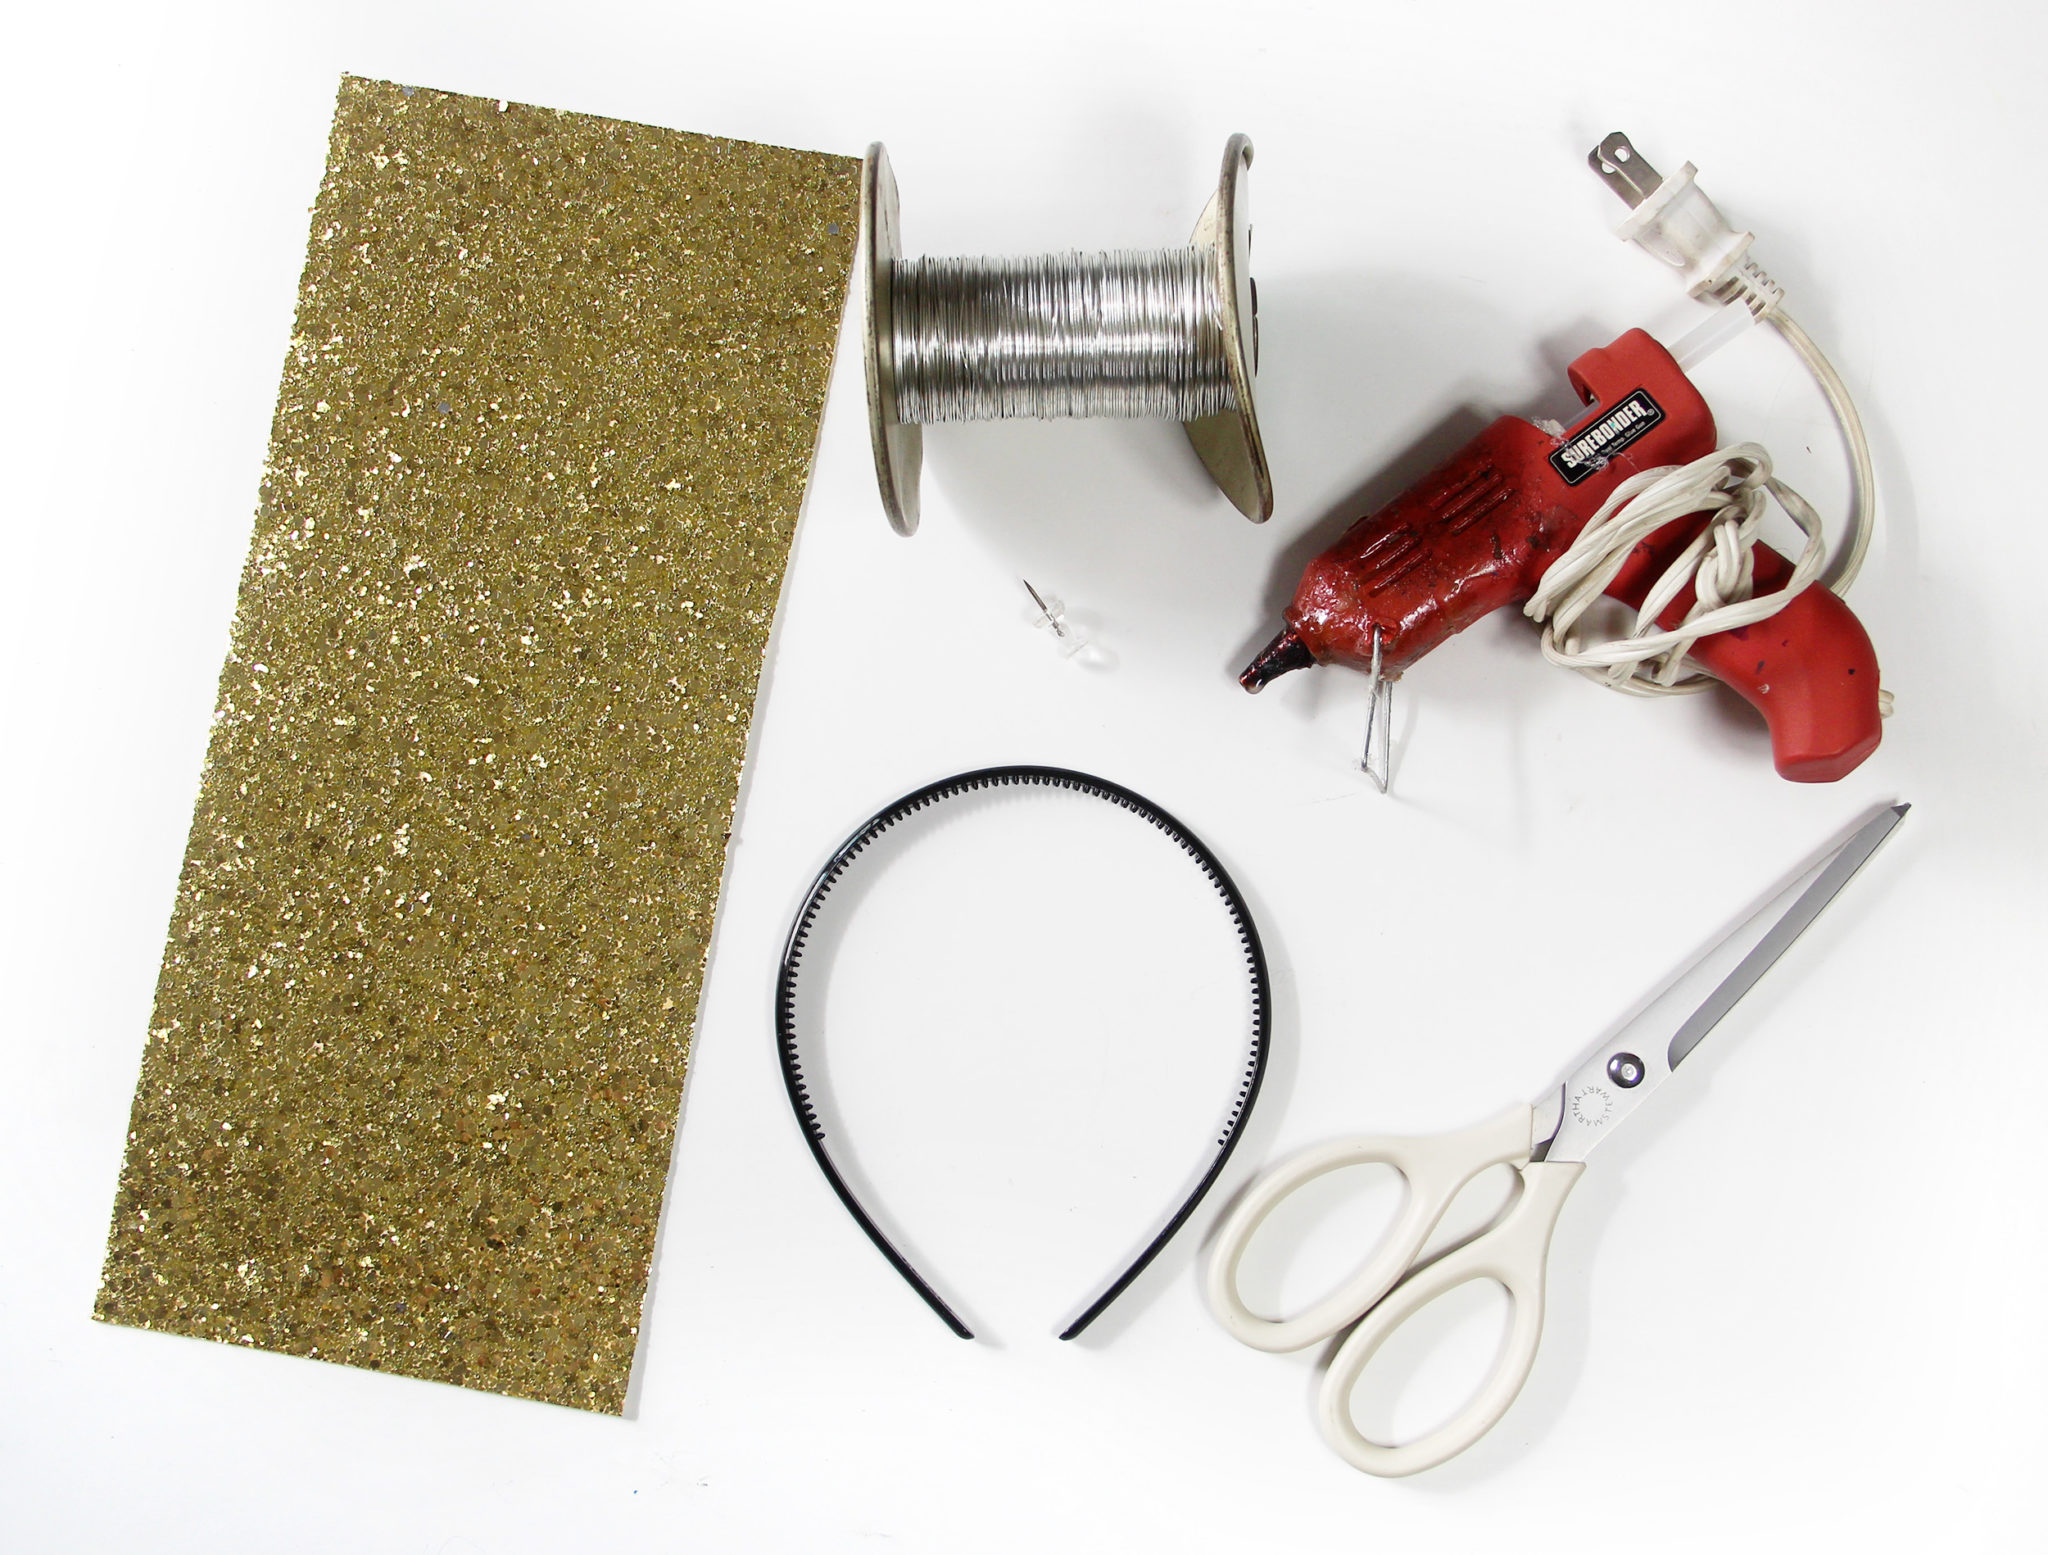
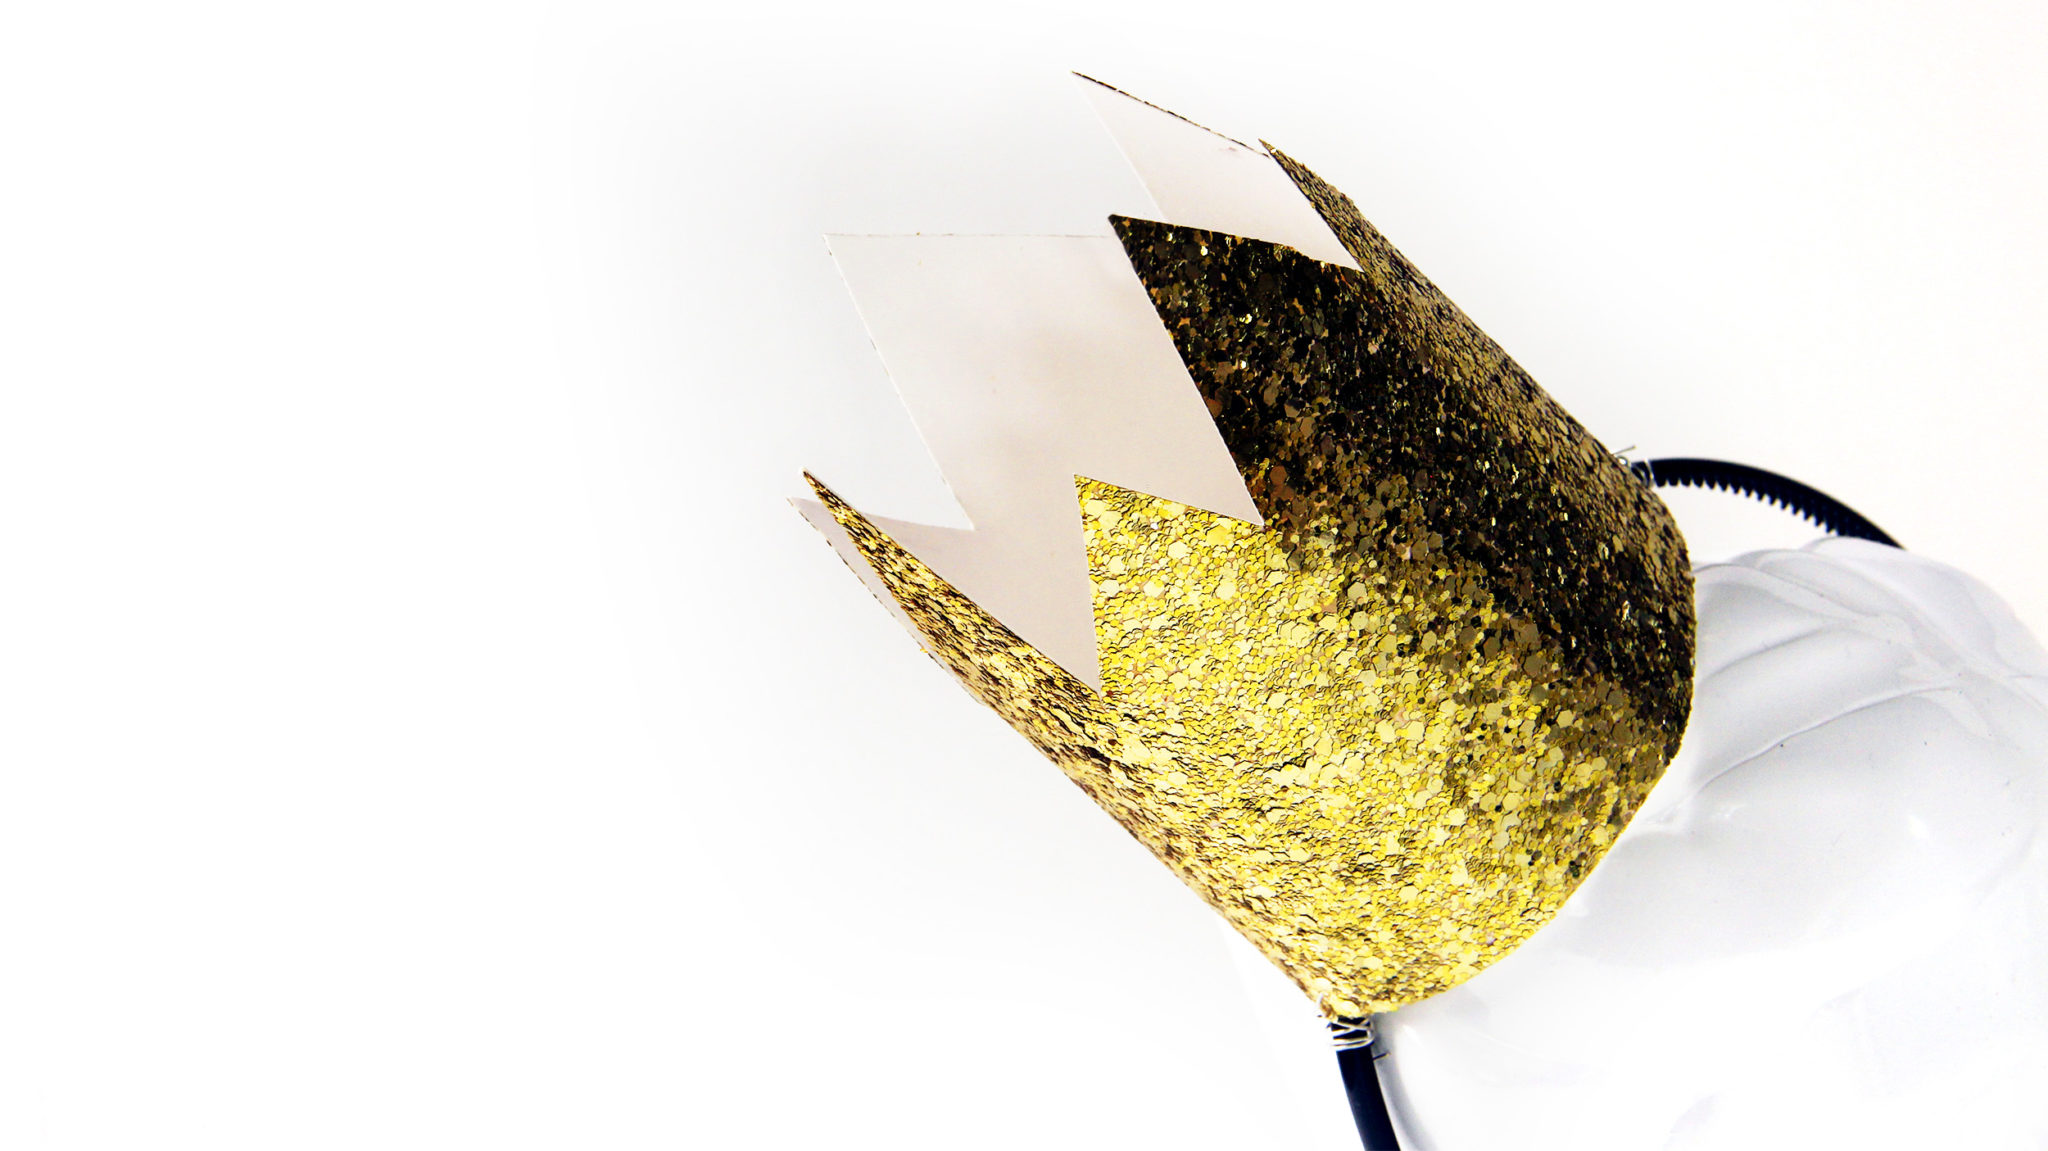
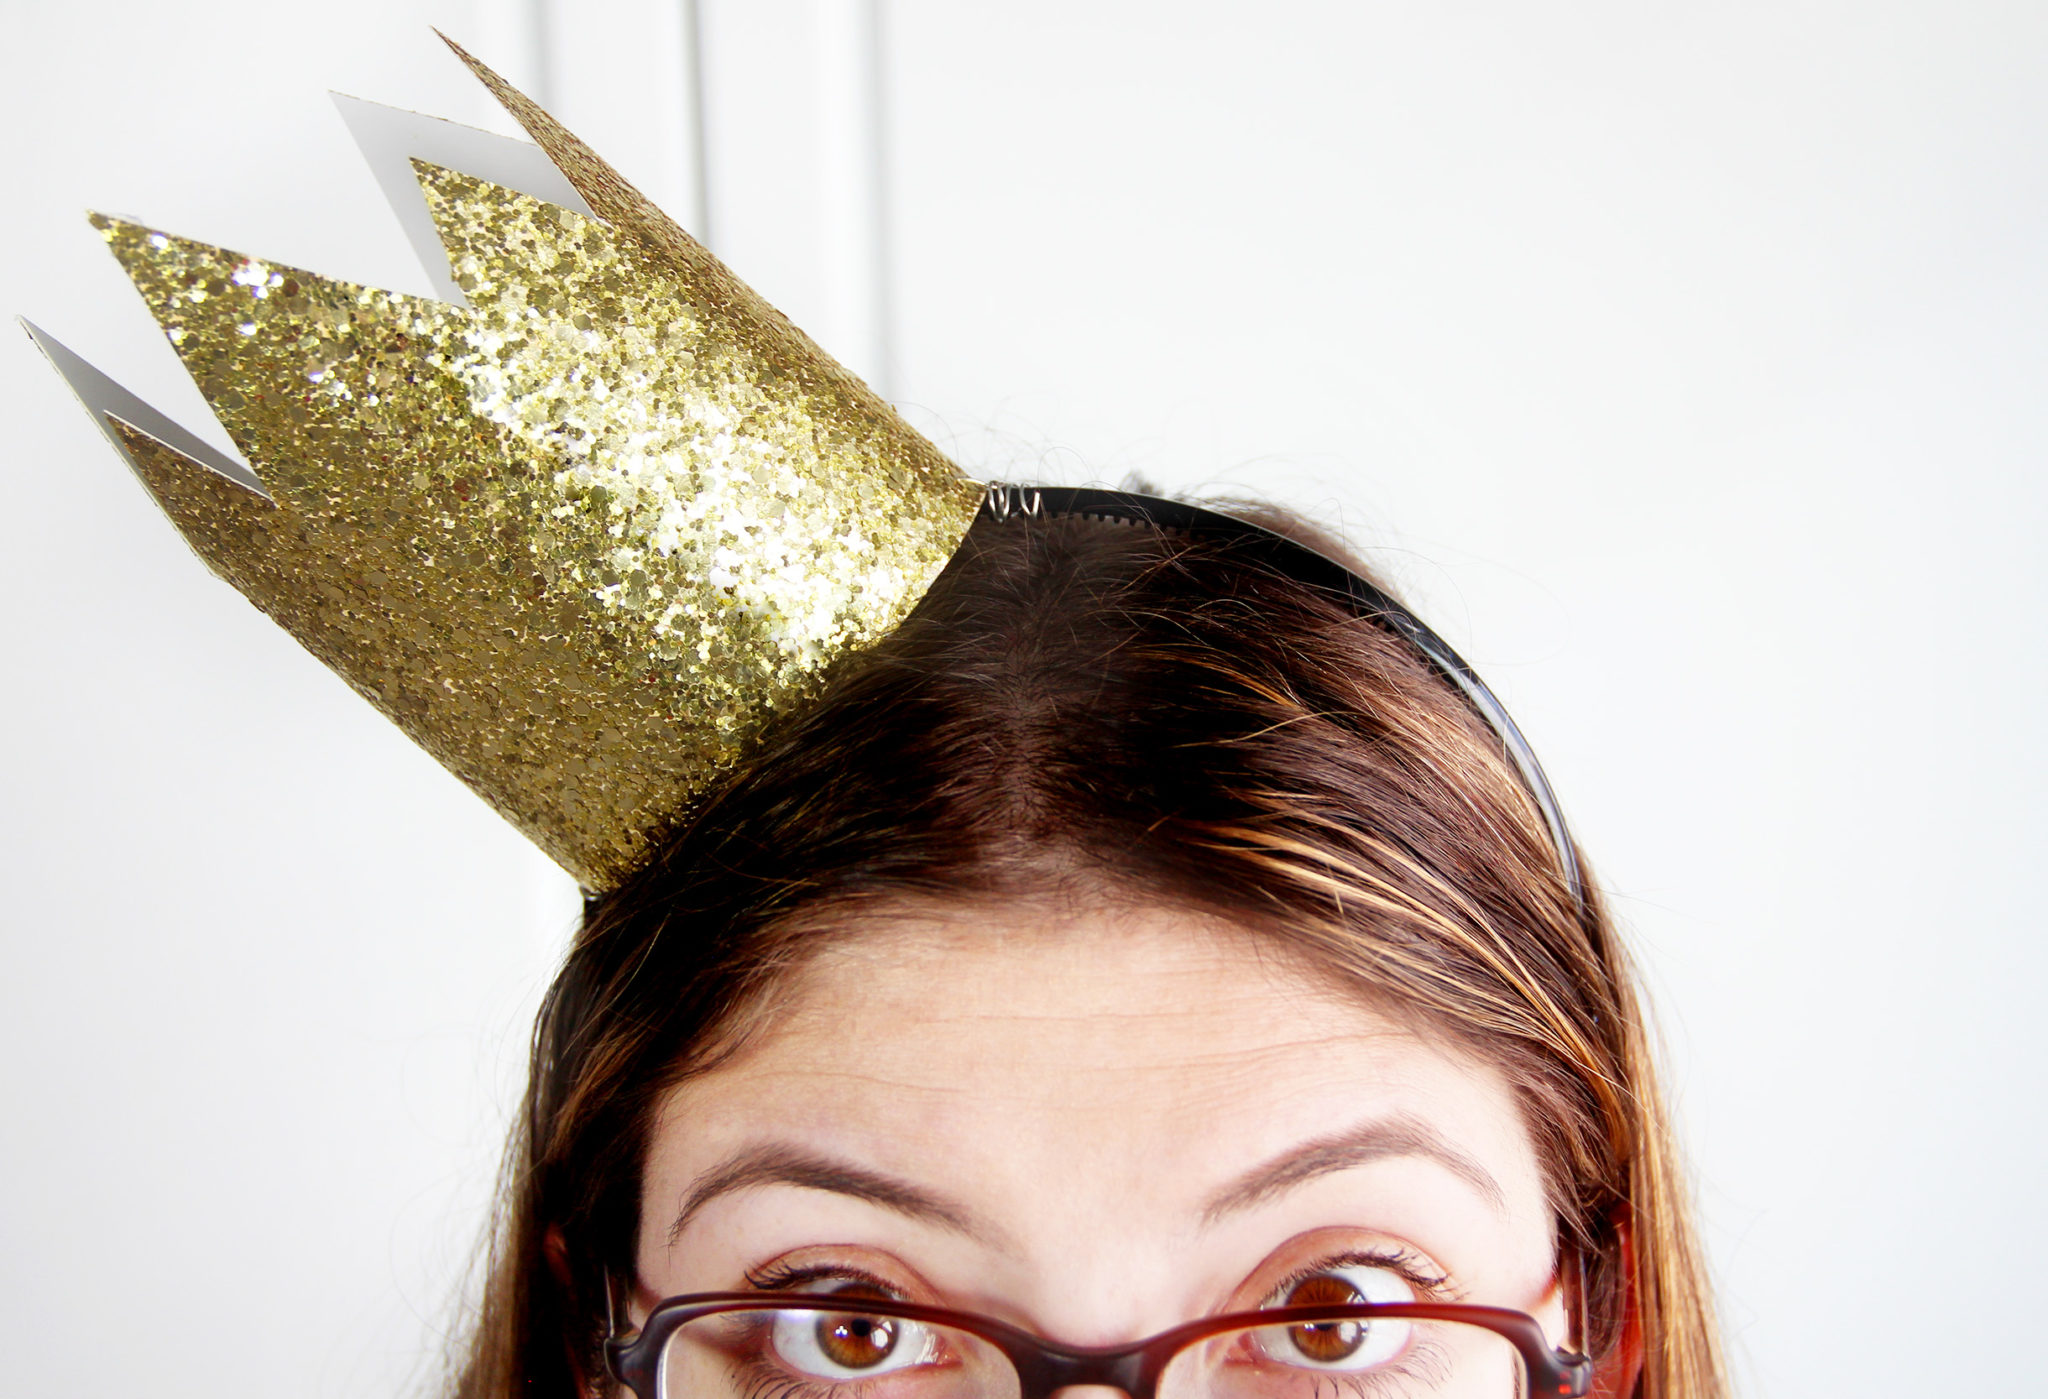
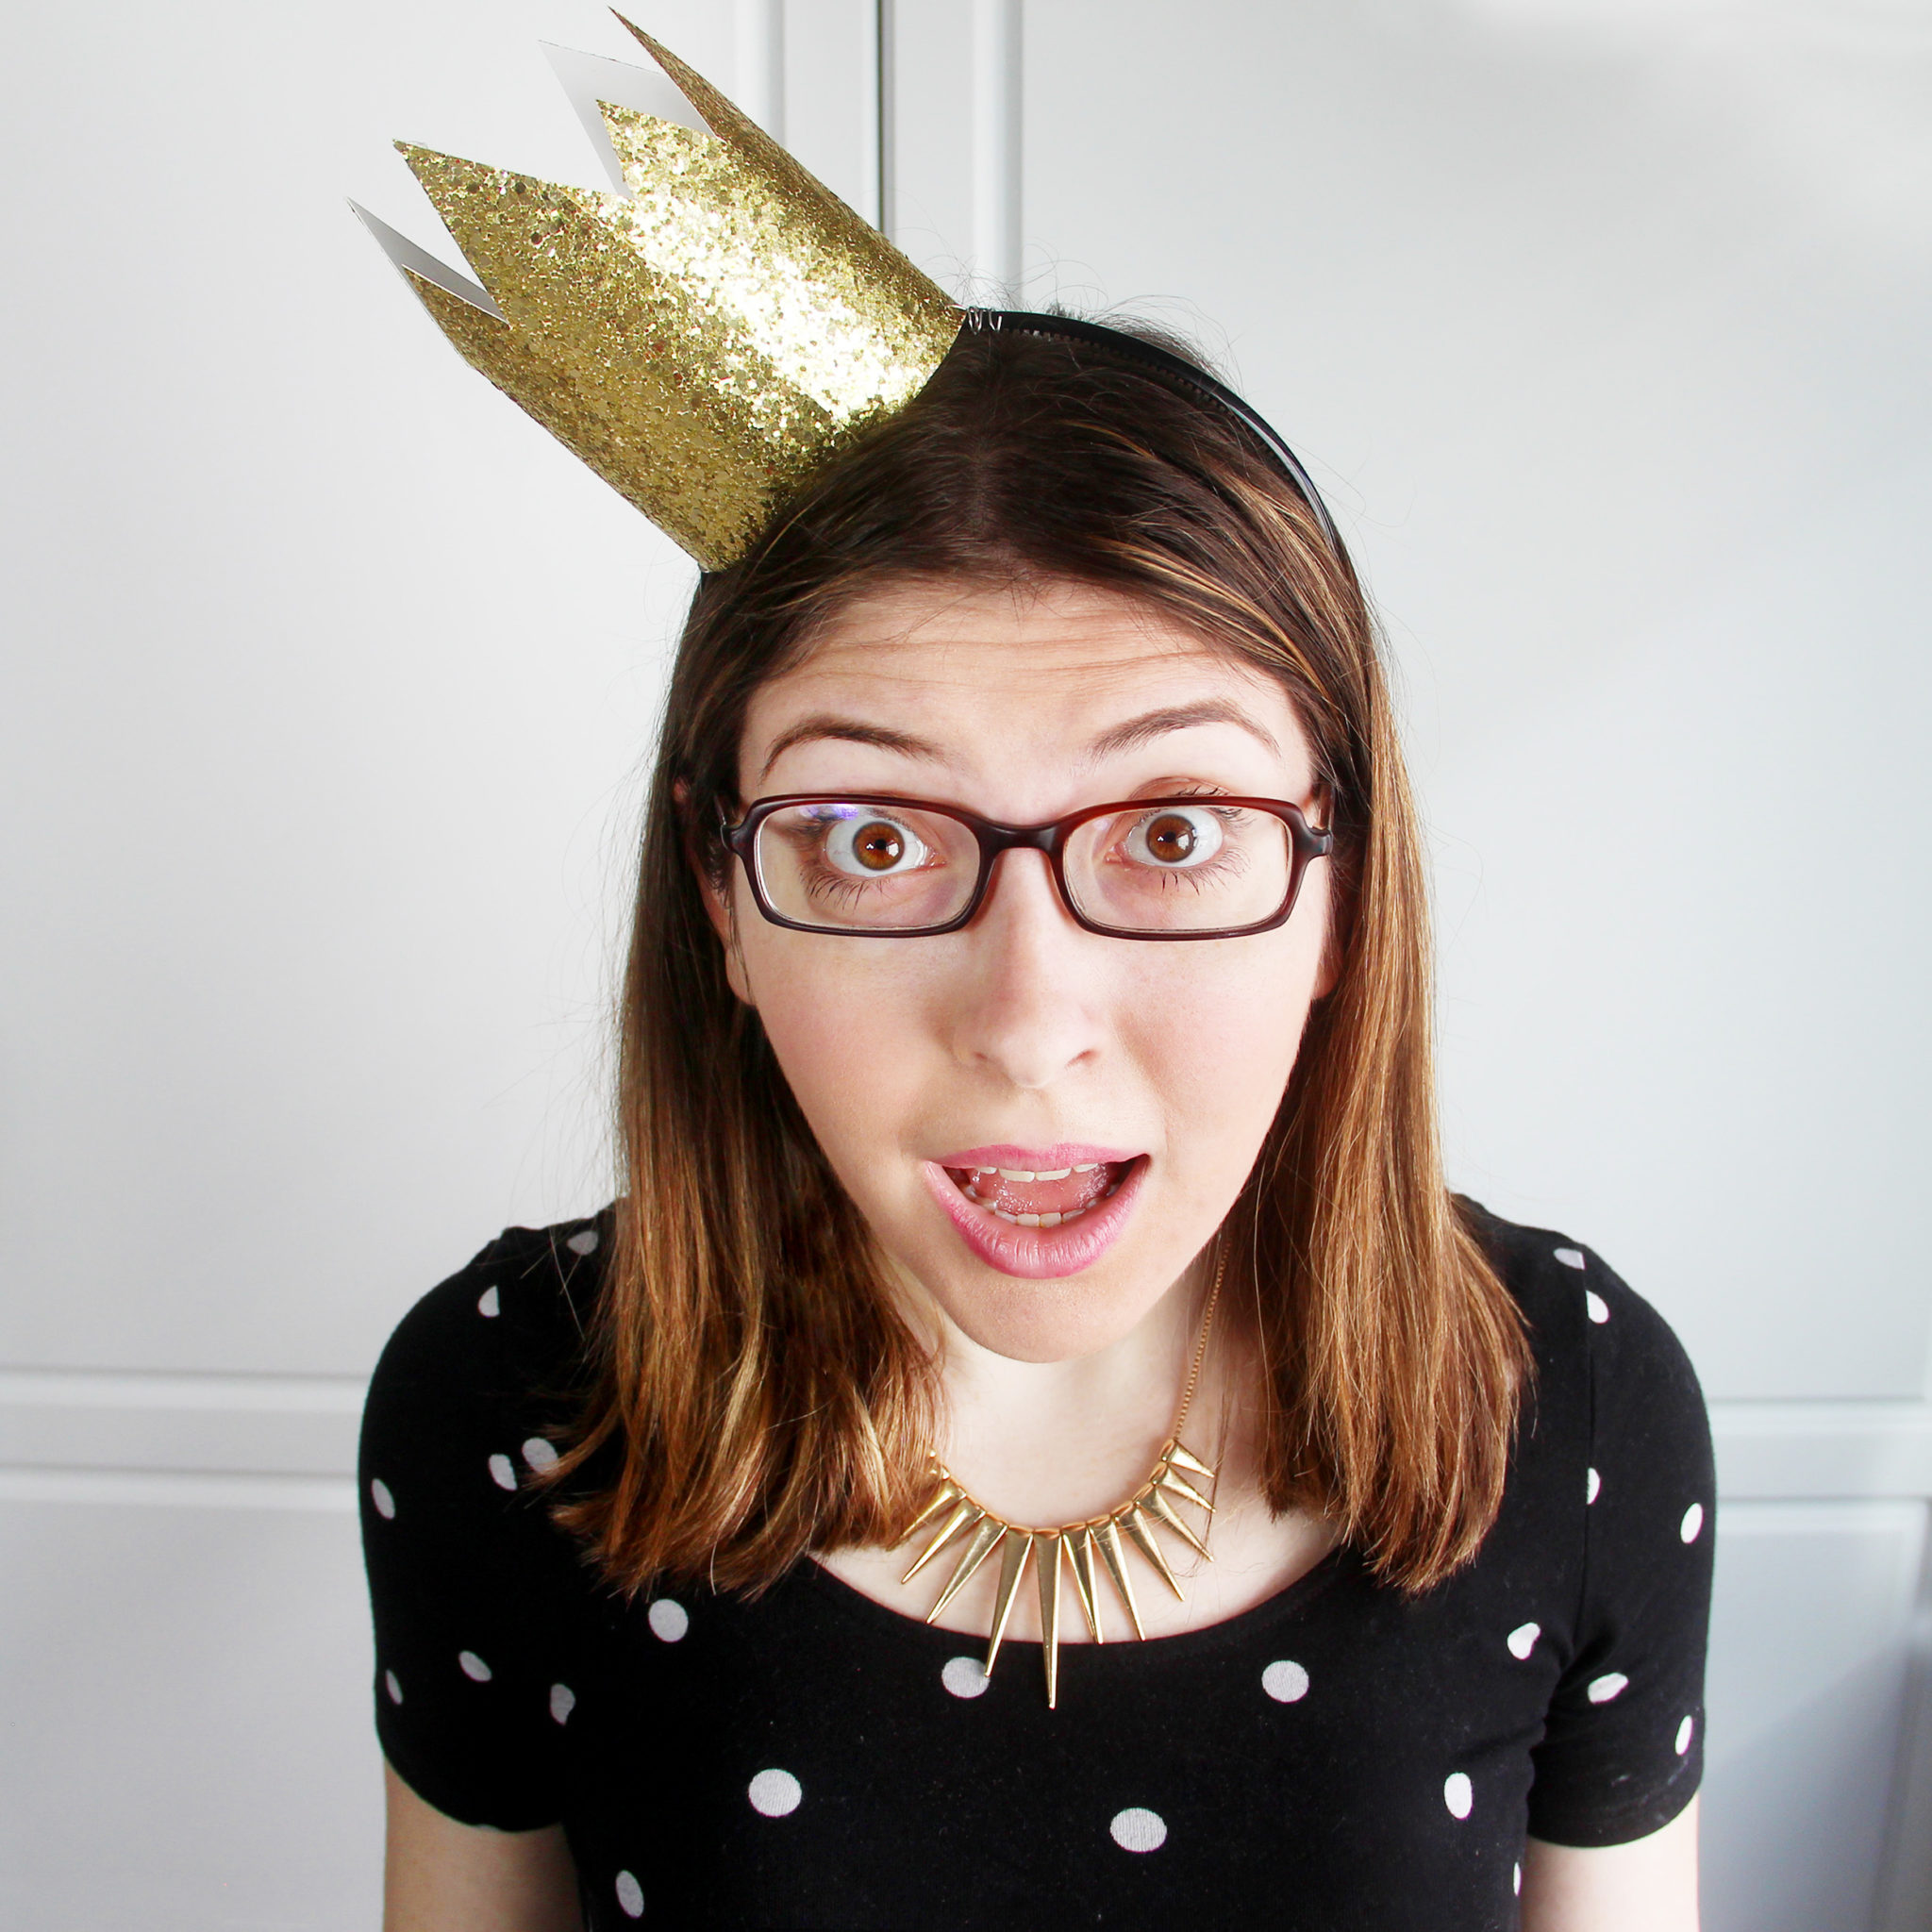
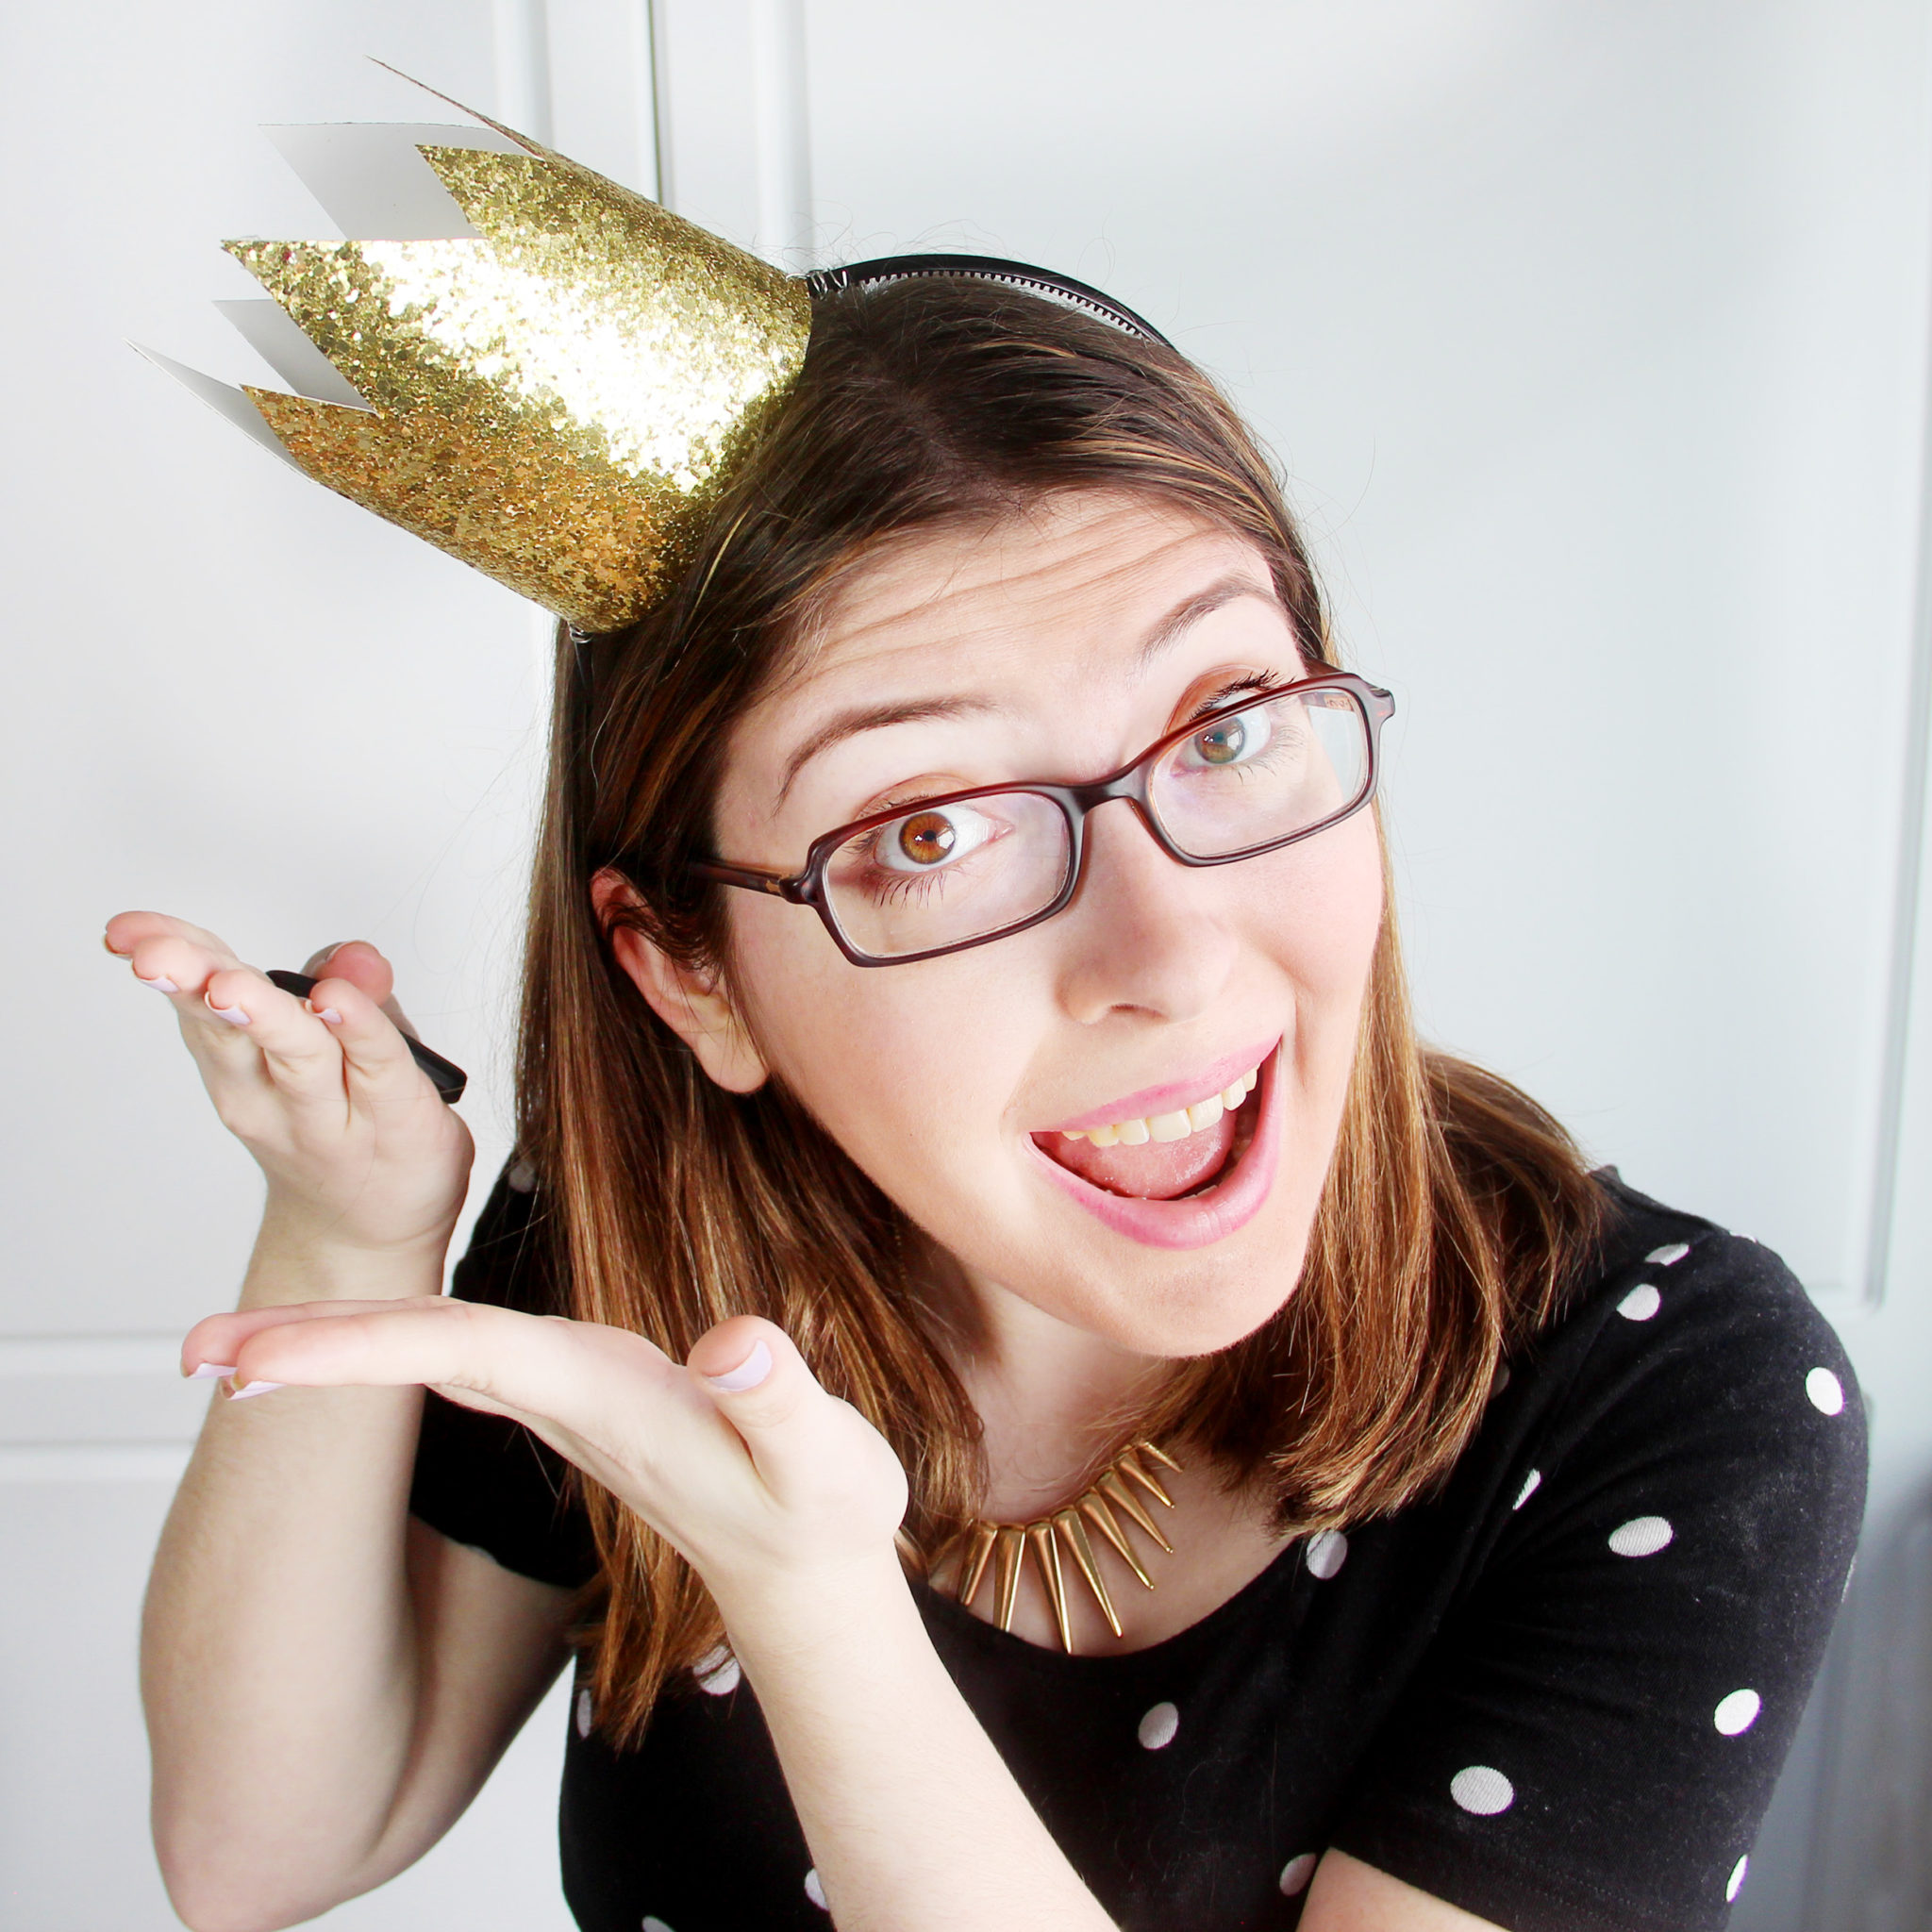
Next we’re going to make a glittery gold crown. For this project you’ll need half a piece of glitter cardstock, wire, a thumbtack, a hot glue gun, scissors, and a headband.
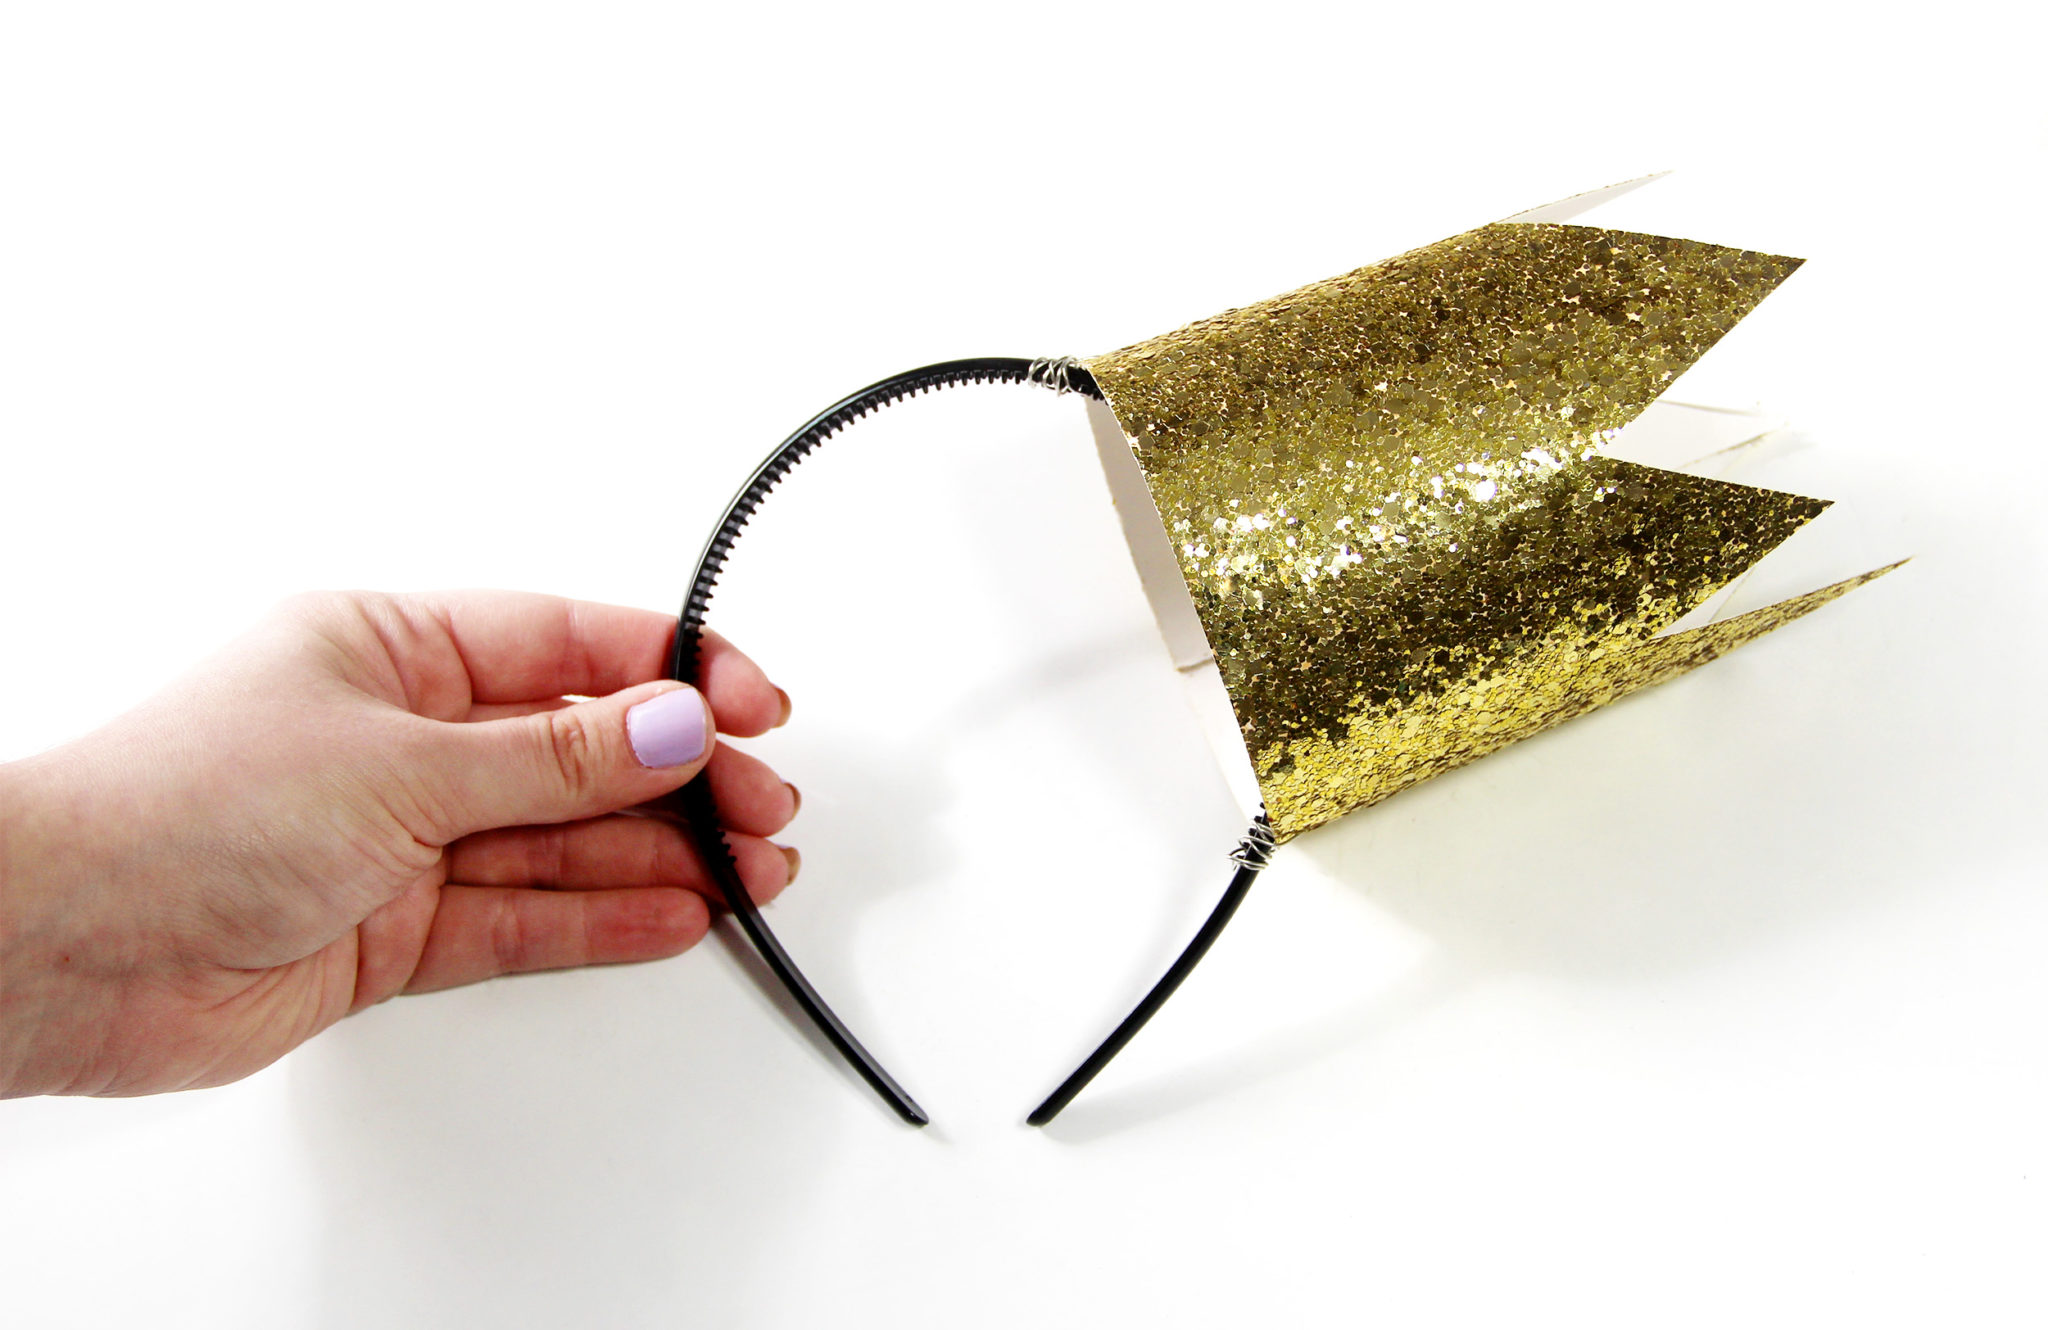
Basically, just draw a “mountain range” onto the cardstock like I showed in the video. Cut it out and hot glue it into a circle to make your crown. Use the thumbtack to add holes for the wire on either side and attach it off-center to the headband using the wire. Again, it only takes about 10 minutes to make!
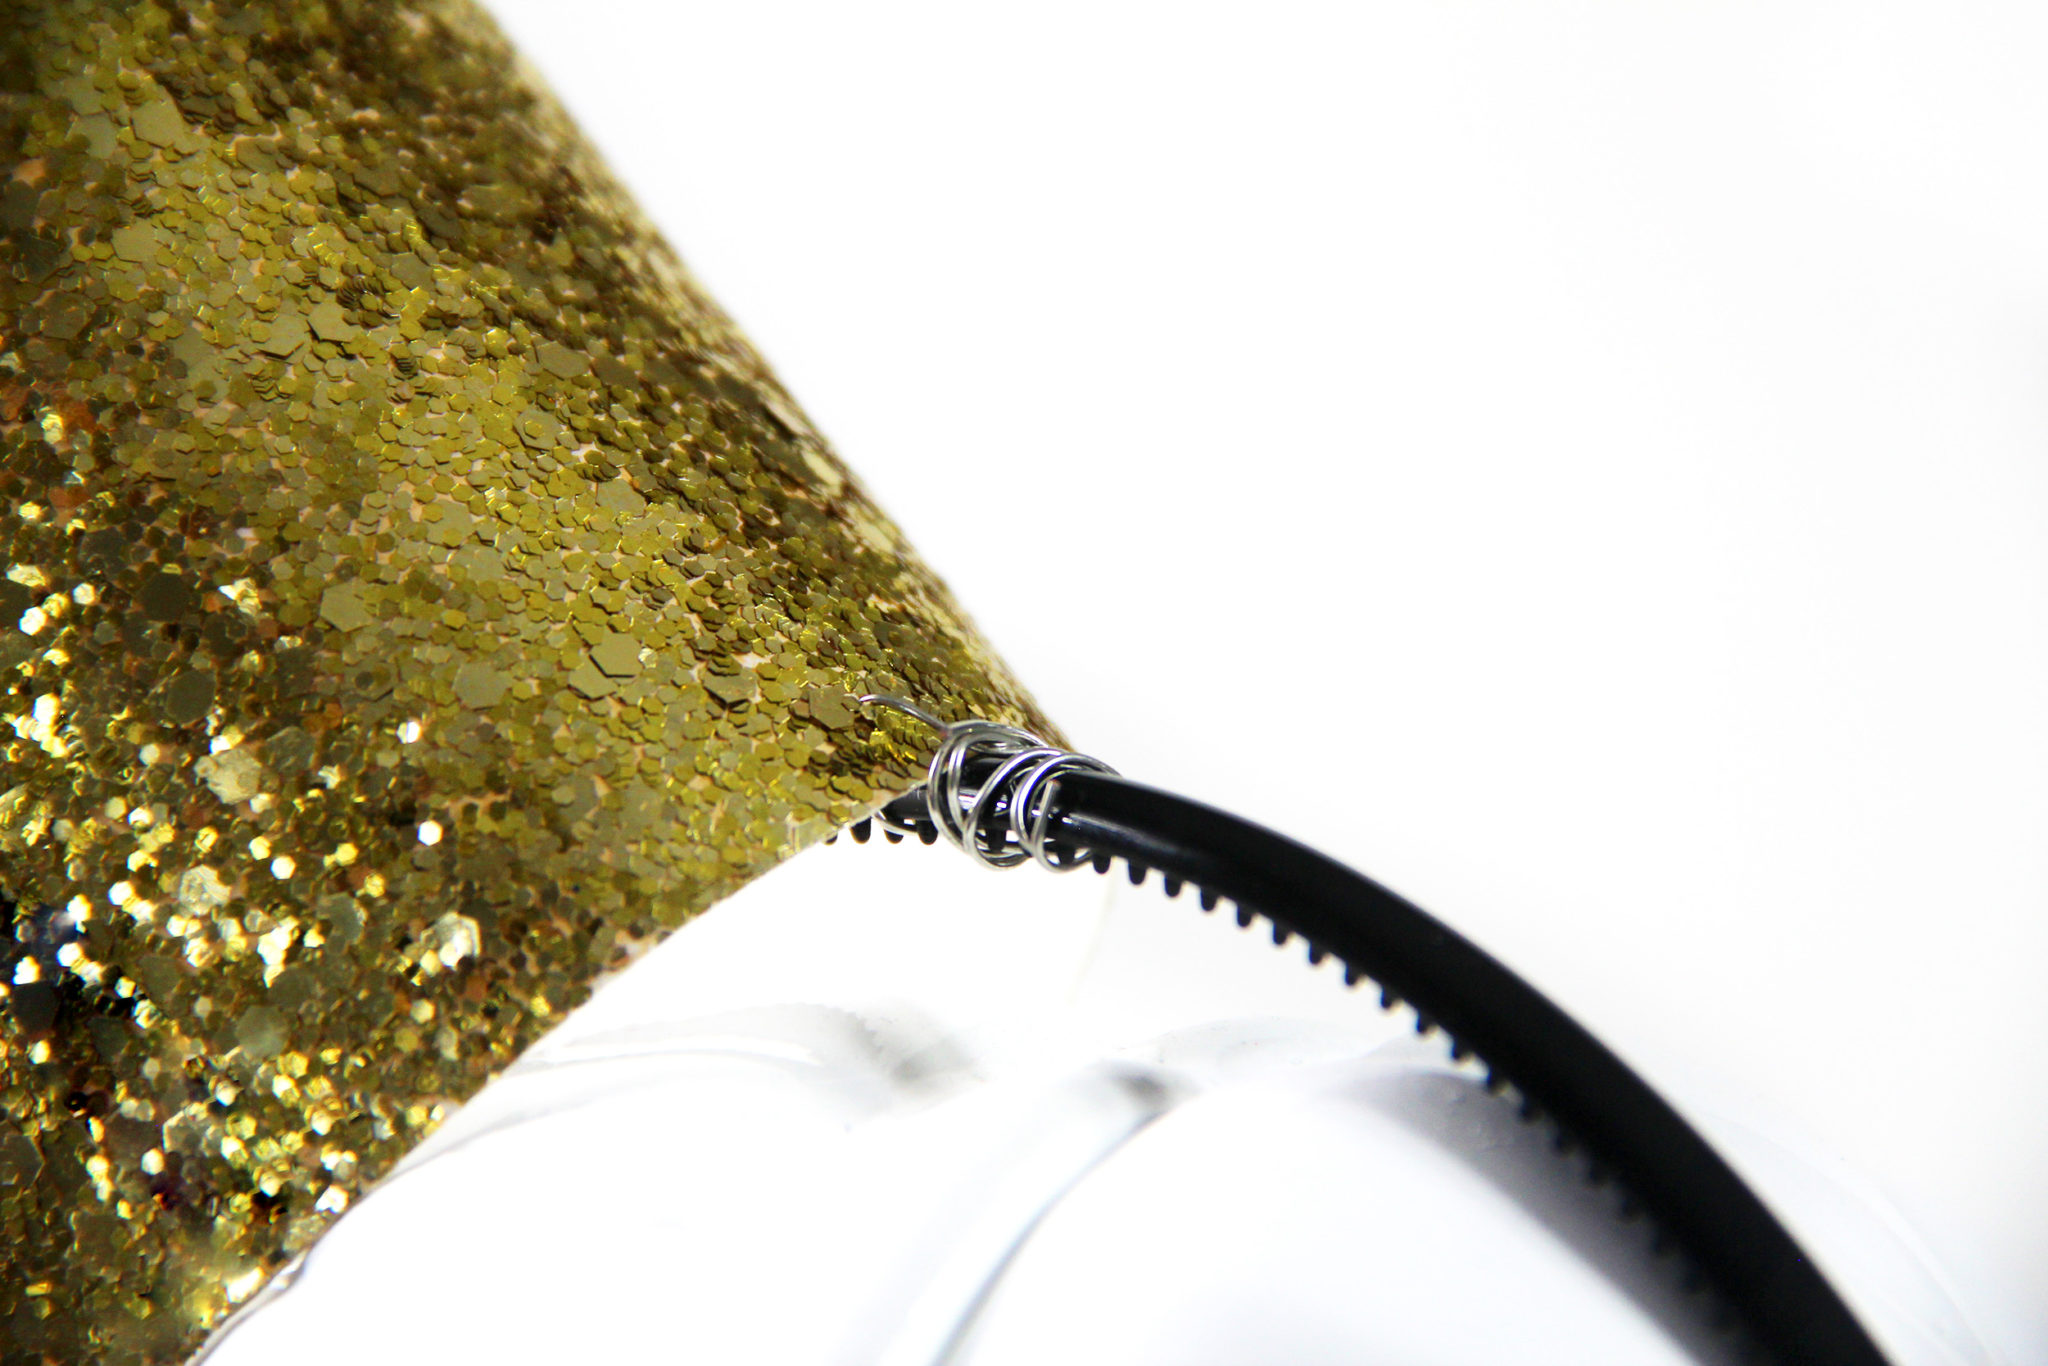
Try to be neat with the wire so it doesn’t poke you in the head when you put on the headband!
Who do you think is a better model – me or this head bookend?

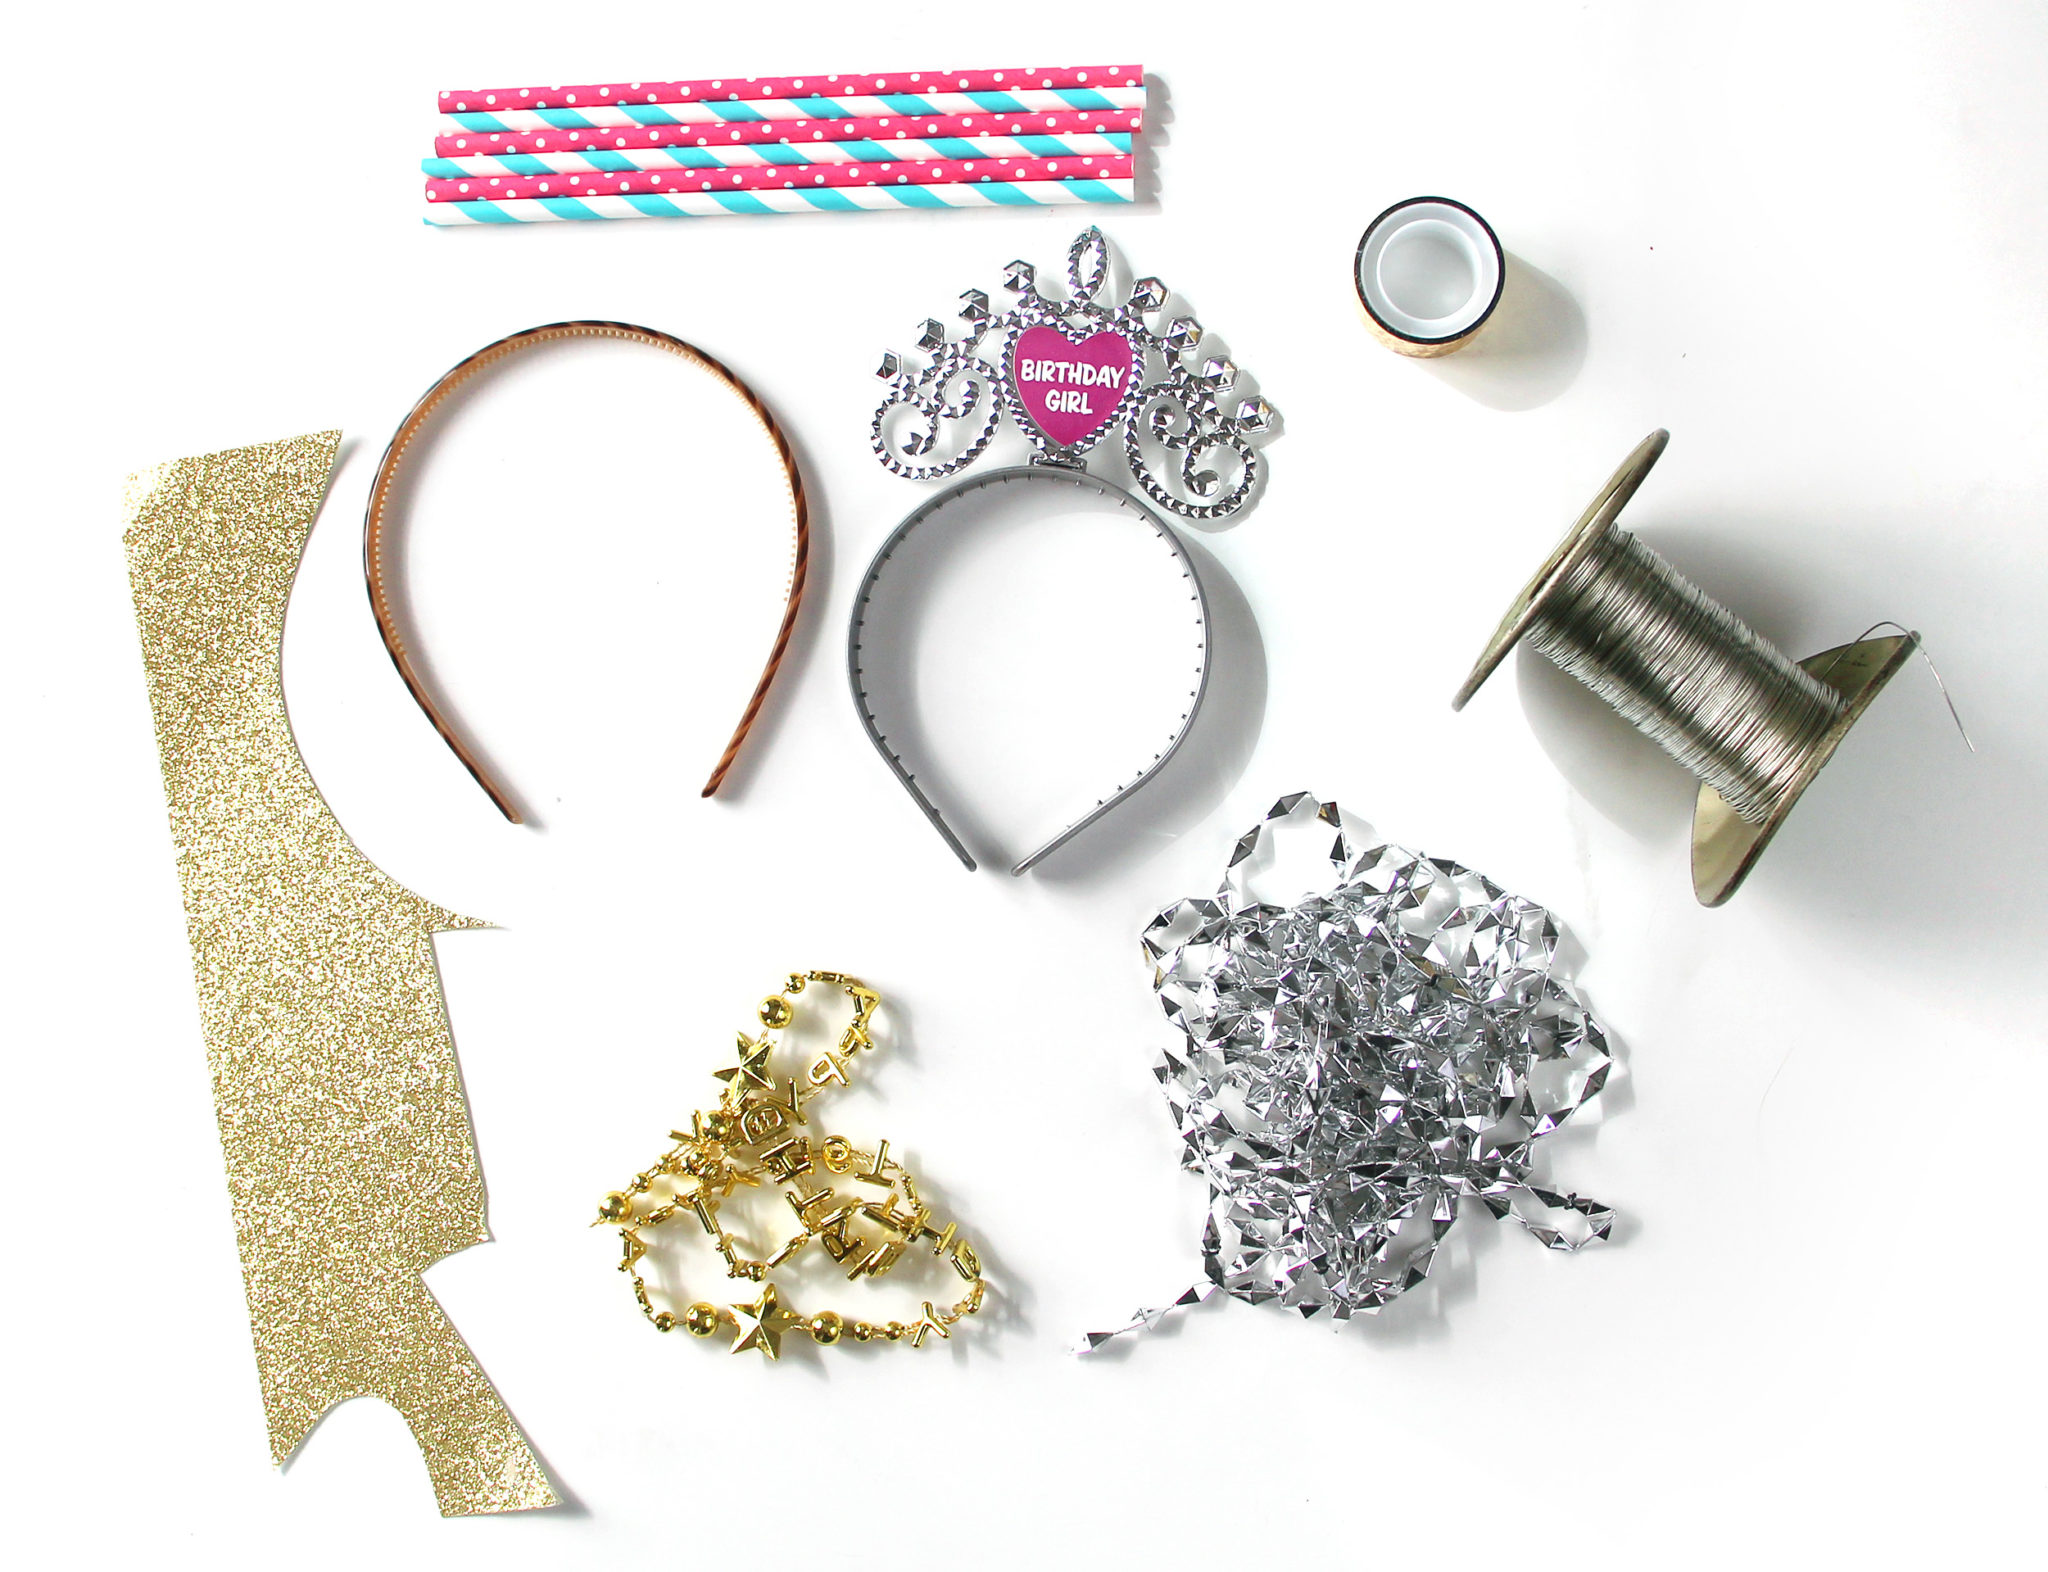
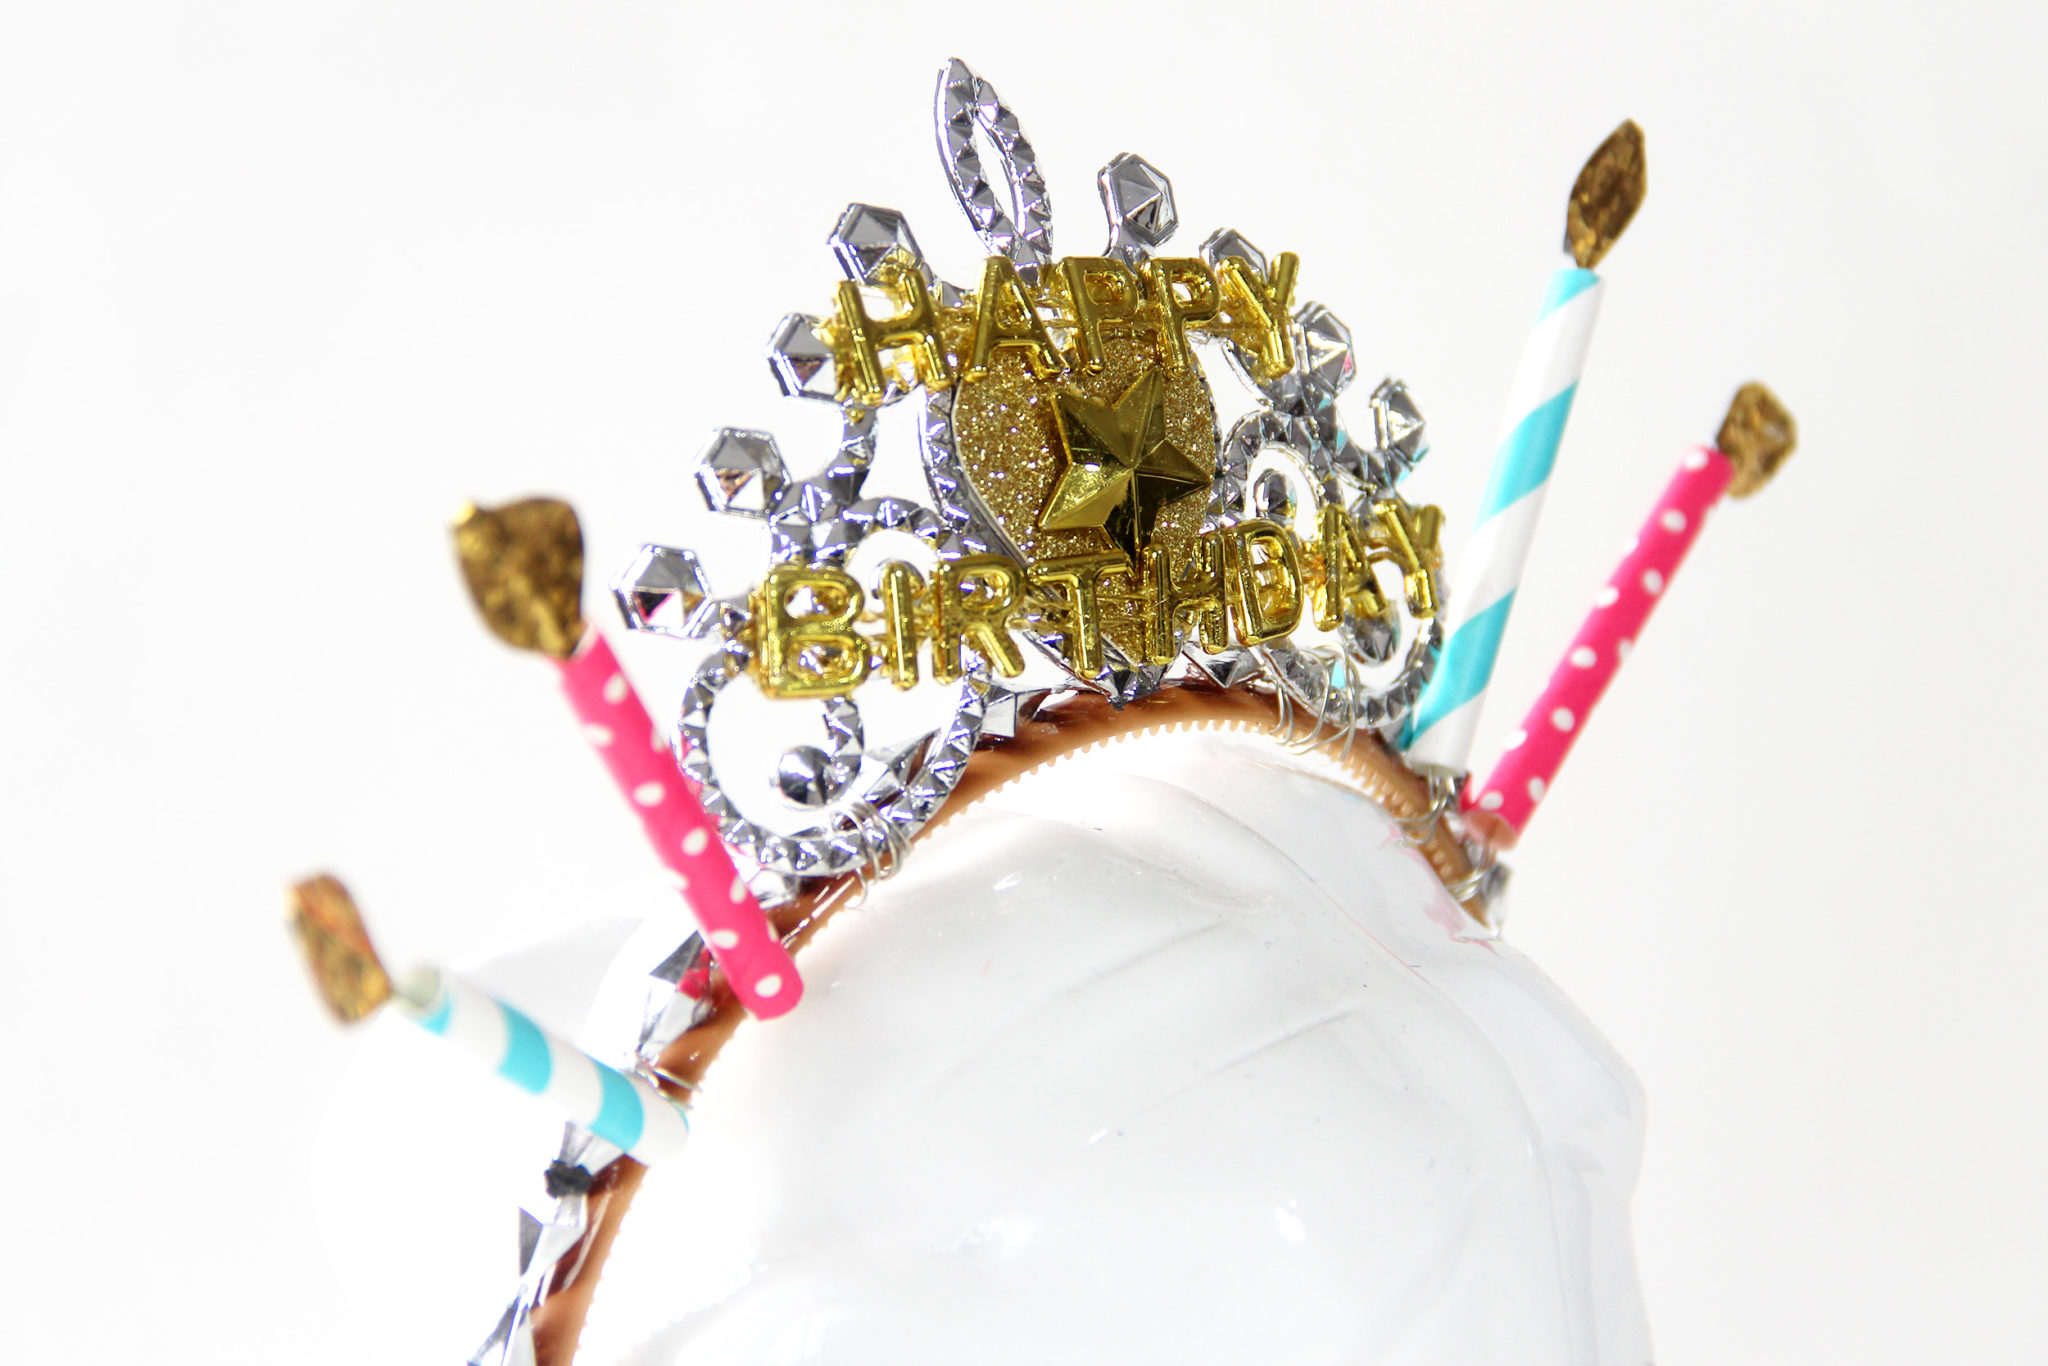
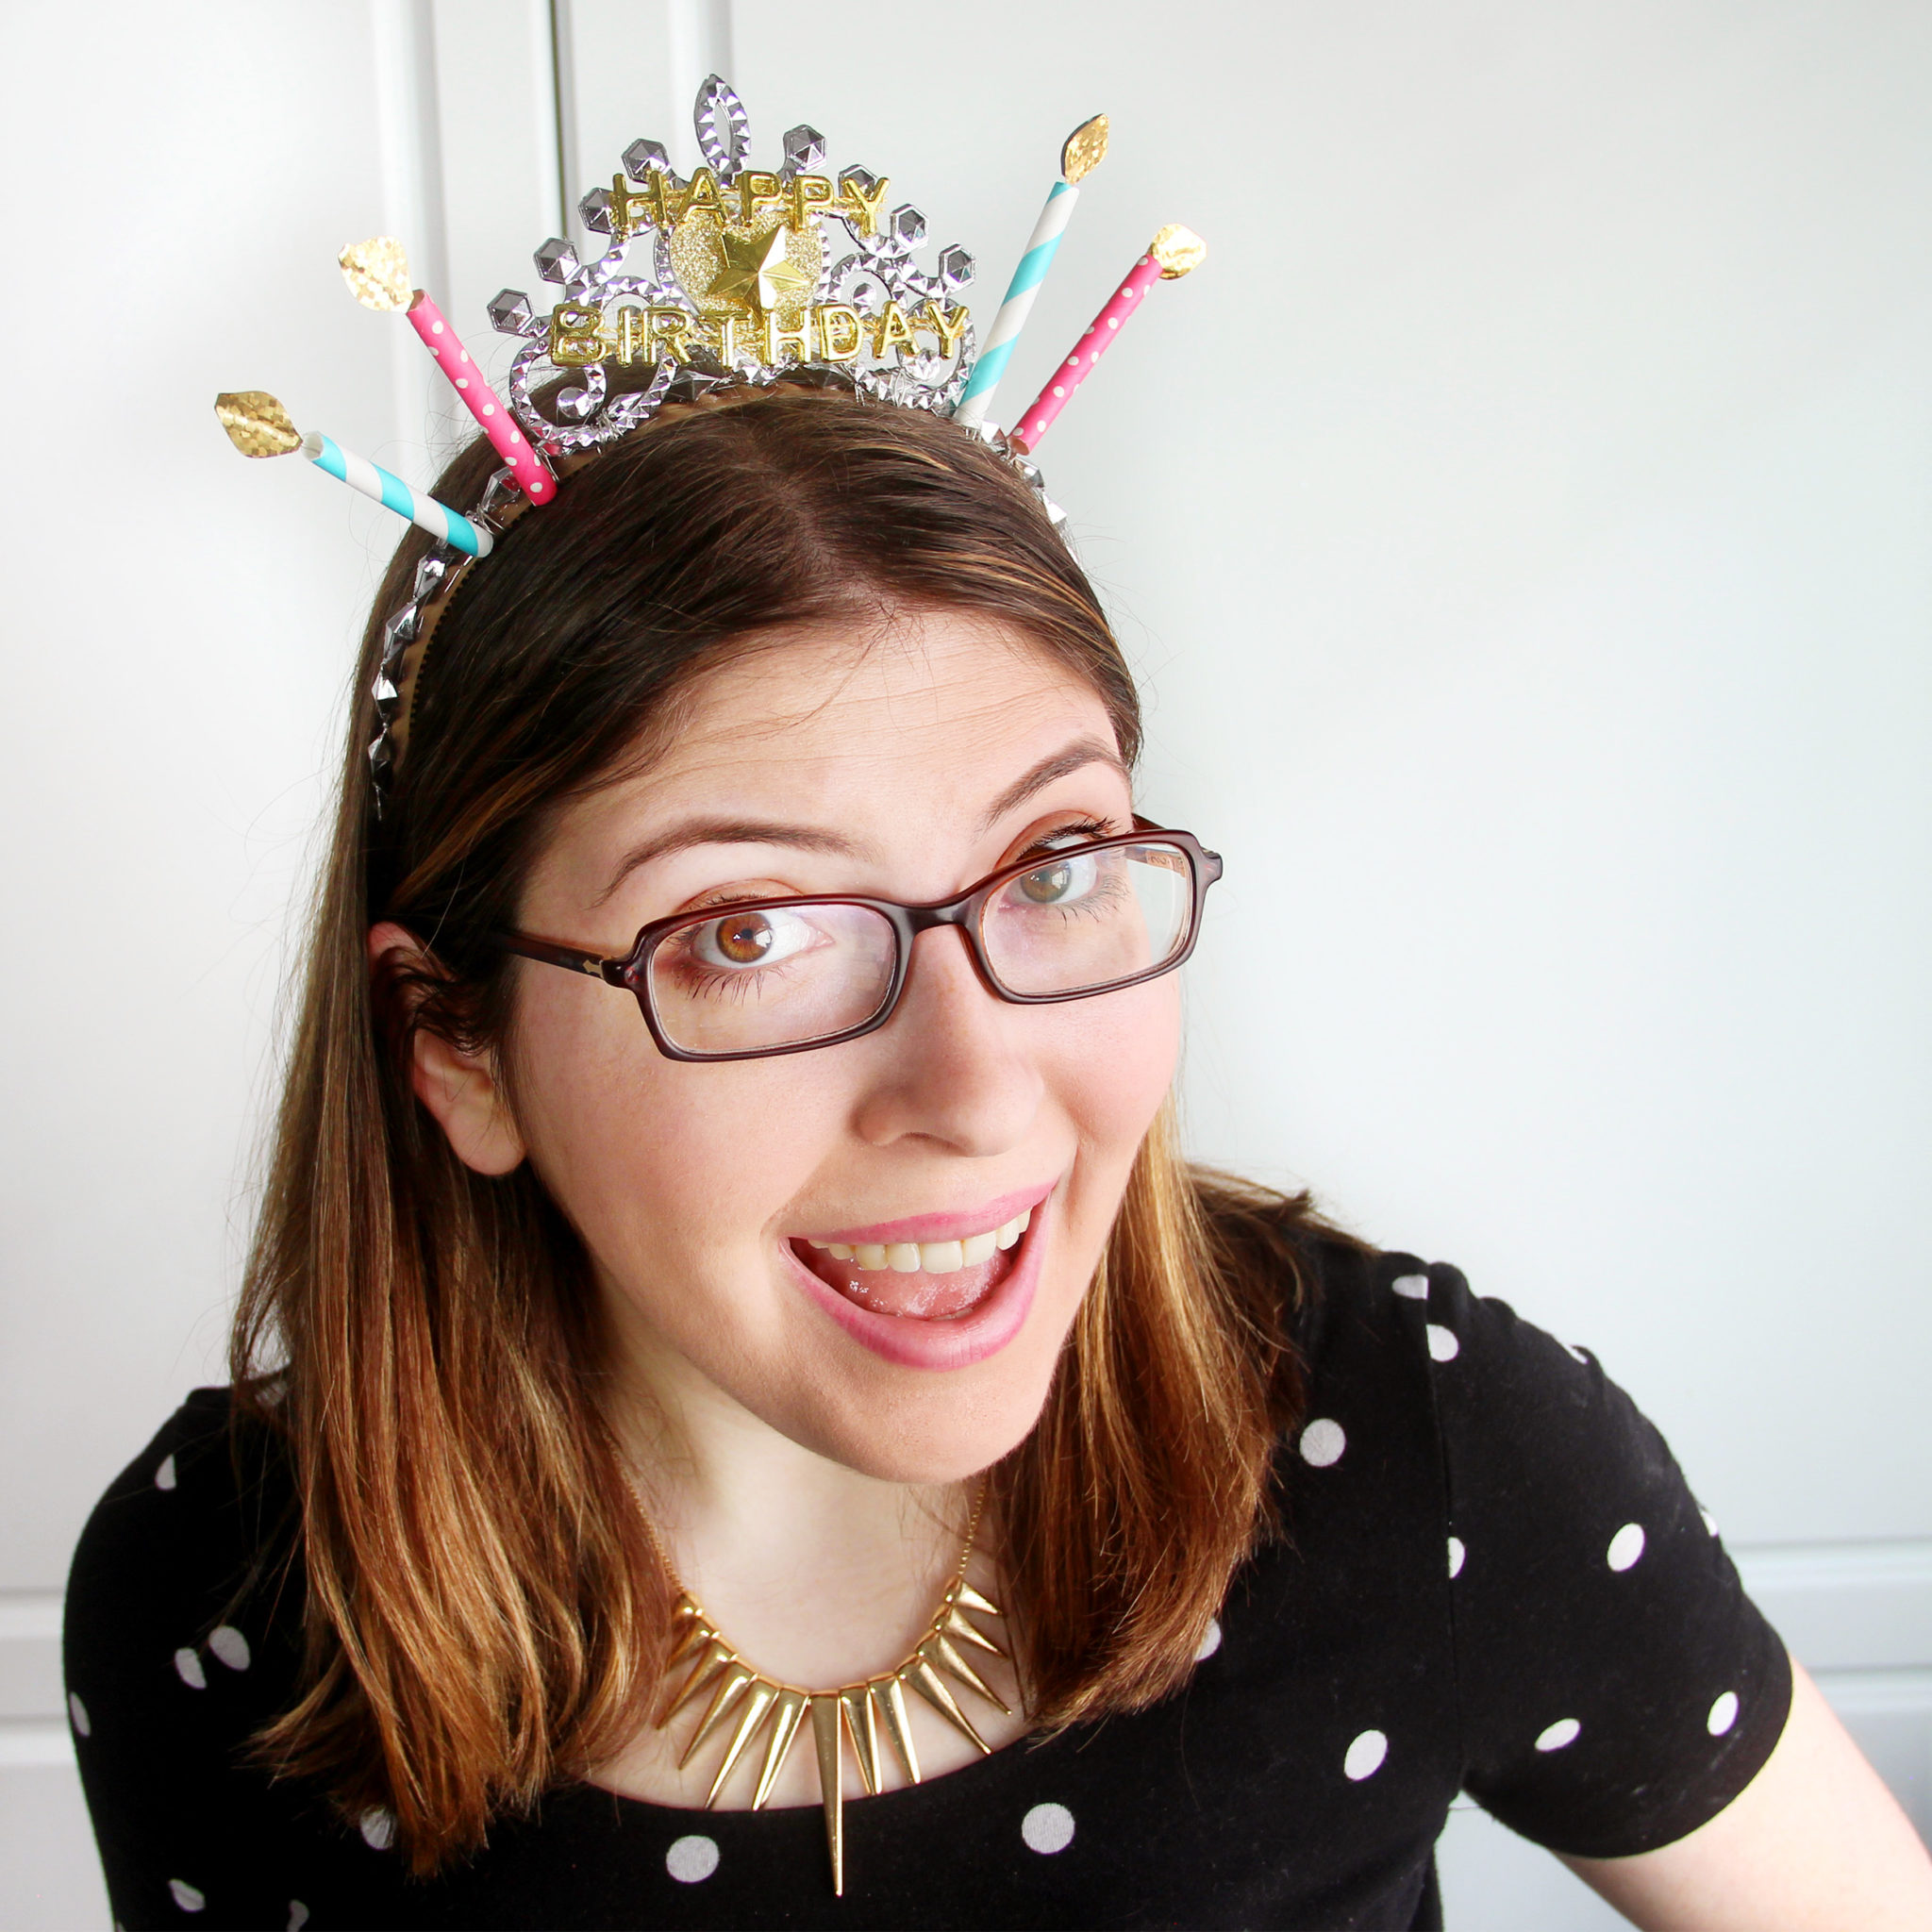
And finally, this last crown is the most complicated of the group. You’ll need a piece of glitter cardstock, paper straws, a headband, a child’s birthday crown, gold tape, wire, mardi gras beads, and a Happy Birthday necklace.
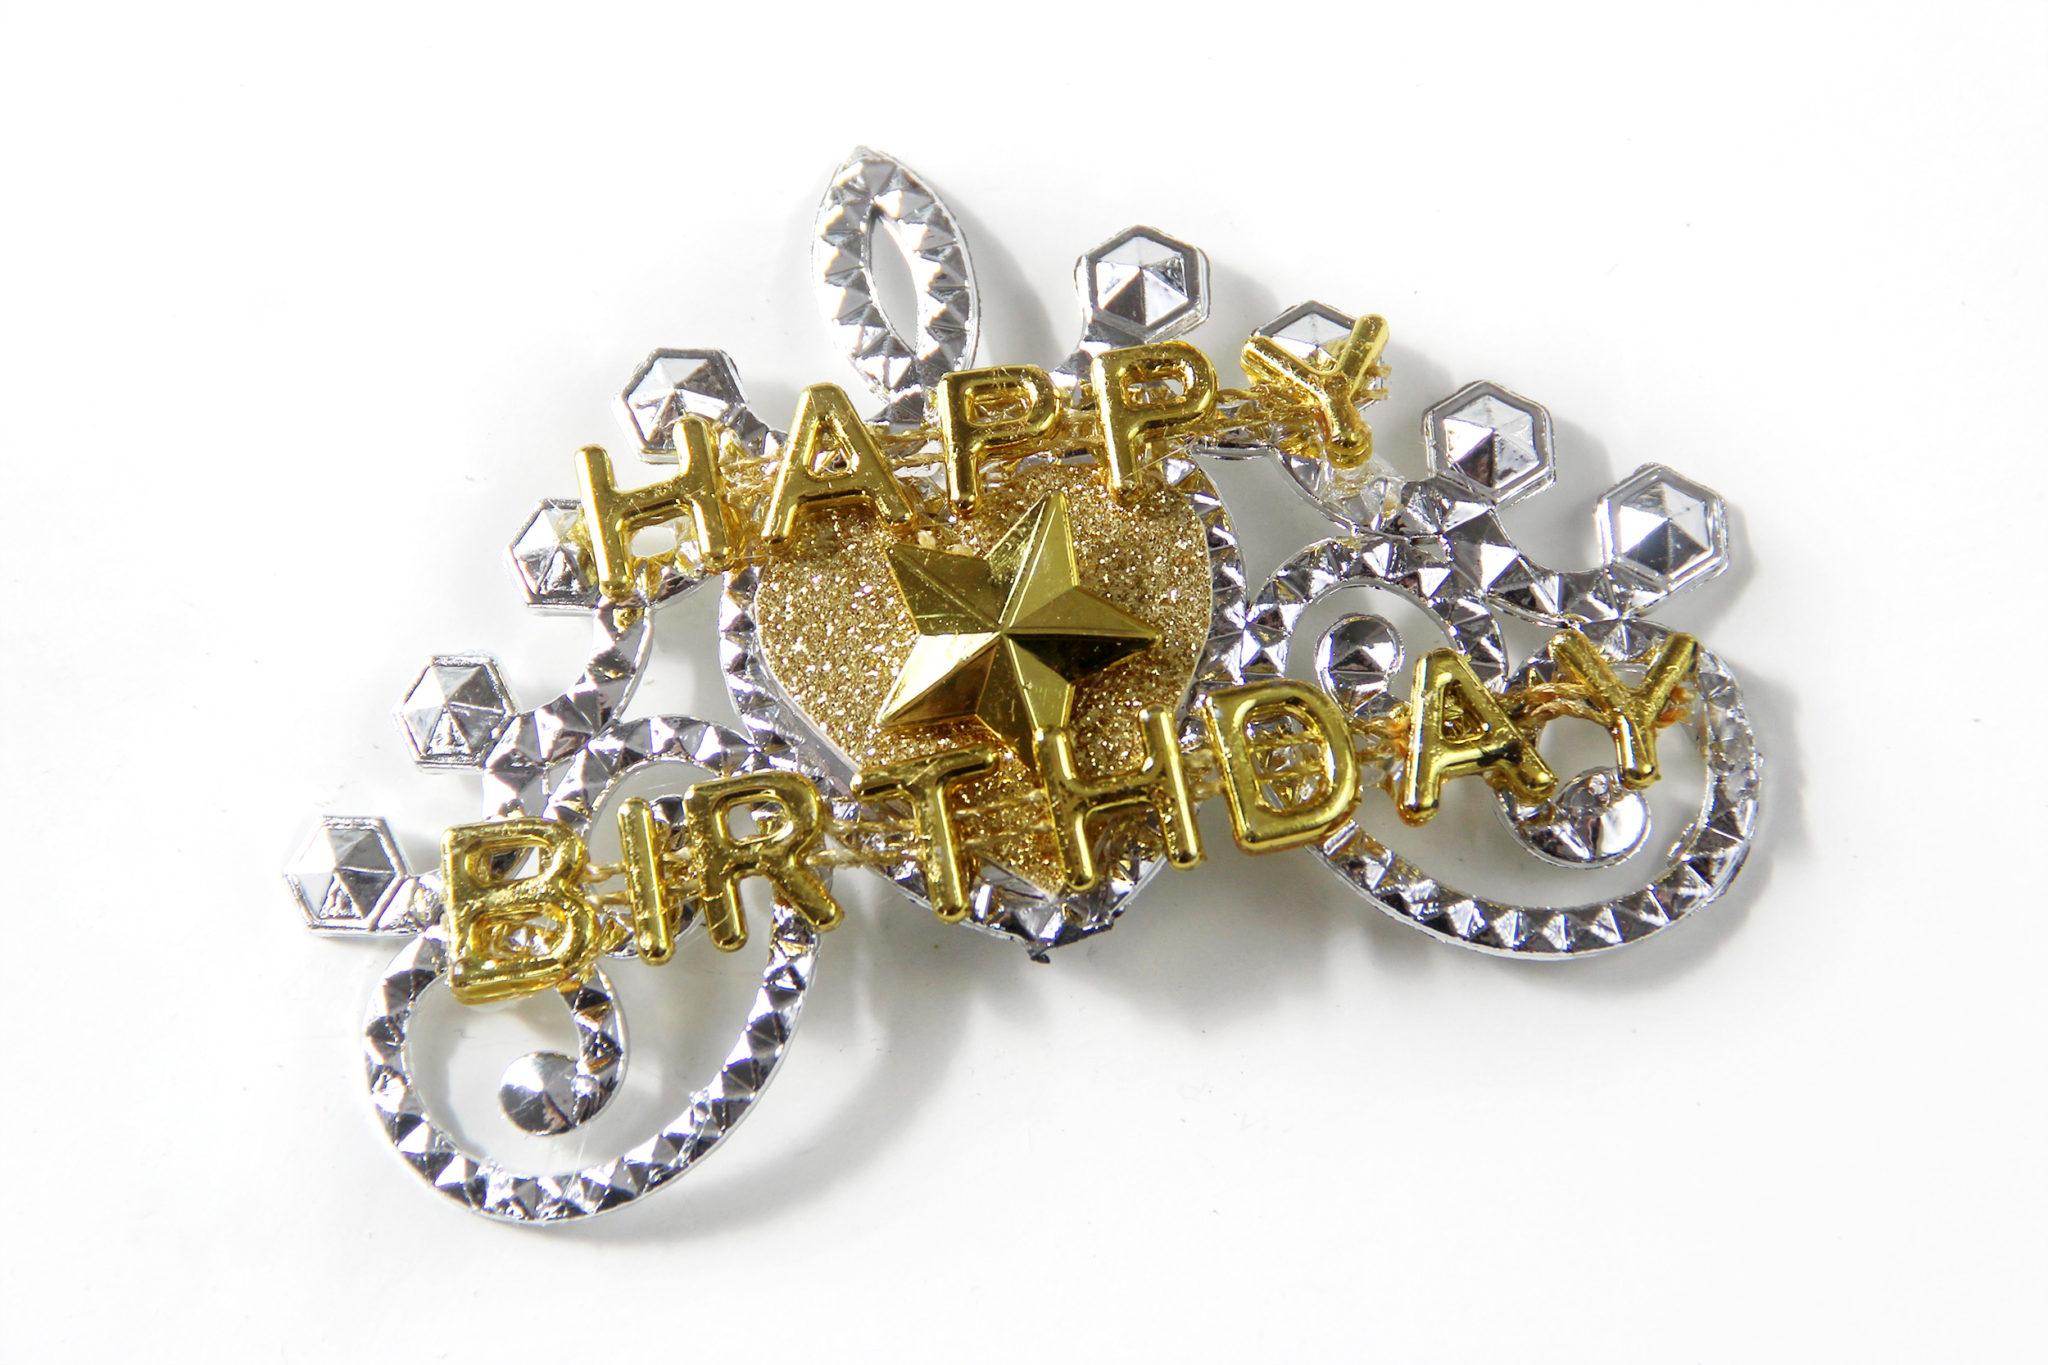
The first step is to make the center of the crown. Detach the child’s birthday crown from the headband and use the glitter cardstock to cover up the heart. Then cut apart the birthday necklace and glue it in place.
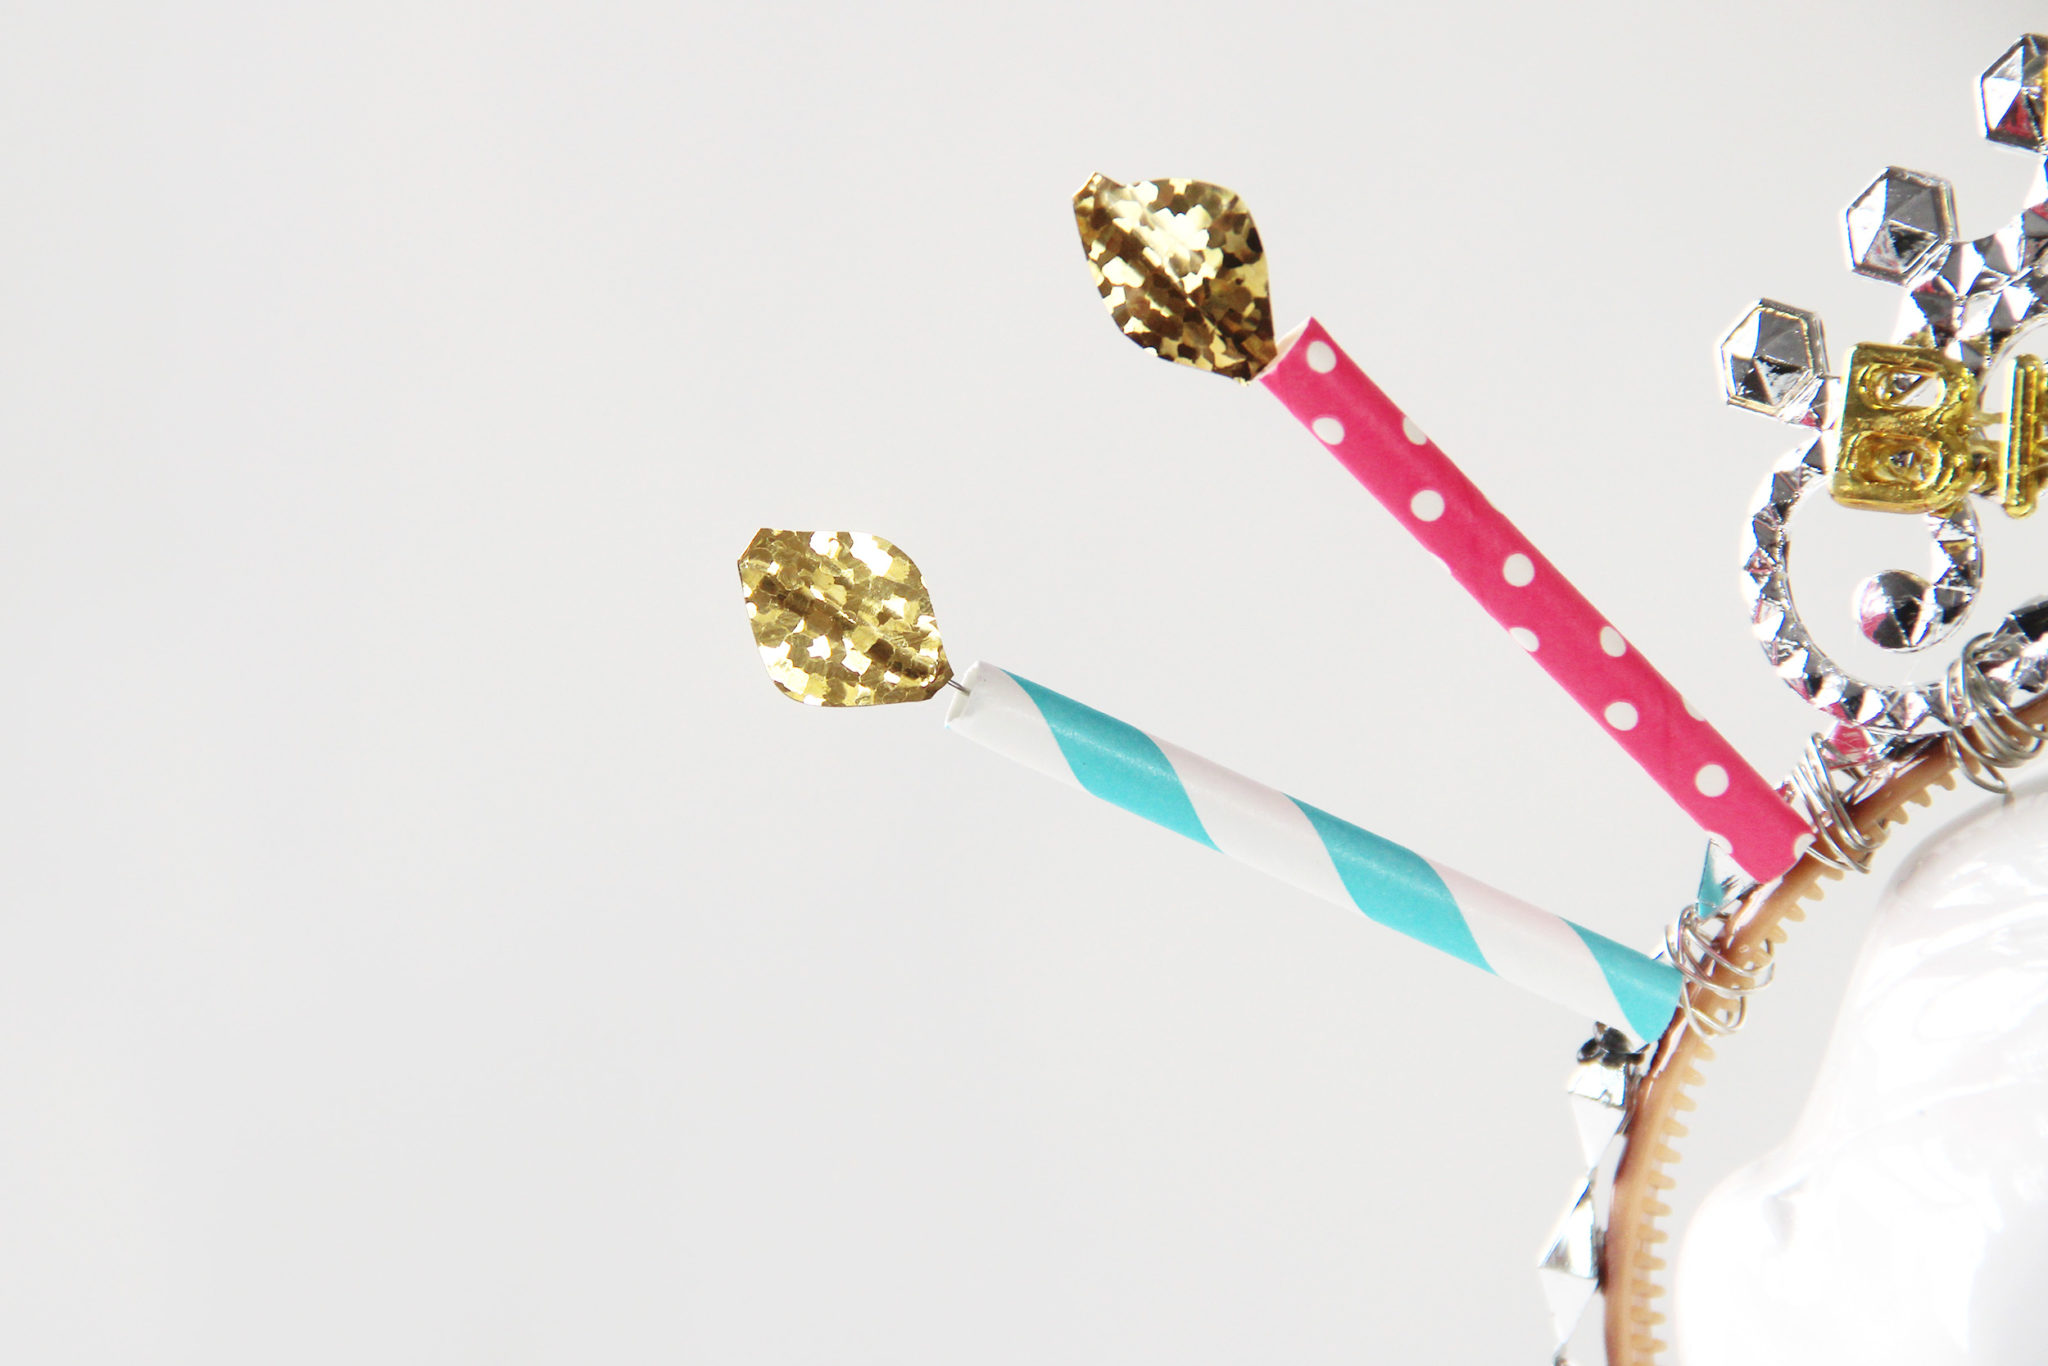
Now for the candles, this is the same process as the candle crown I made for the cupcake Halloween costume last October. Cut down the straws to about two inches, and cut a piece of wire for each straw. Fold a piece of gold tape over the end of each wire and cut it into a flame shape. Feed a straw onto each wire.
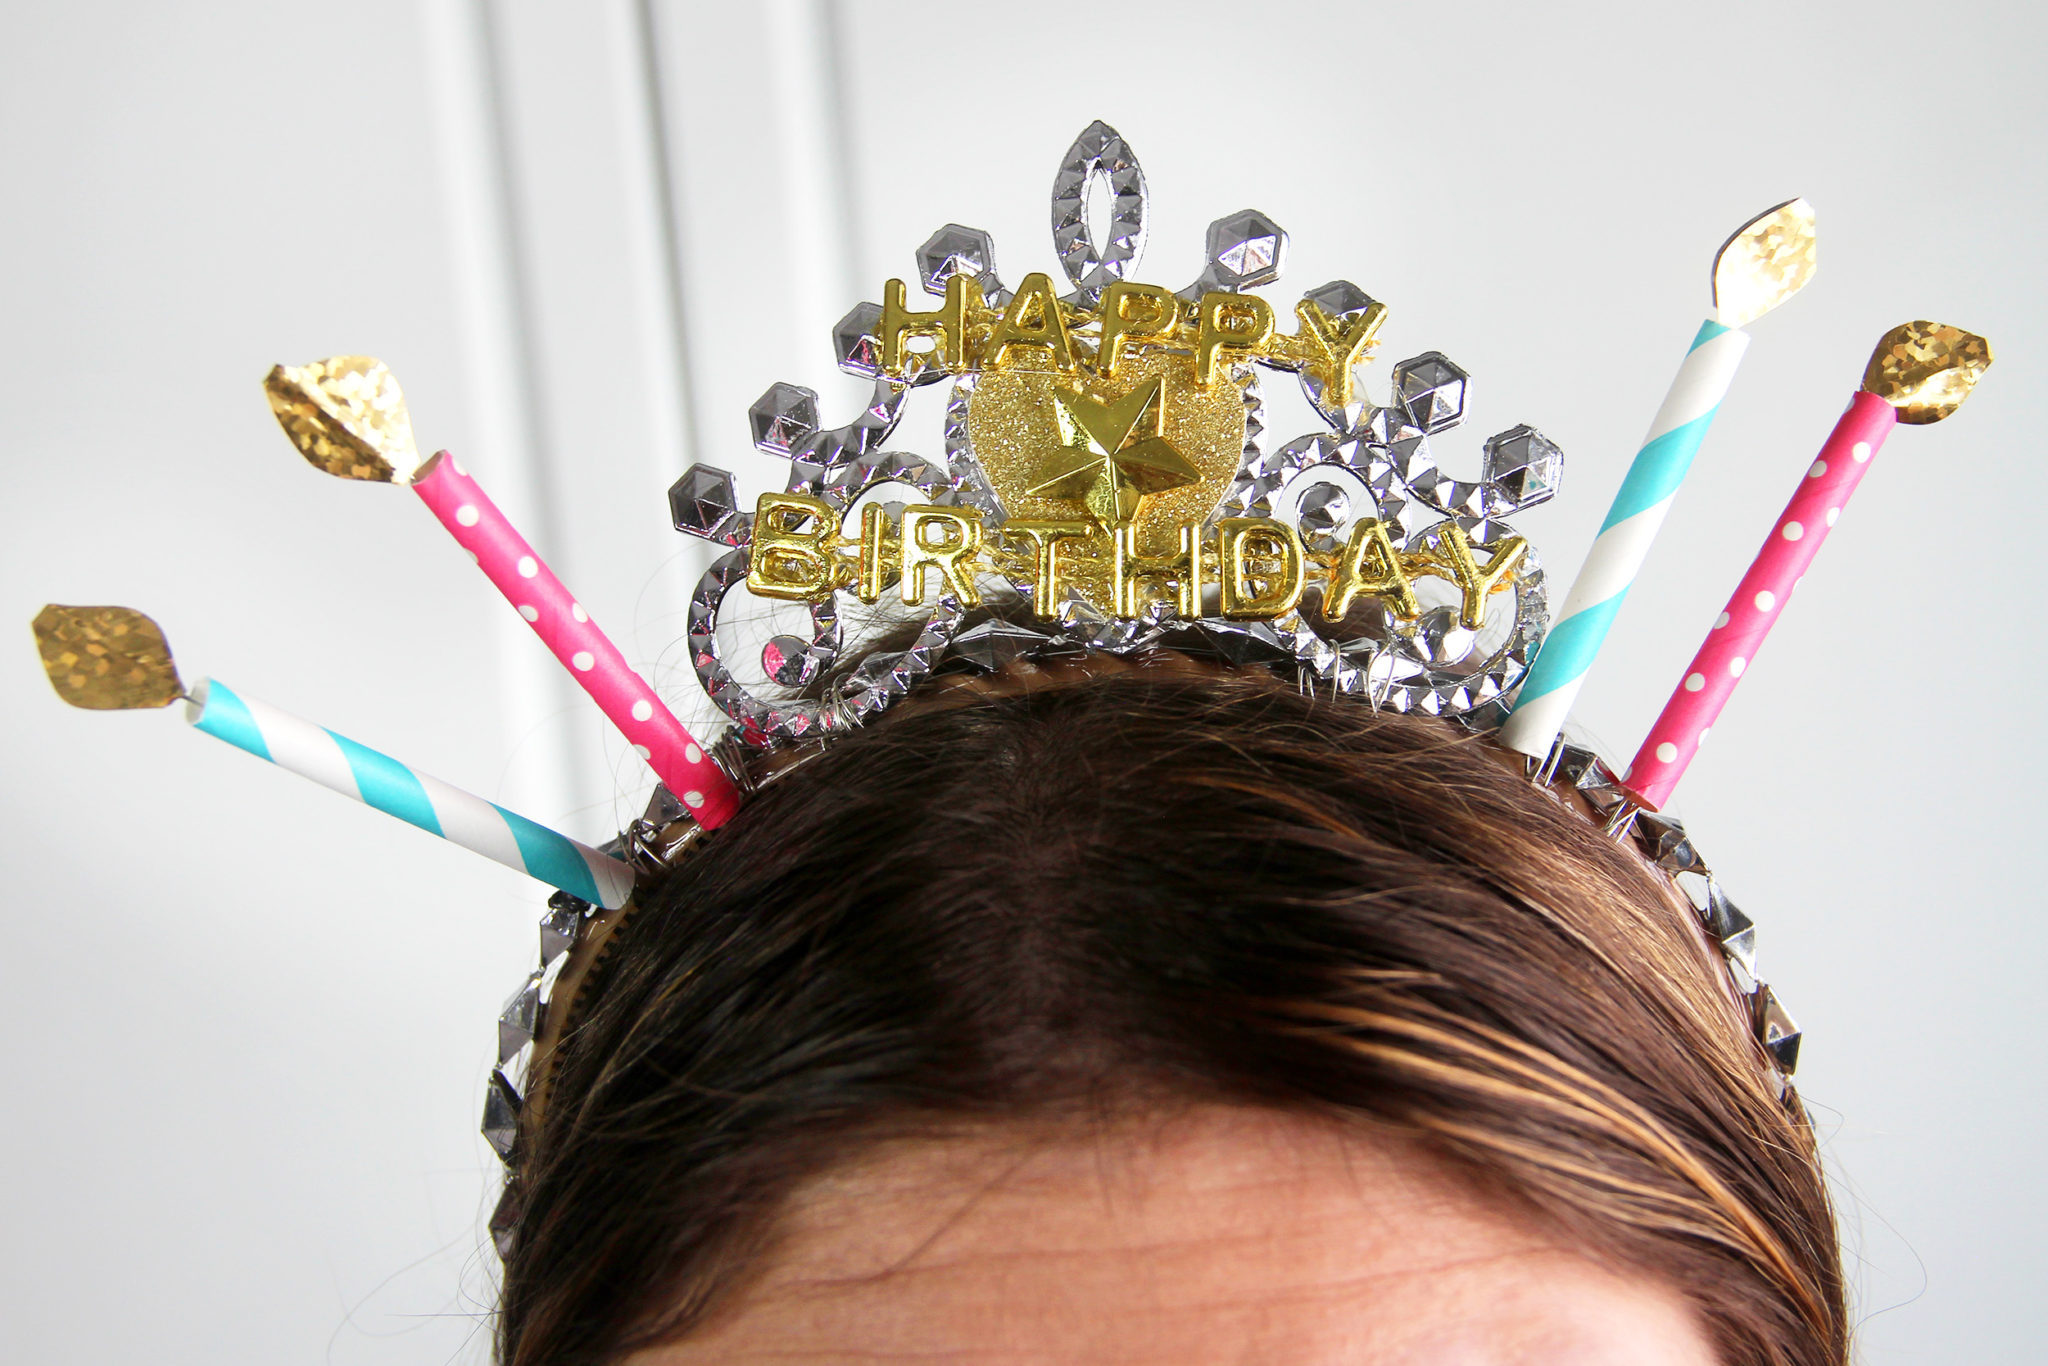
Then just wire everything onto the headband like I showed in the video and you’re done. Now, this project uses a lot of materials that I got from my local party supply store, so if you can’t source the exact same ones, just use what you have and be creative!
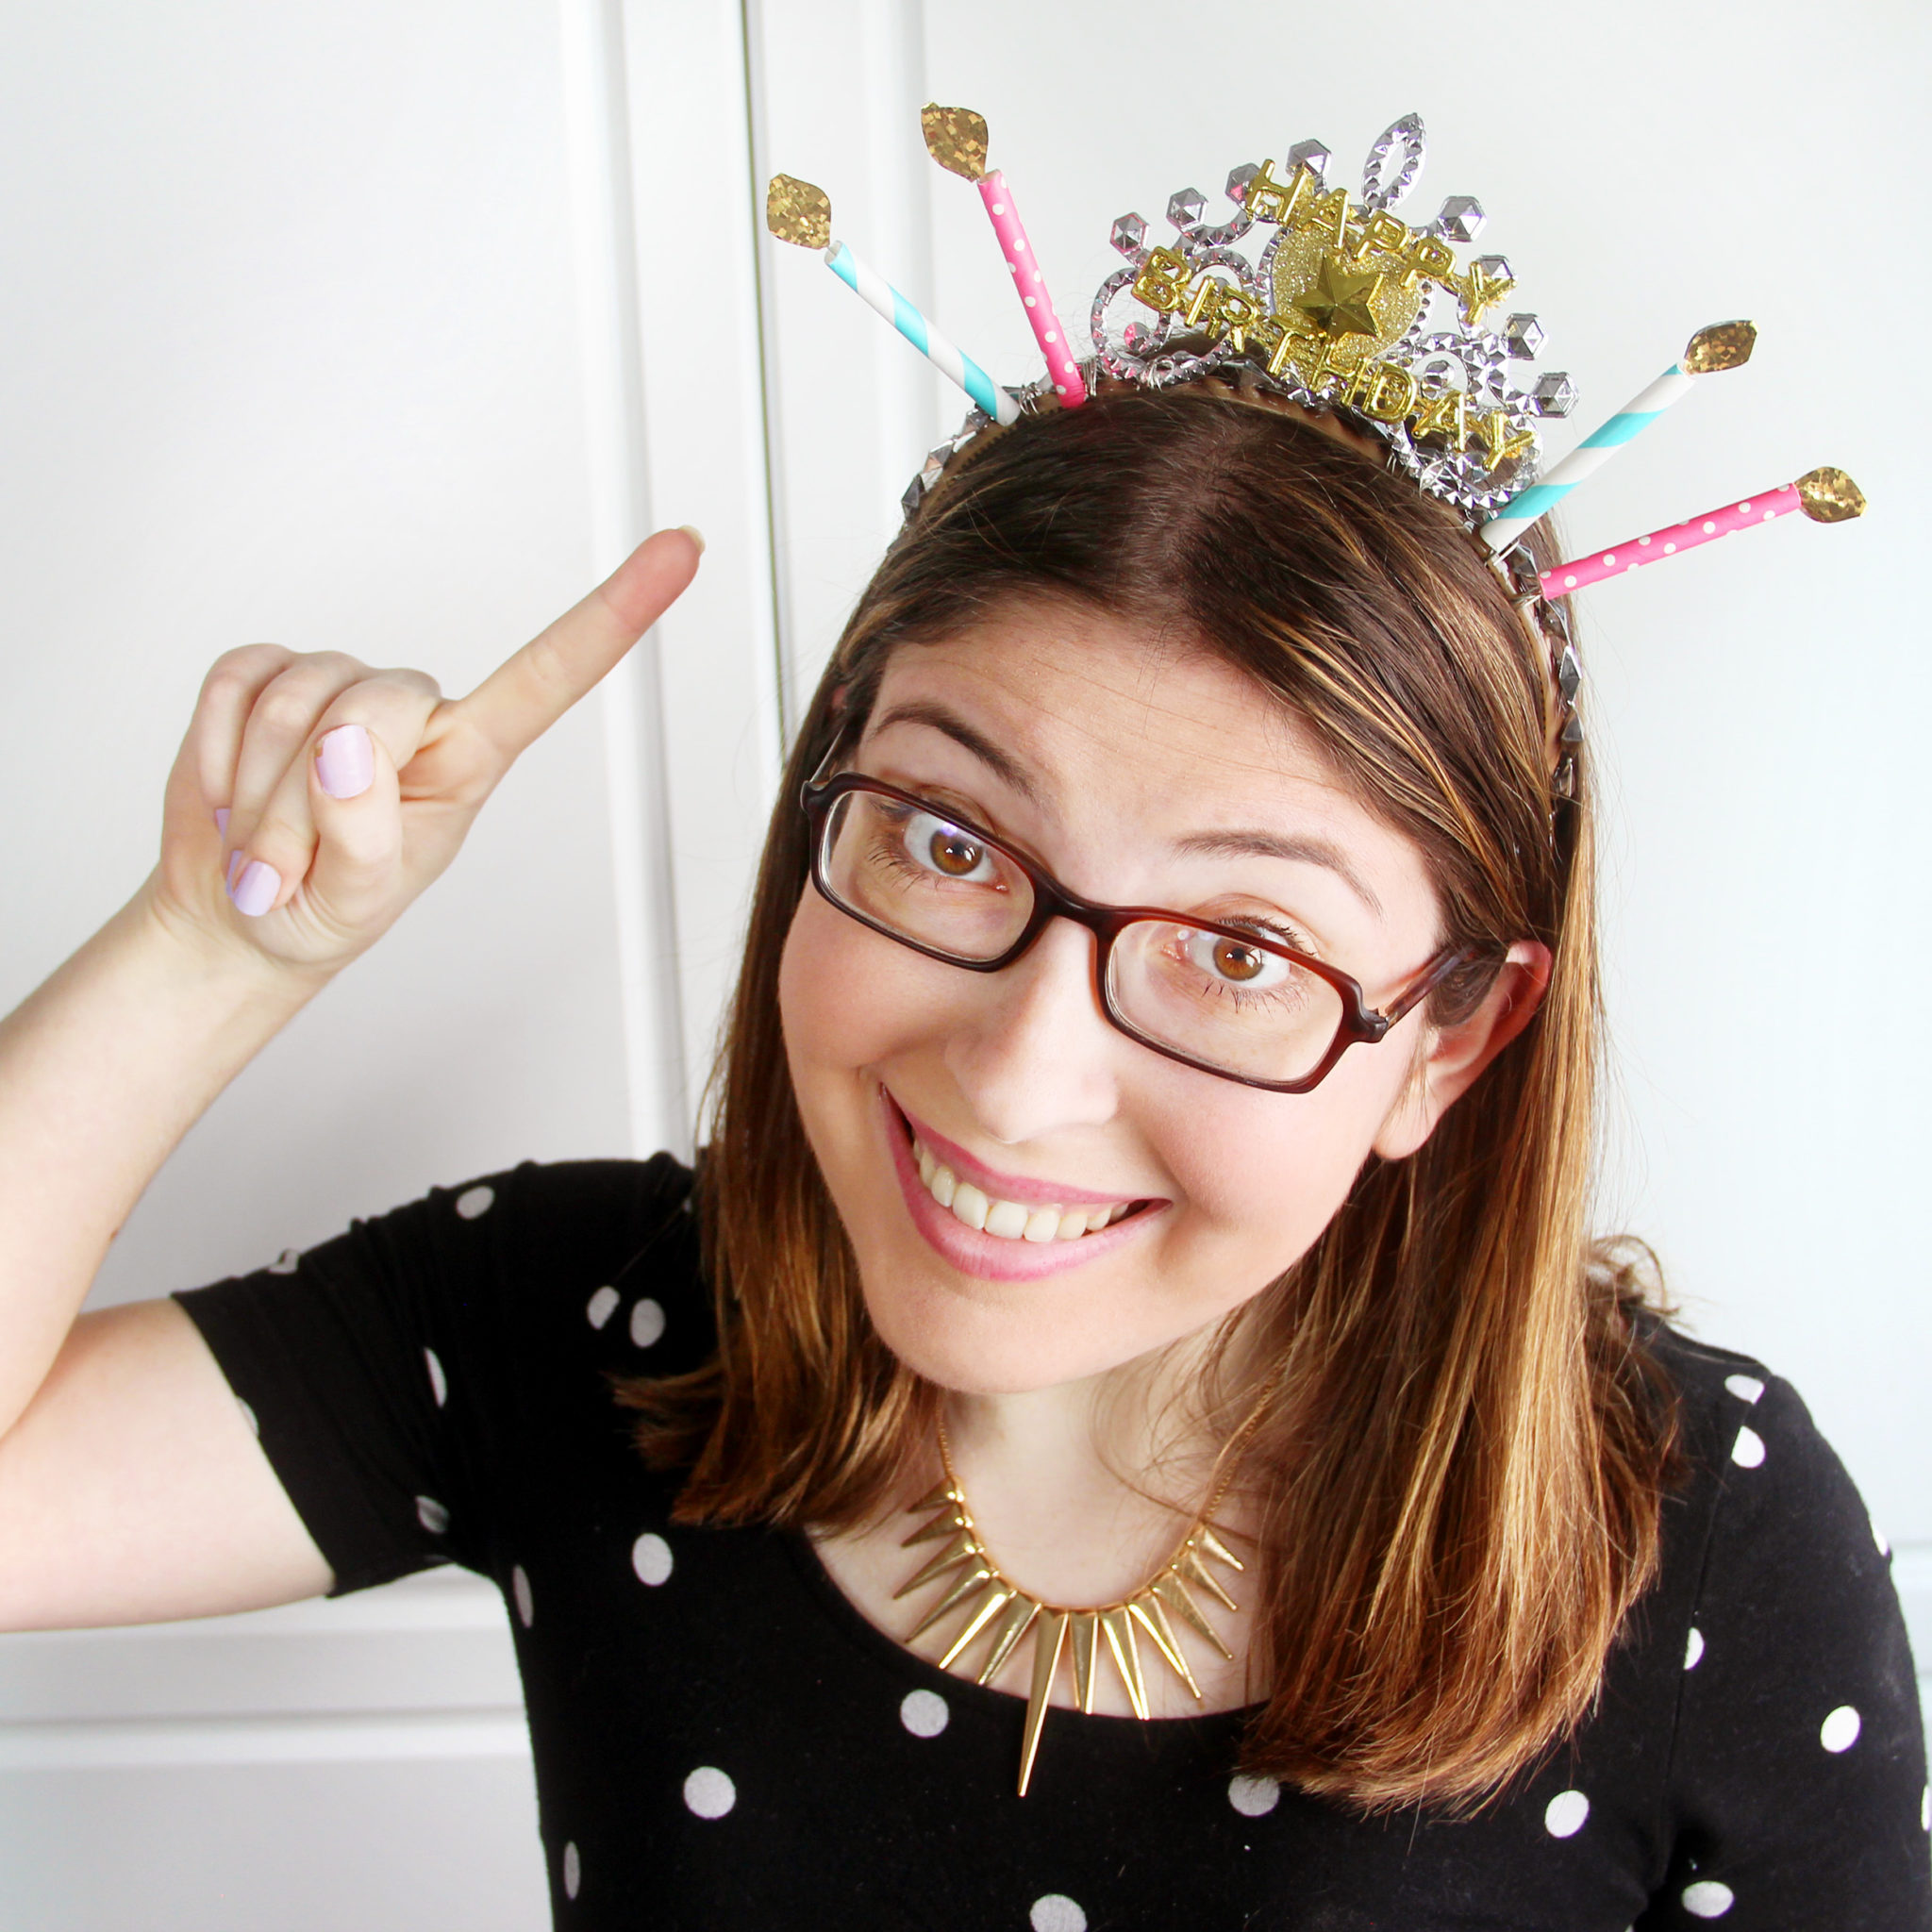
I hope you guys liked these birthday crown projects, and all the photos from my little photoshoot that I did in my apartment. If you have a birthday coming up, a very happy birthday to you! Or if you just want to get ready for Valentine’s Day, be sure to check out the Conversation Hearts DIY video I posted on Monday. Thanks so much for reading!