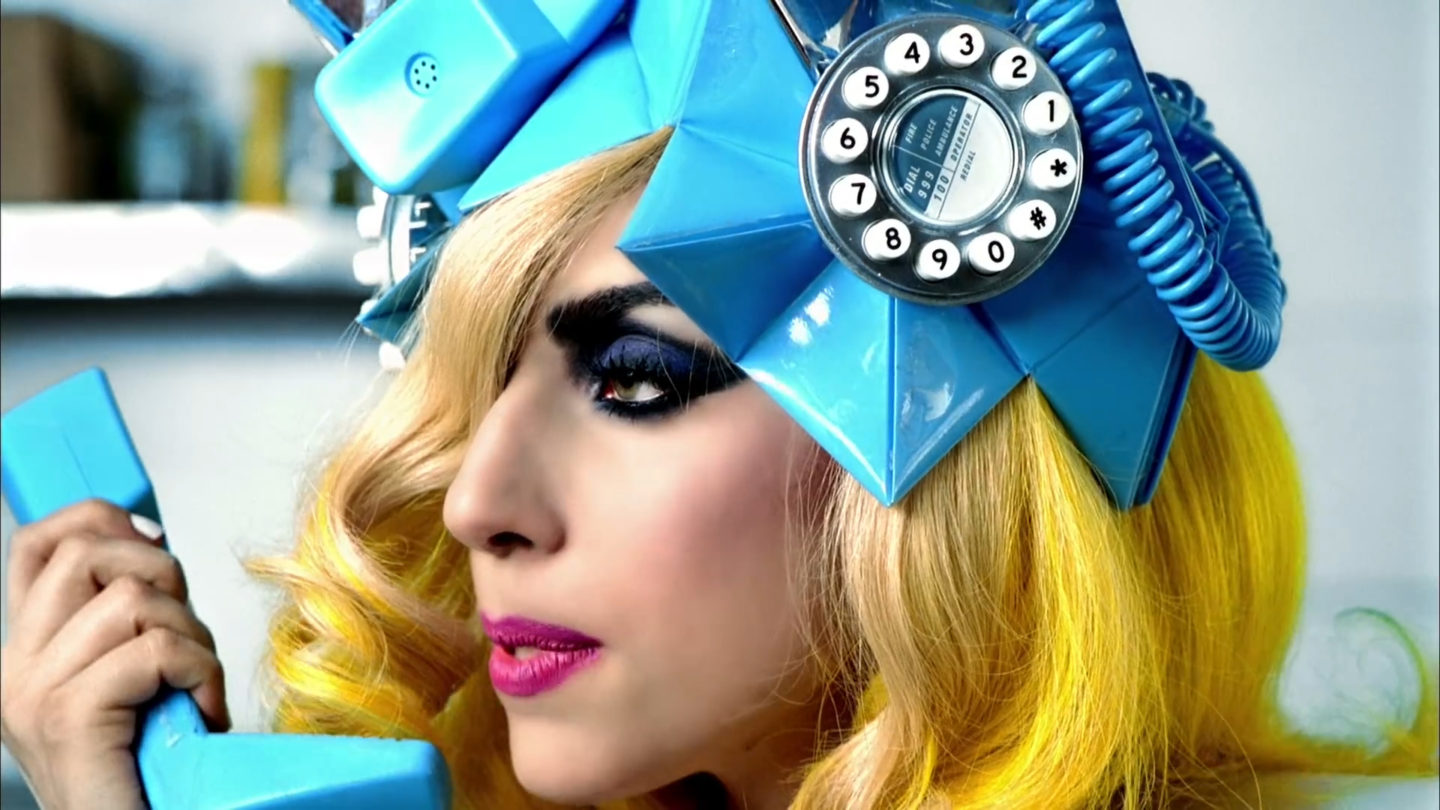
*Hello, hello, baby, you called, I can’t hear a thing*
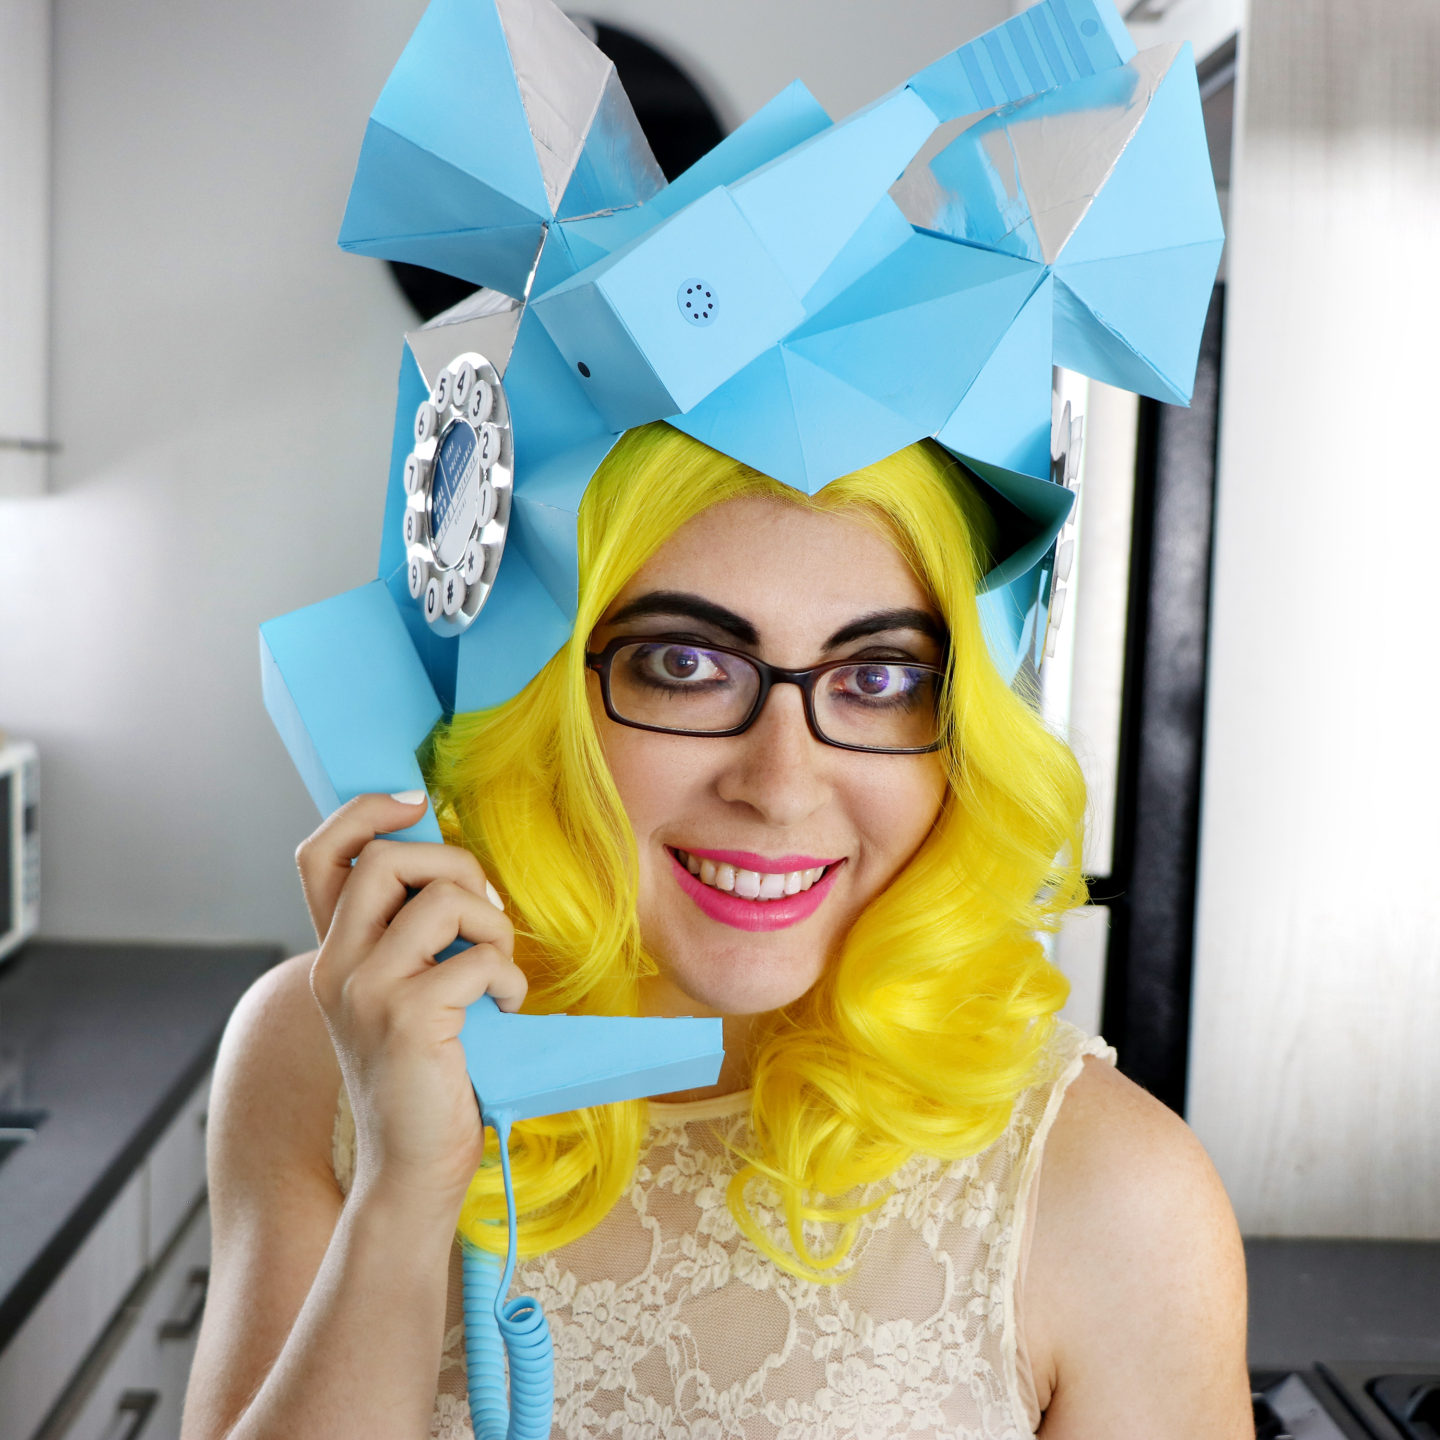
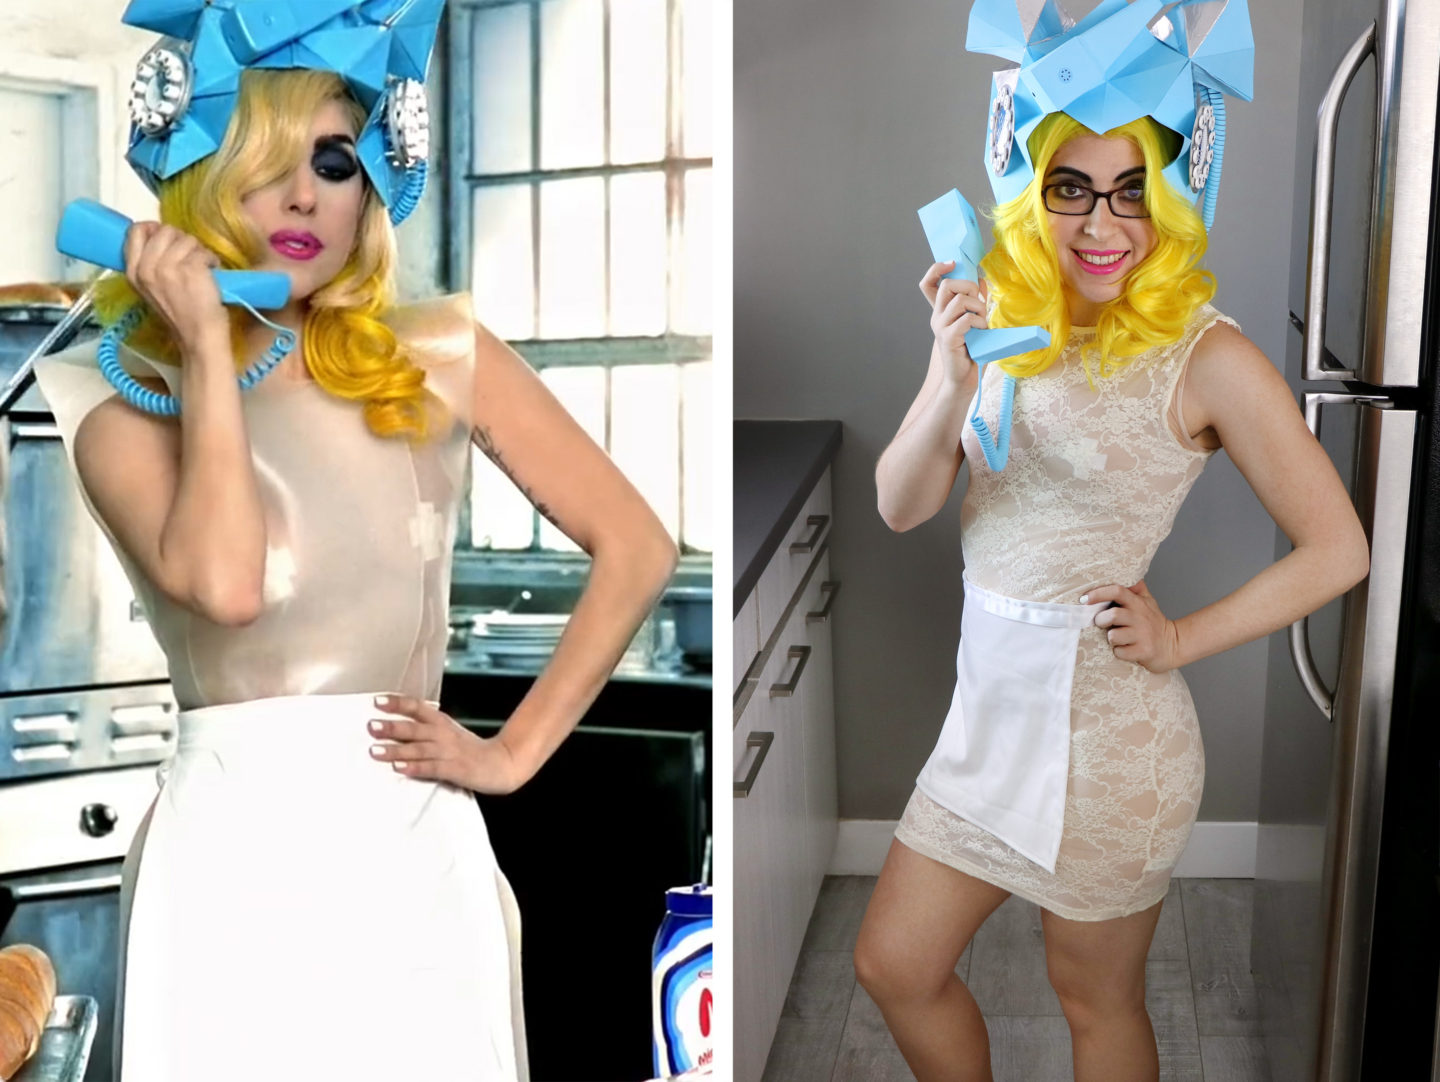
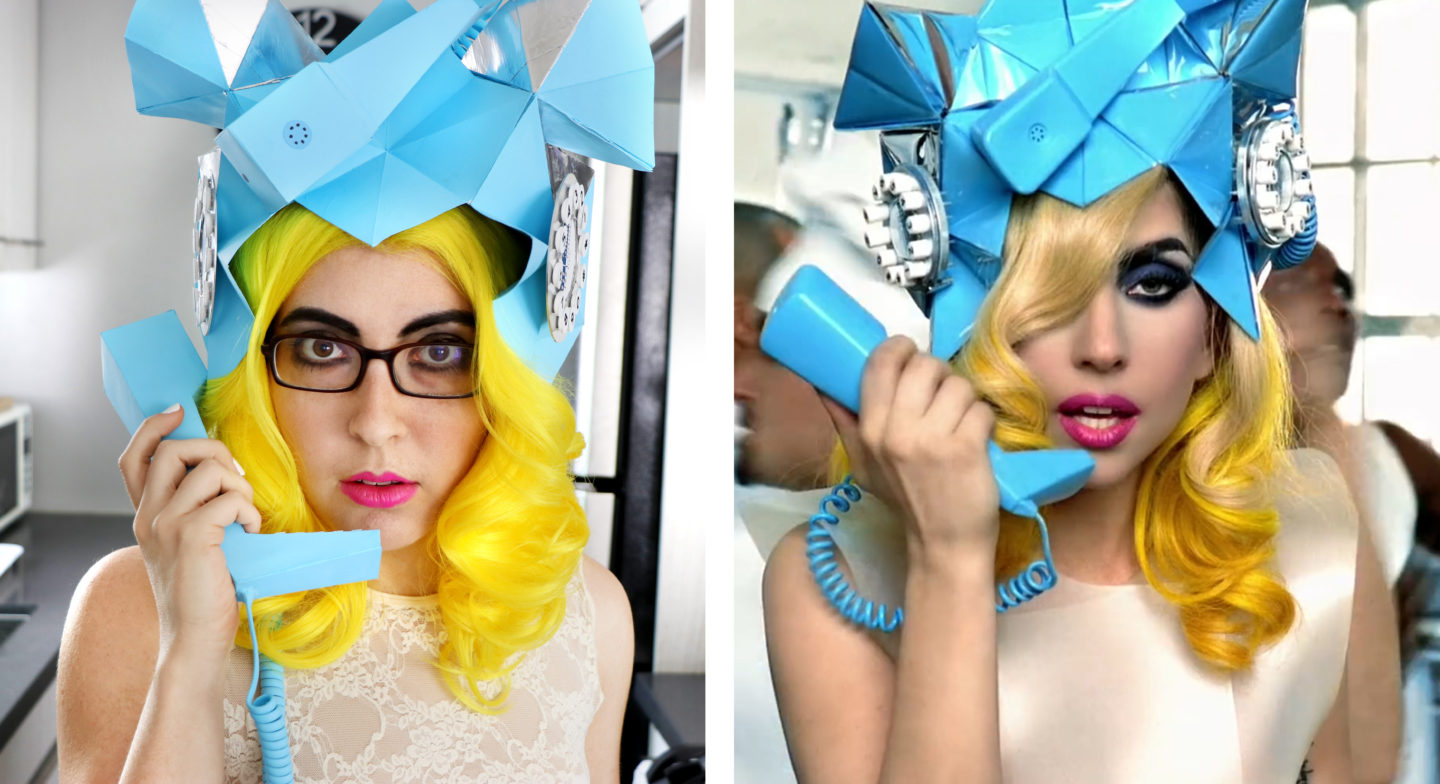
I’m so happy to be sharing my Halloween costume today – Lady Gaga from the Telephone music video! I’ve loved this look ever since the music video came out ten years ago, and when I decided to do it as my costume, I knew it would be a big undertaking. But, I think I managed to pull it off, so I’m going to take you through the process every step of the way!
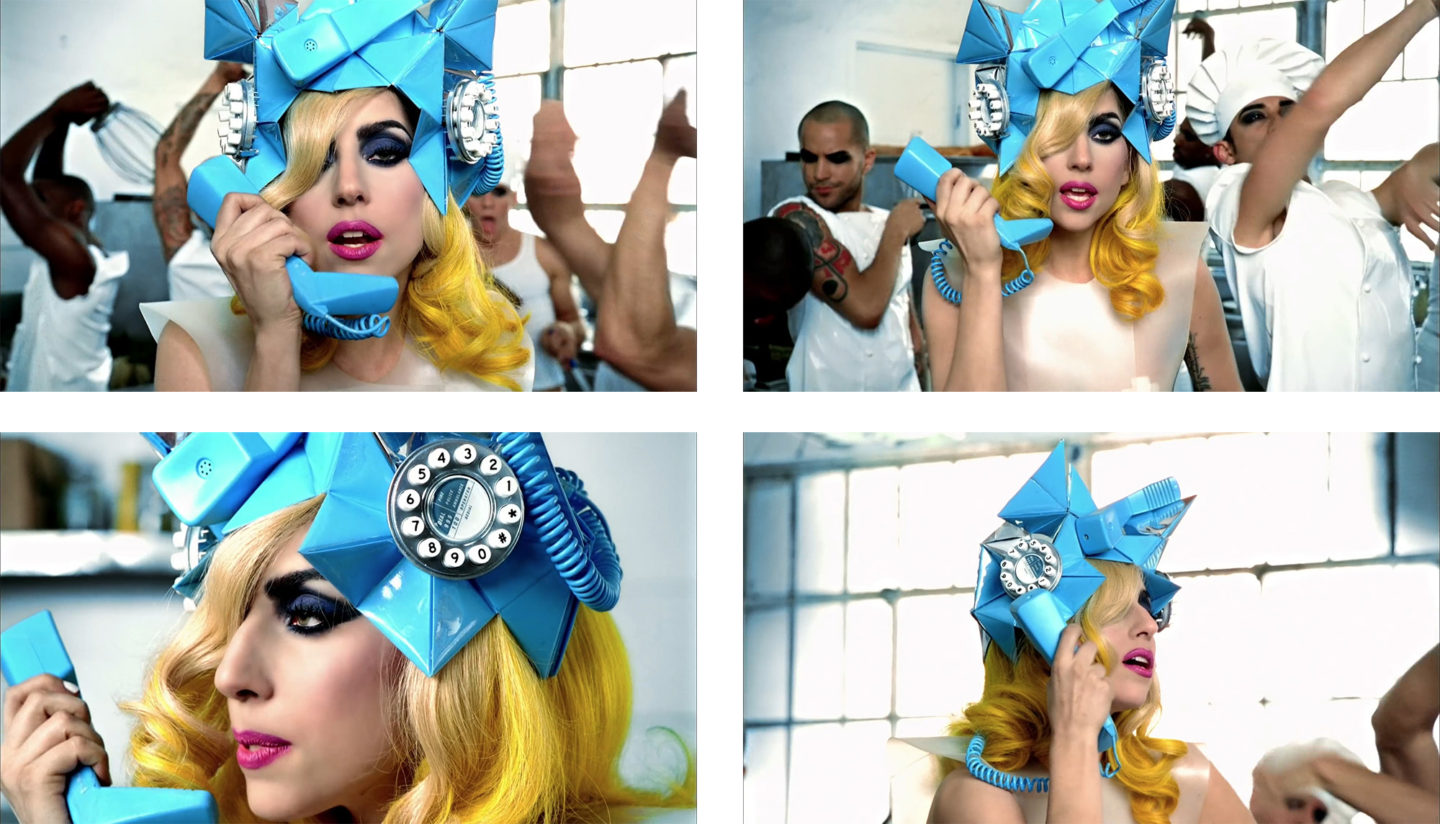
The first thing I did was download the video off of YouTube and export stills of every single different shot of the outfit so I had as much reference material as possible. Then I sorted them into closeups, medium shots, and wide shots. Literally, I have at least 40 different images from the video saved on my computer right now.
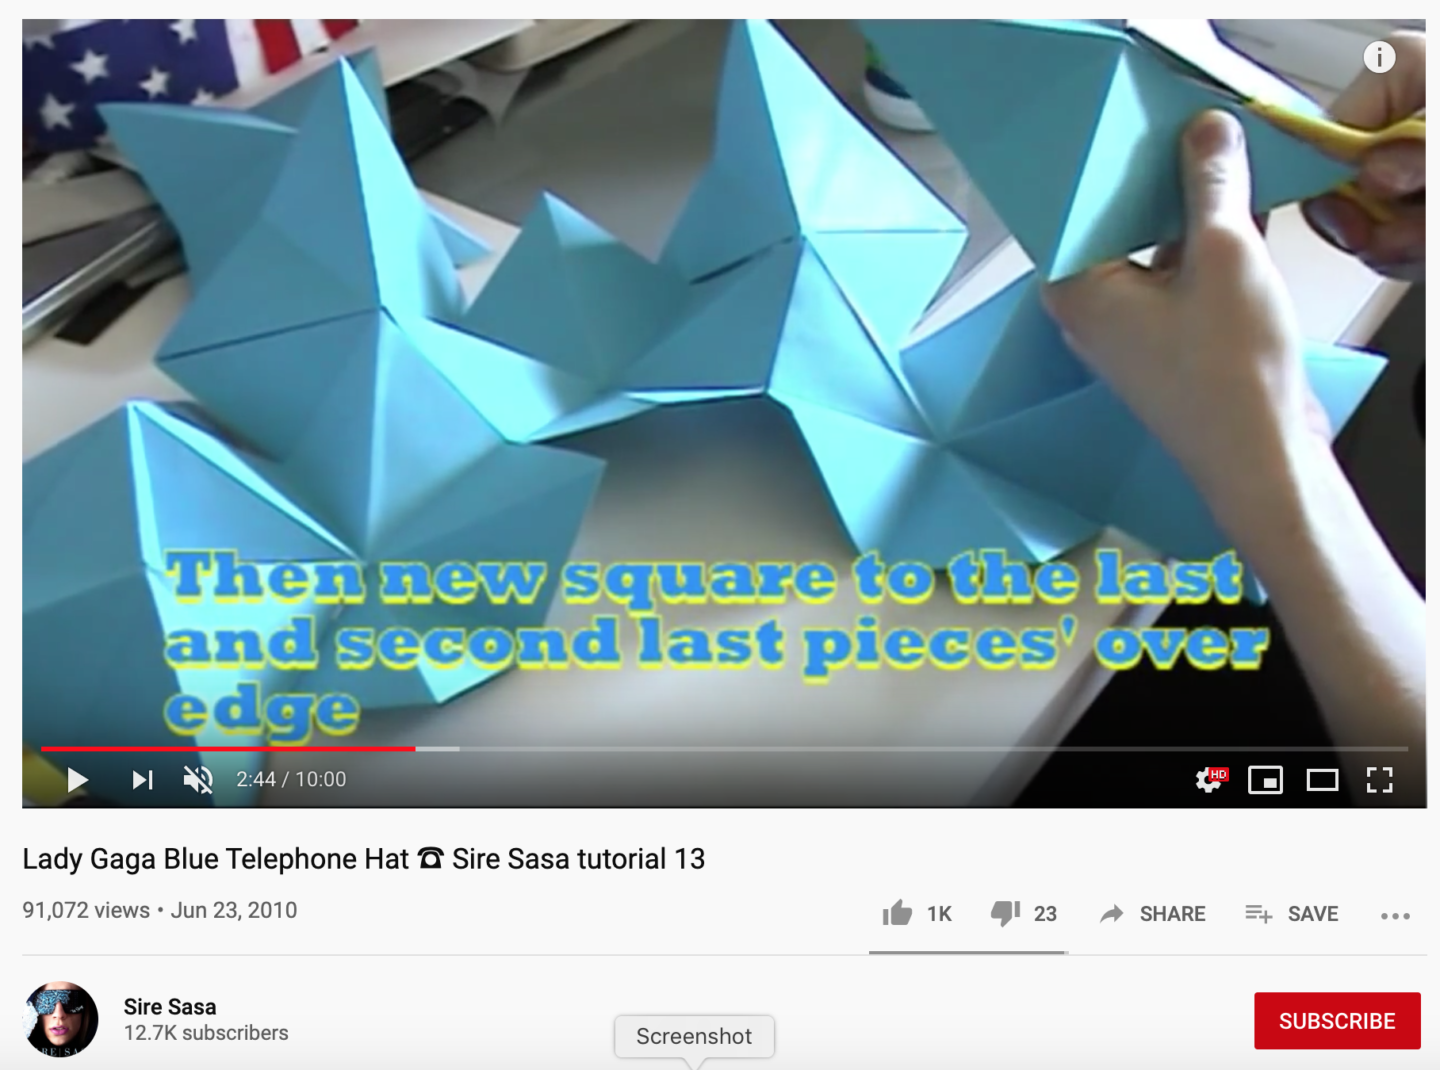
Next I want to give a huge shout-out to YouTuber Sire Sasa, who made a DIY video about how to make the hat ten years ago, and I never would have been able to make it without his video. It was a little confusing to follow, but I got there in the end, and he is the real MVP of this whole costume.
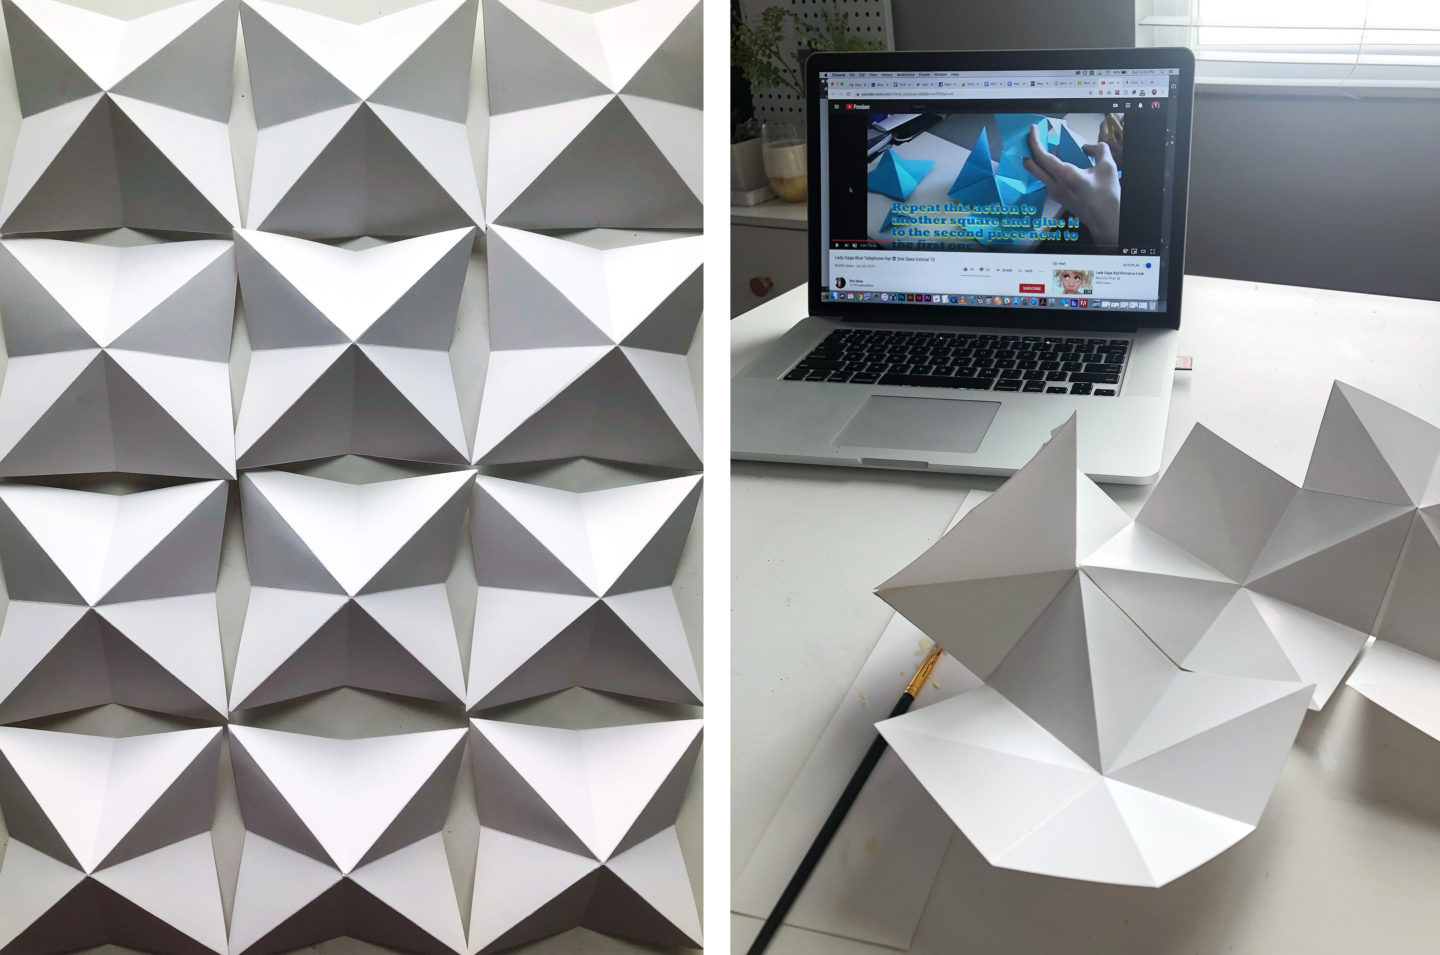
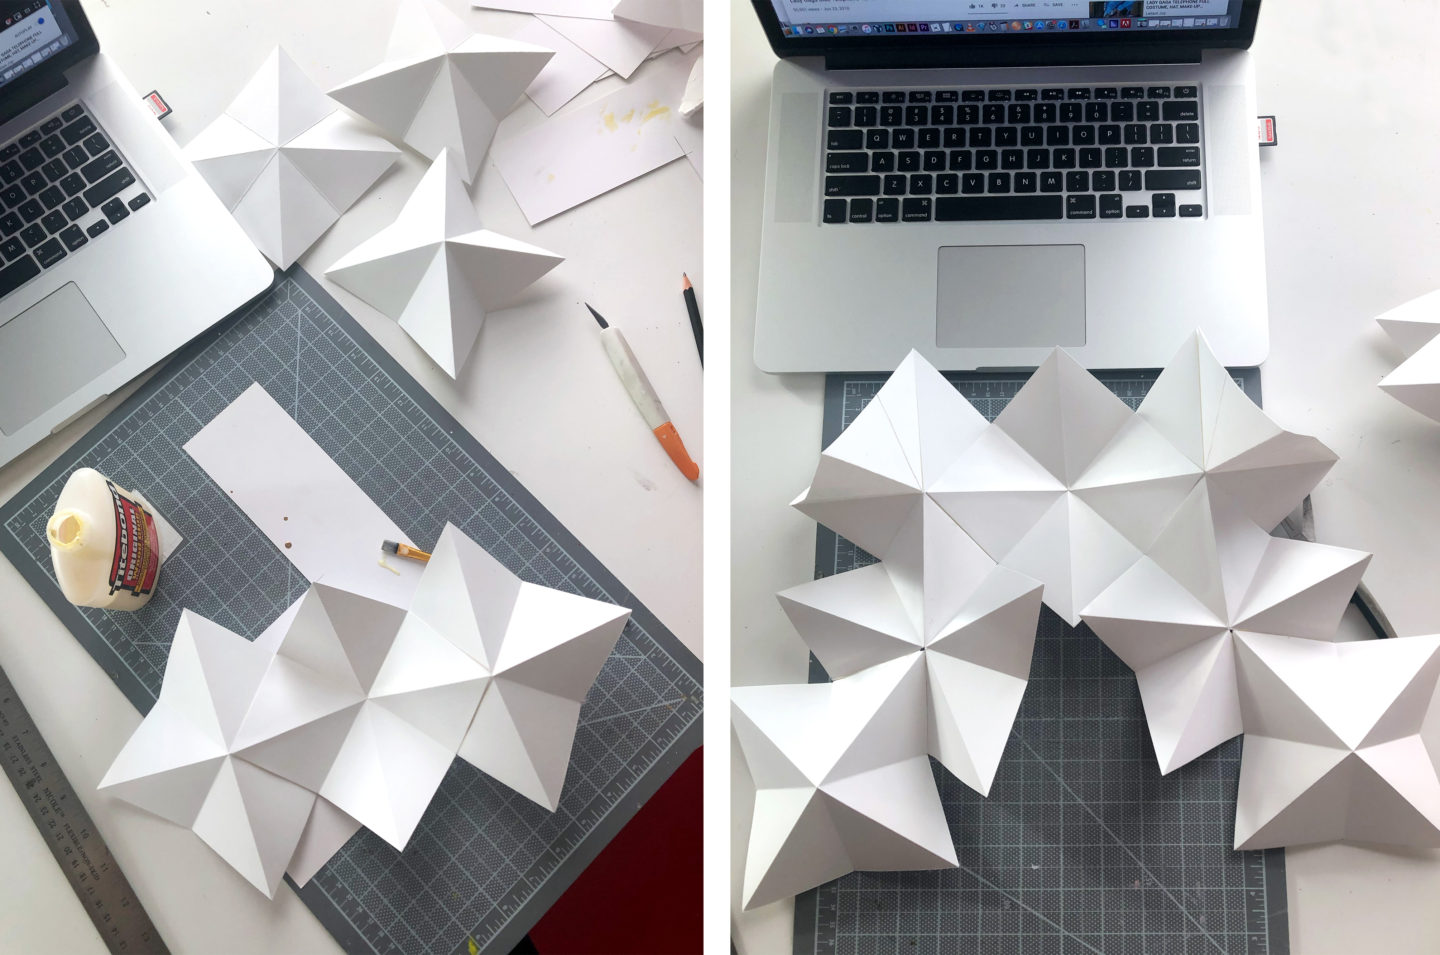
To make the hat, I used posterboard and wood glue (Amazon affiliate link), and it was a similar process to when I made the papercraft unicorn in this video. I actually had to make the hat twice, because the first time I got almost all the way through and then realized I messed it up somewhere along the way, and since it was glued together, I couldn’t take it apart. So the second time, I watched parts of the tutorial video literally frame by frame to make sure I was gluing in exactly the right areas.

I’m so glad I wasn’t trying to film this project, because it was so fiddly and confusing that I have no idea how I would have edited it for the camera. But I managed to get it done in the end, and making the structure of the hat was definitely the hardest part of this whole project.

Next it was time to paint the hat, and I used Apple Barrel paint in Parrot Blue (aflink). I did two coats on the outside of the hat and one coat on the inside, and with everything else there is to paint too, I’d recommend having two bottles of paint on hand if you’re going to try this project. The hat was also a bit awkward to balance while I was painting it, so I came up with the idea to place it on a globe protected by a plastic bag as a makeshift hat stand.

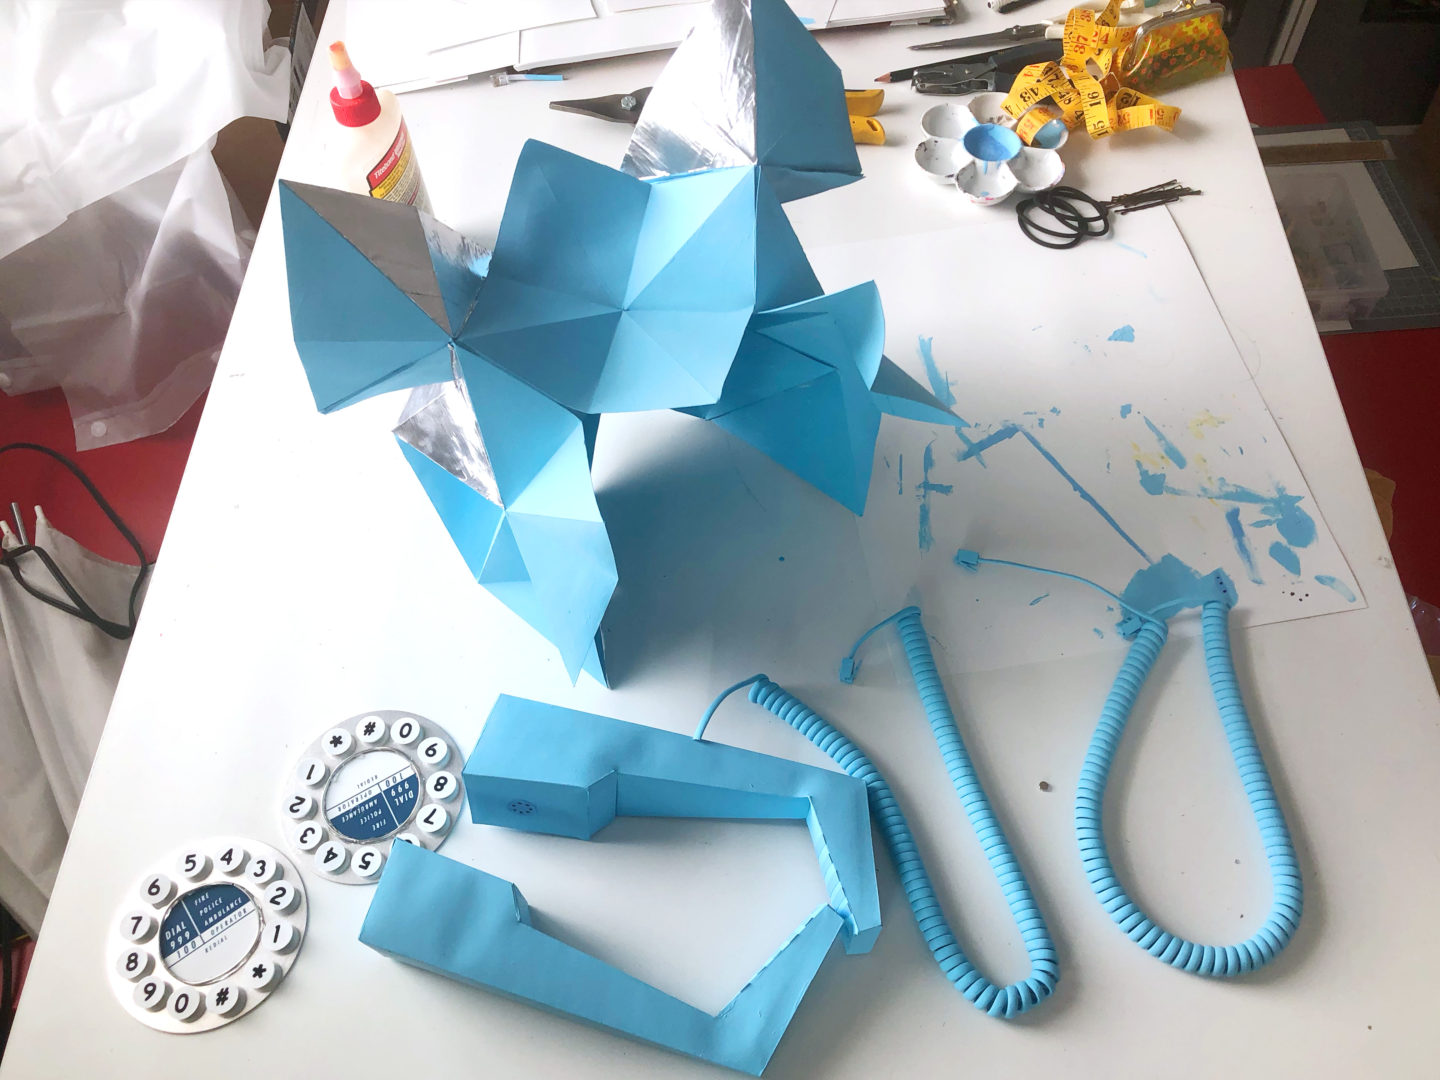
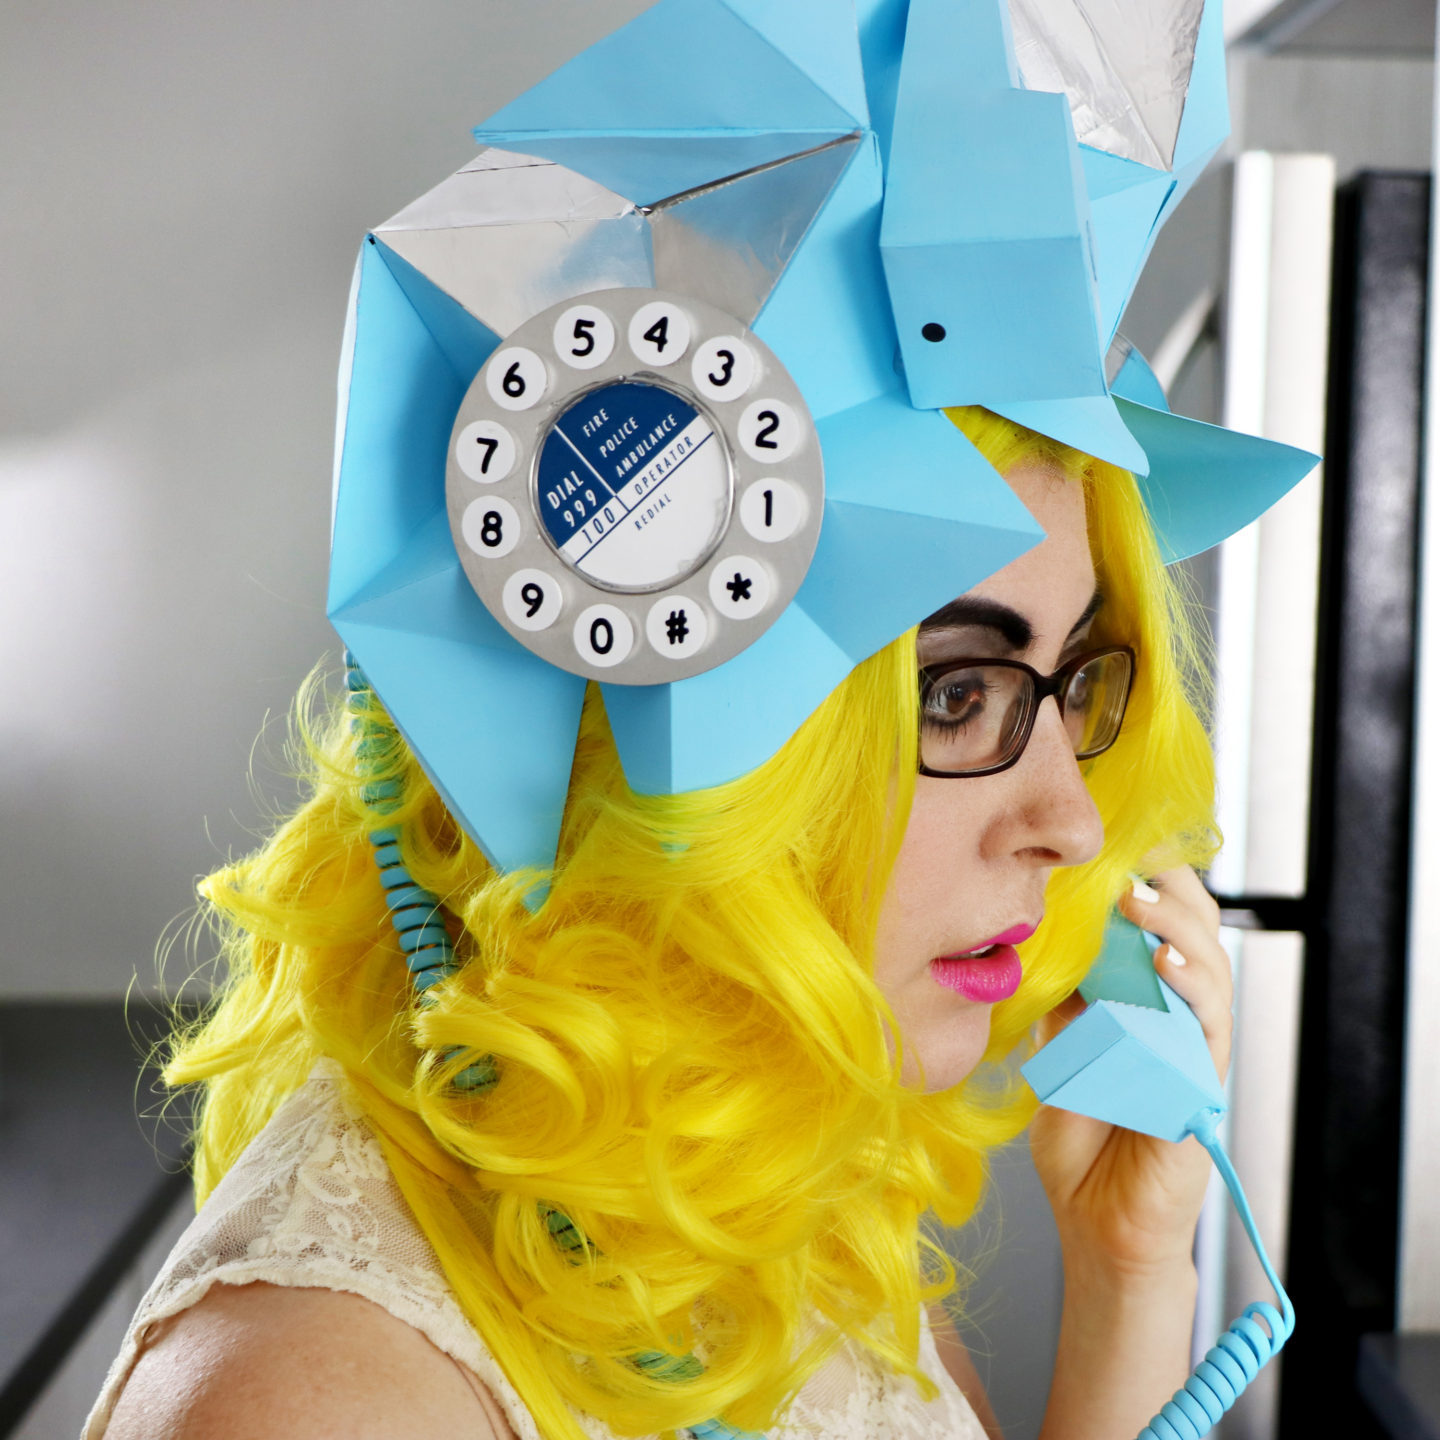
Next it was time to make the dials. I traced the interior design off a screenshot from the video, and Photoshopped out the numbers from that same shot. You can download the printable here if you want to make it for yourself.
I used circle punches to cut them out, and then I thought I was very clever for coming up with using googly eyes to make the buttons 3D. I painted the eyes white and then glued the numbers to the back of them, and hot glued them to metal discs that I got from my dad ages ago. You could also use a CD or the lid of a metal can here.

Next it was time to make the phones. The phones in Gaga’s hat are vintage Trimphones, which look very cool, but are very expensive to buy the real thing. And, in the tutorial video above, Sire Sasa had a printable pattern in the description, but at some point in the last ten years, the link broke, so I had to start from scratch and make my own pattern.
I traced the basic shapes from photos of Trimphones and then used my pattern-making skills to create a printable pattern where all of the edges lined up (…mostly). Above you can see my first attempt, which was a bit too fat and bulky, so I went back into Photoshop and adjusted the shapes to get the second phone, which looks pretty good.
Once I had taped the test phone together out of computer paper, I carefully removed the tape and traced it onto posterboard twice, and I glued them together the same way as I did with the hat. You can download my phone pattern here, but note that I didn’t include the tabs for gluing in the pattern, so you’ll have to visualize where they go yourself.
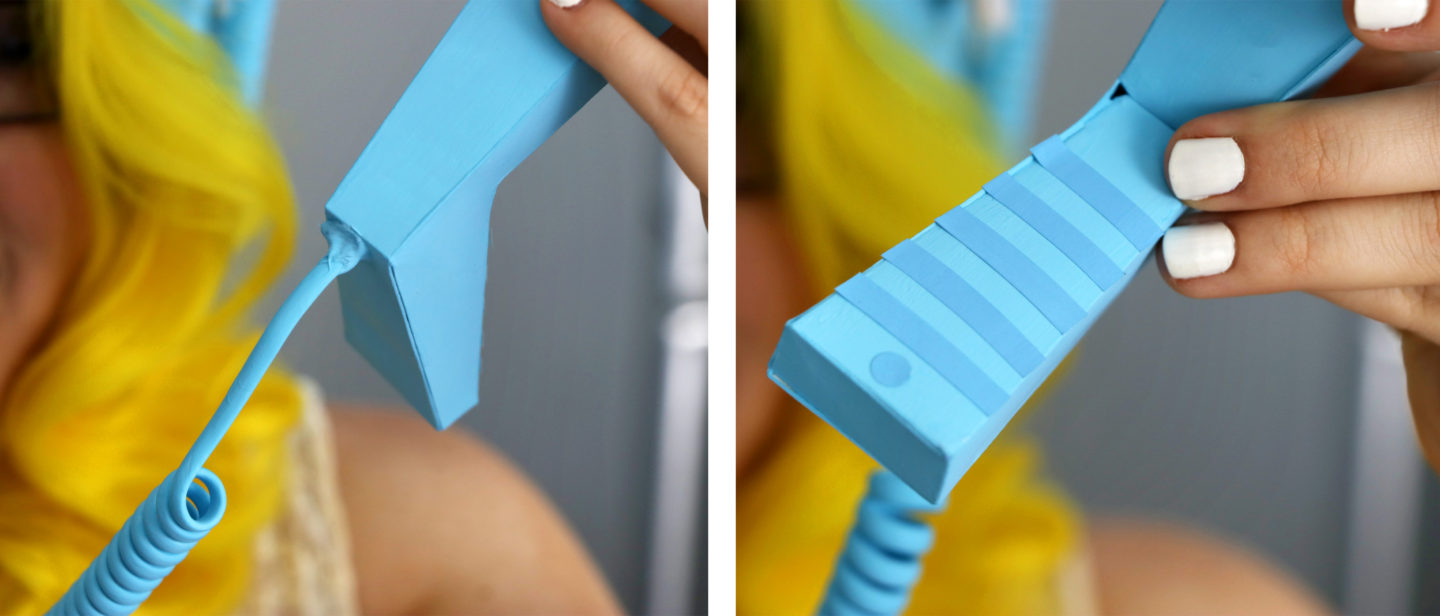
I painted the phones the same color blue as the hat and added the details on by painting a darker blue color onto sticker paper, cutting out the lines and dots with scissors and a hole punch, and sticking them on. I also cut a small hole in the bottom of the phone for the phone cord. I cut off the connector from the end of the cord so I could stick the wire in and hot glue it in place. Speaking of the phone cord…
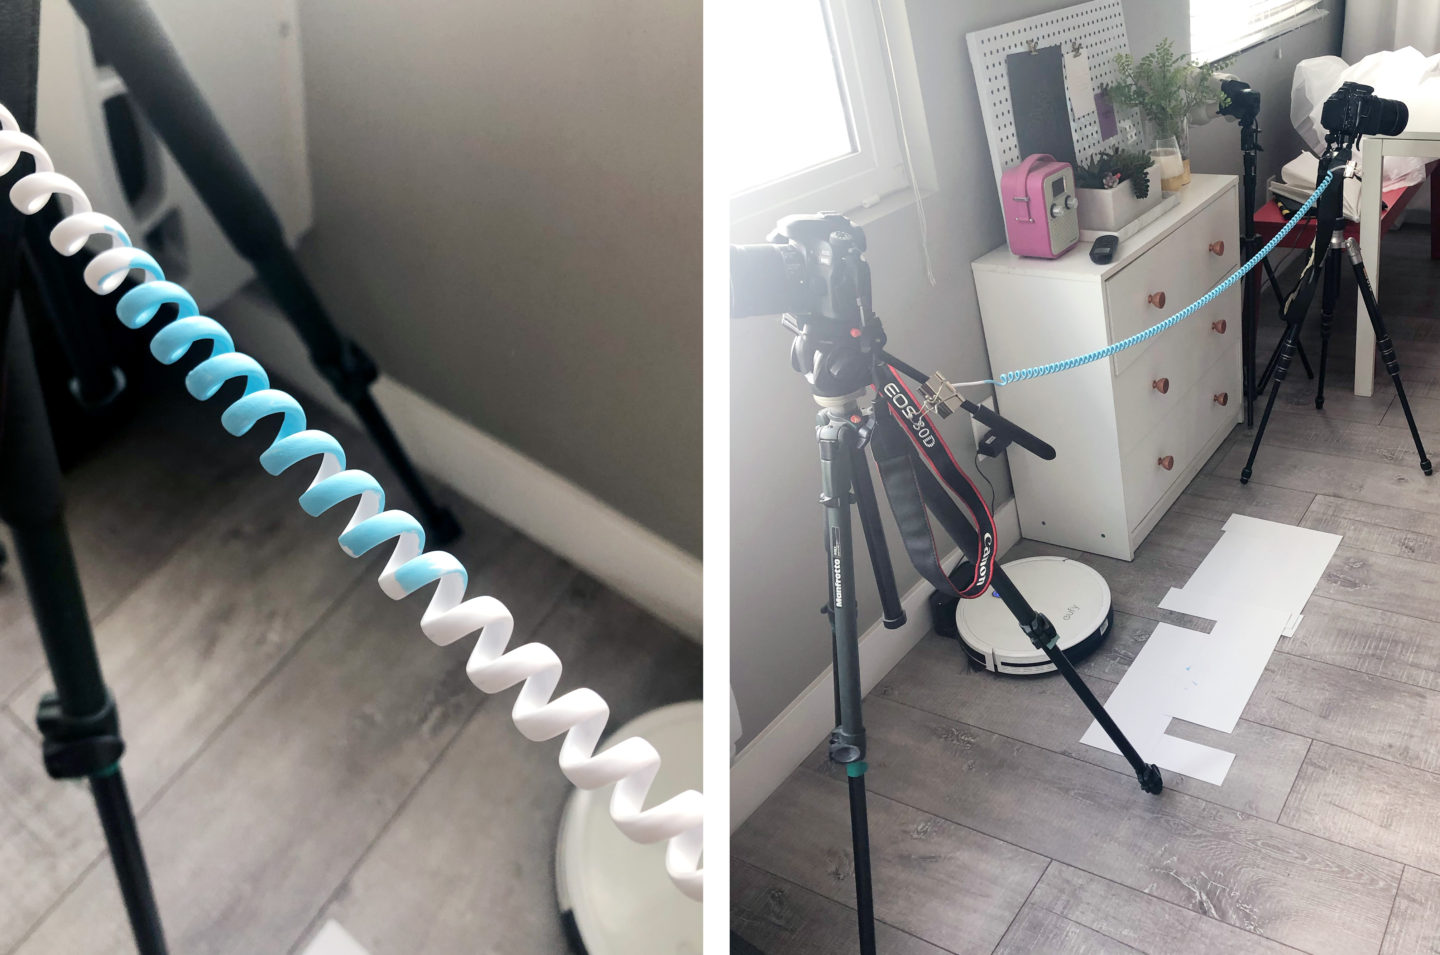
The next thing to do was paint the phone cords that I bought on Amazon (aflink). I used the same paint as above, and in order to get to the inside of the spiral, I clipped the ends of the cords to my tripods to stretch them out. I was literally in kneepads on my floor for an hour at a time painting these cords with a tiny paintbrush, because apparently that’s my life now.
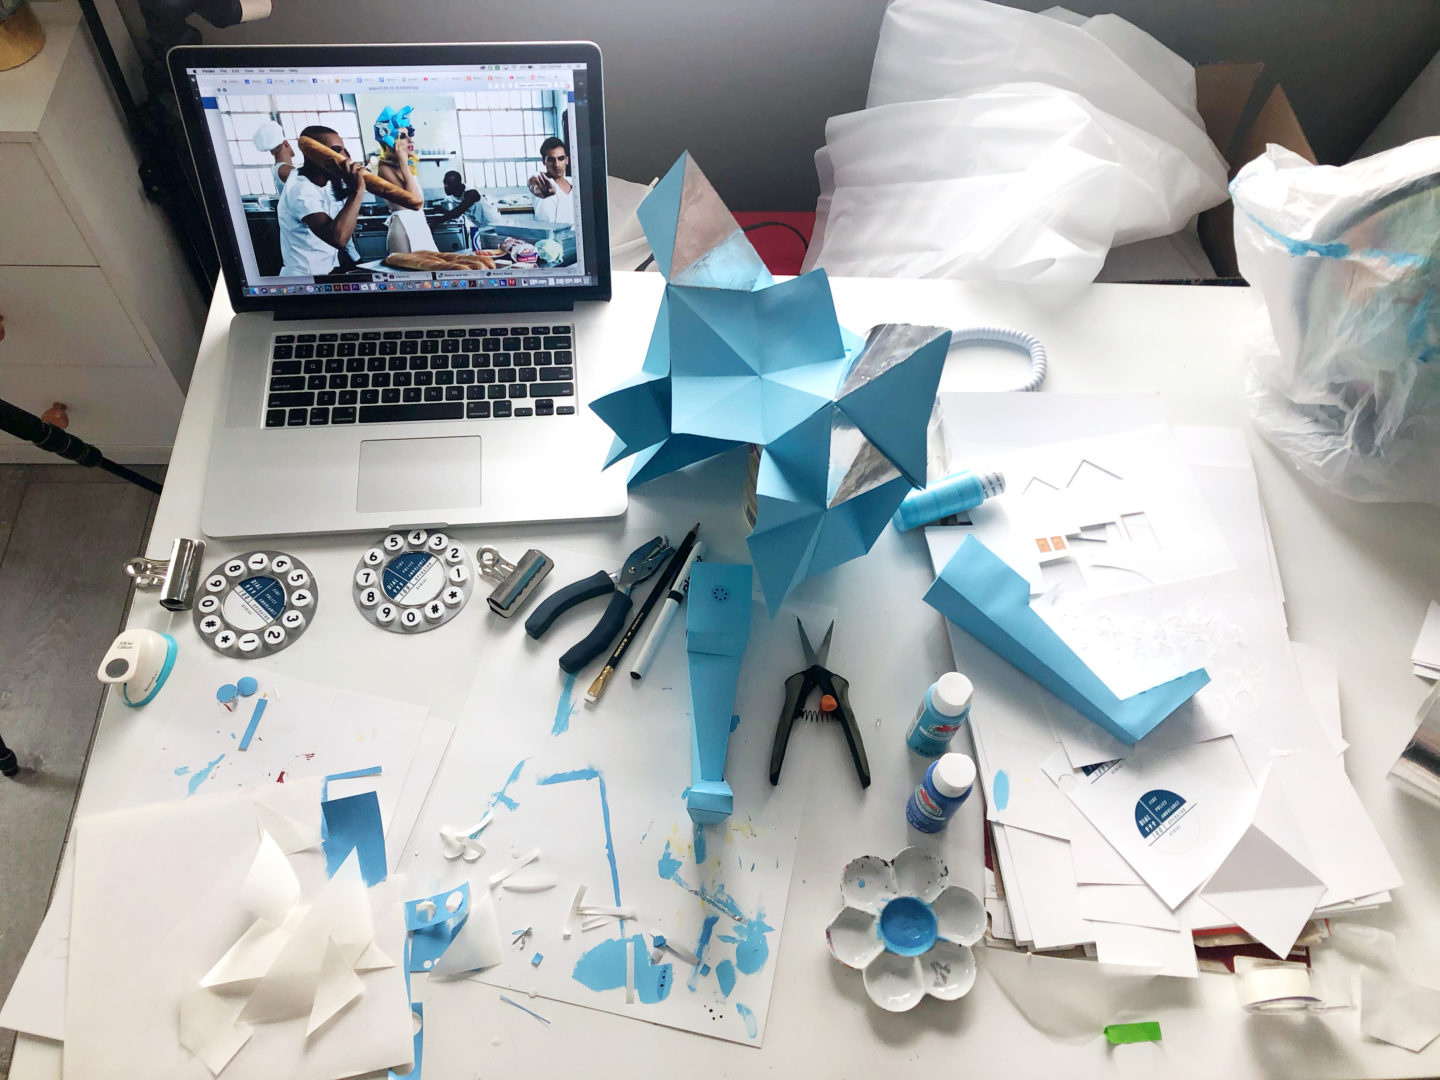
Before gluing everything to the hat, I added the silver sections using aluminum tape (aflink), but silver duct tape would also work here.
I mostly used hot glue to glue all of the components together since it dries the fastest, but I also used e6000 in a few spots where I really wanted to make sure it held.
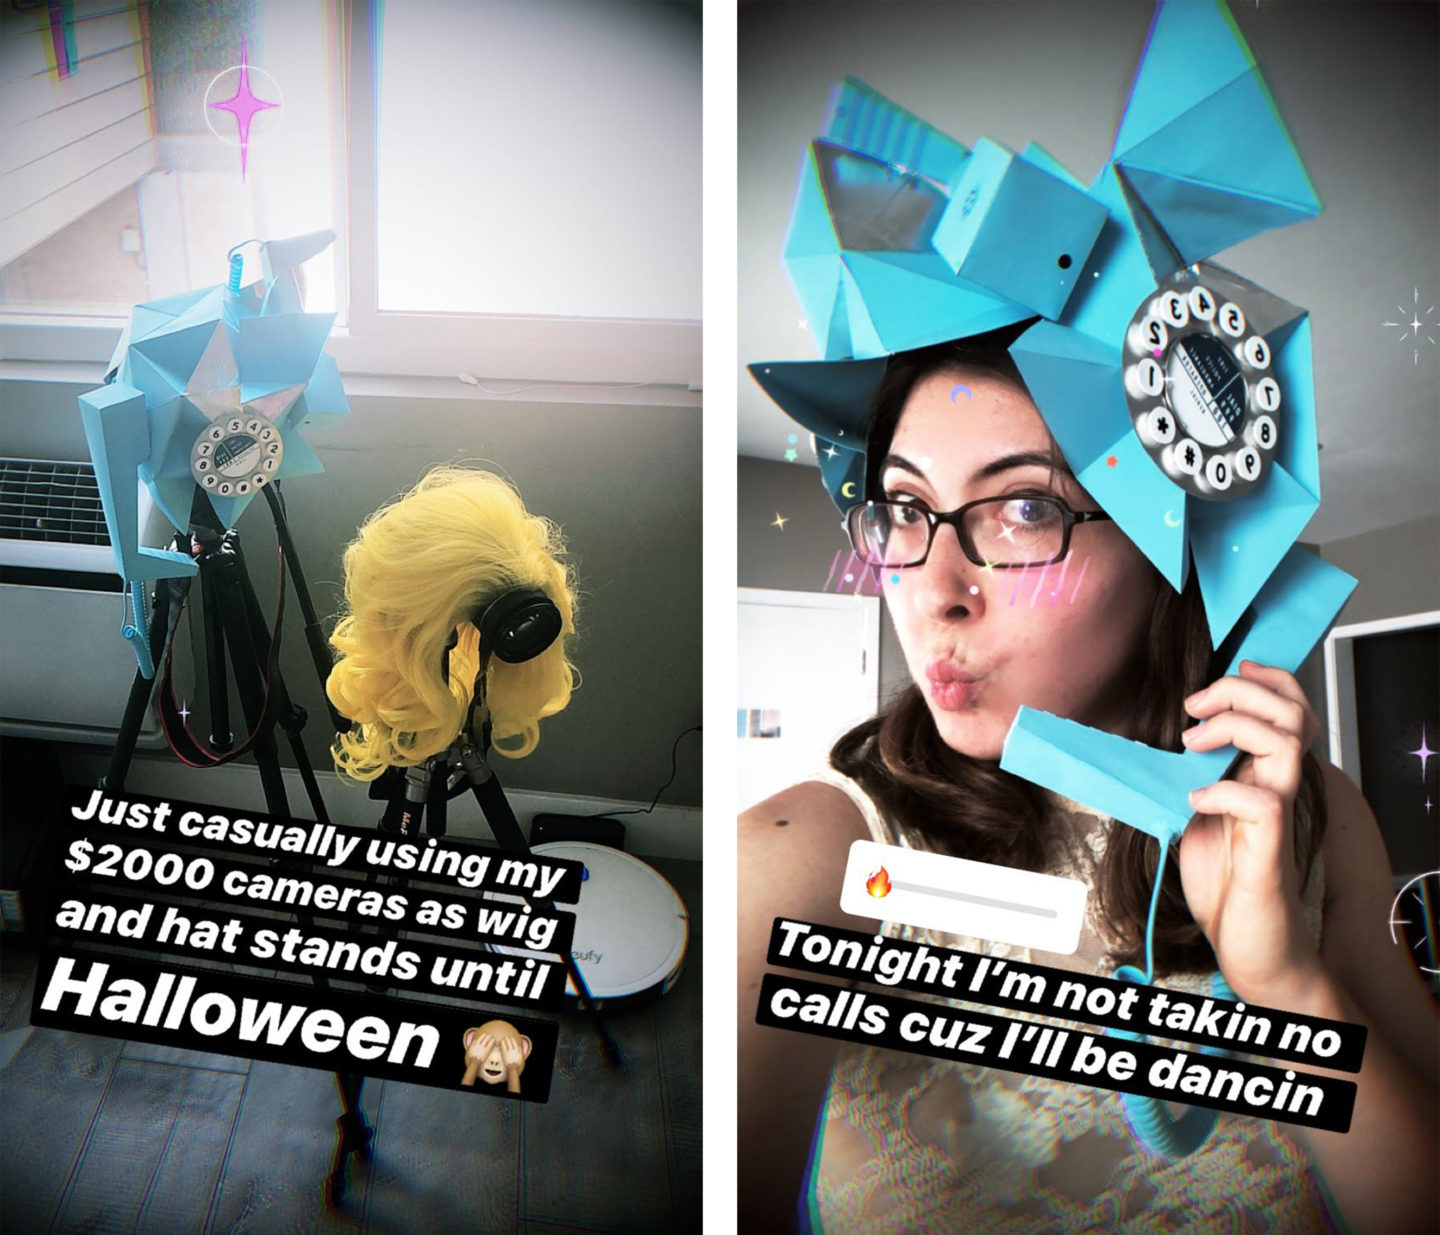
And, that’s the hat finished! It was definitely the most ambitious part of this costume, but I’m really happy with how it came out.

Here is what the hat looks like from the sides and back. This would have been so useful for me to have when I was trying to picture how the initial structure of the hat went together, so I hope this will help anyone else who tries to make it.

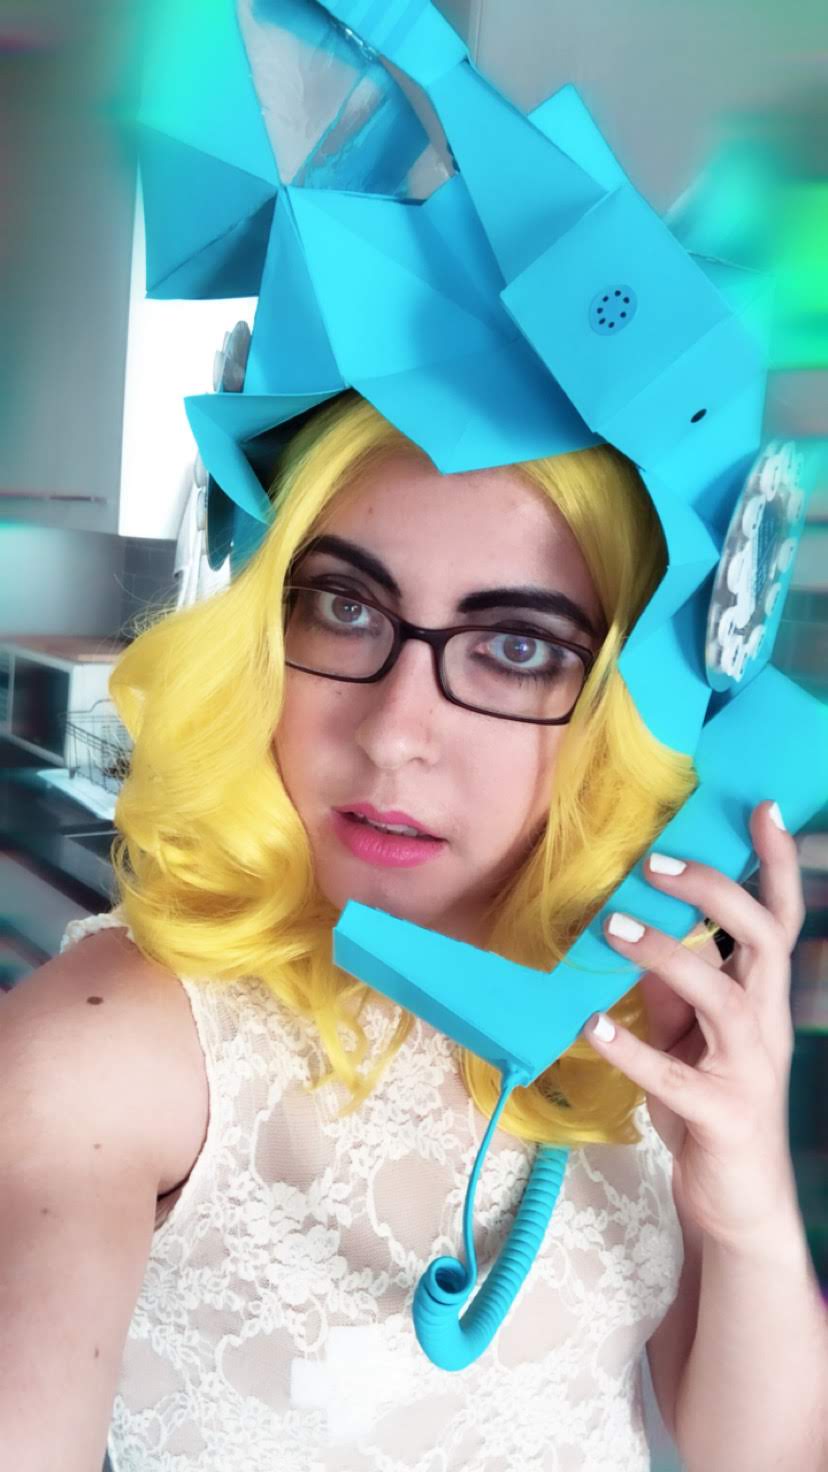
Another thing that I thought was very clever that I thought of was to glue a small magnet to the top of the handheld phone and to the center of the back panel, so that I could “hang up” the phone if I didn’t want to carry it around all night.

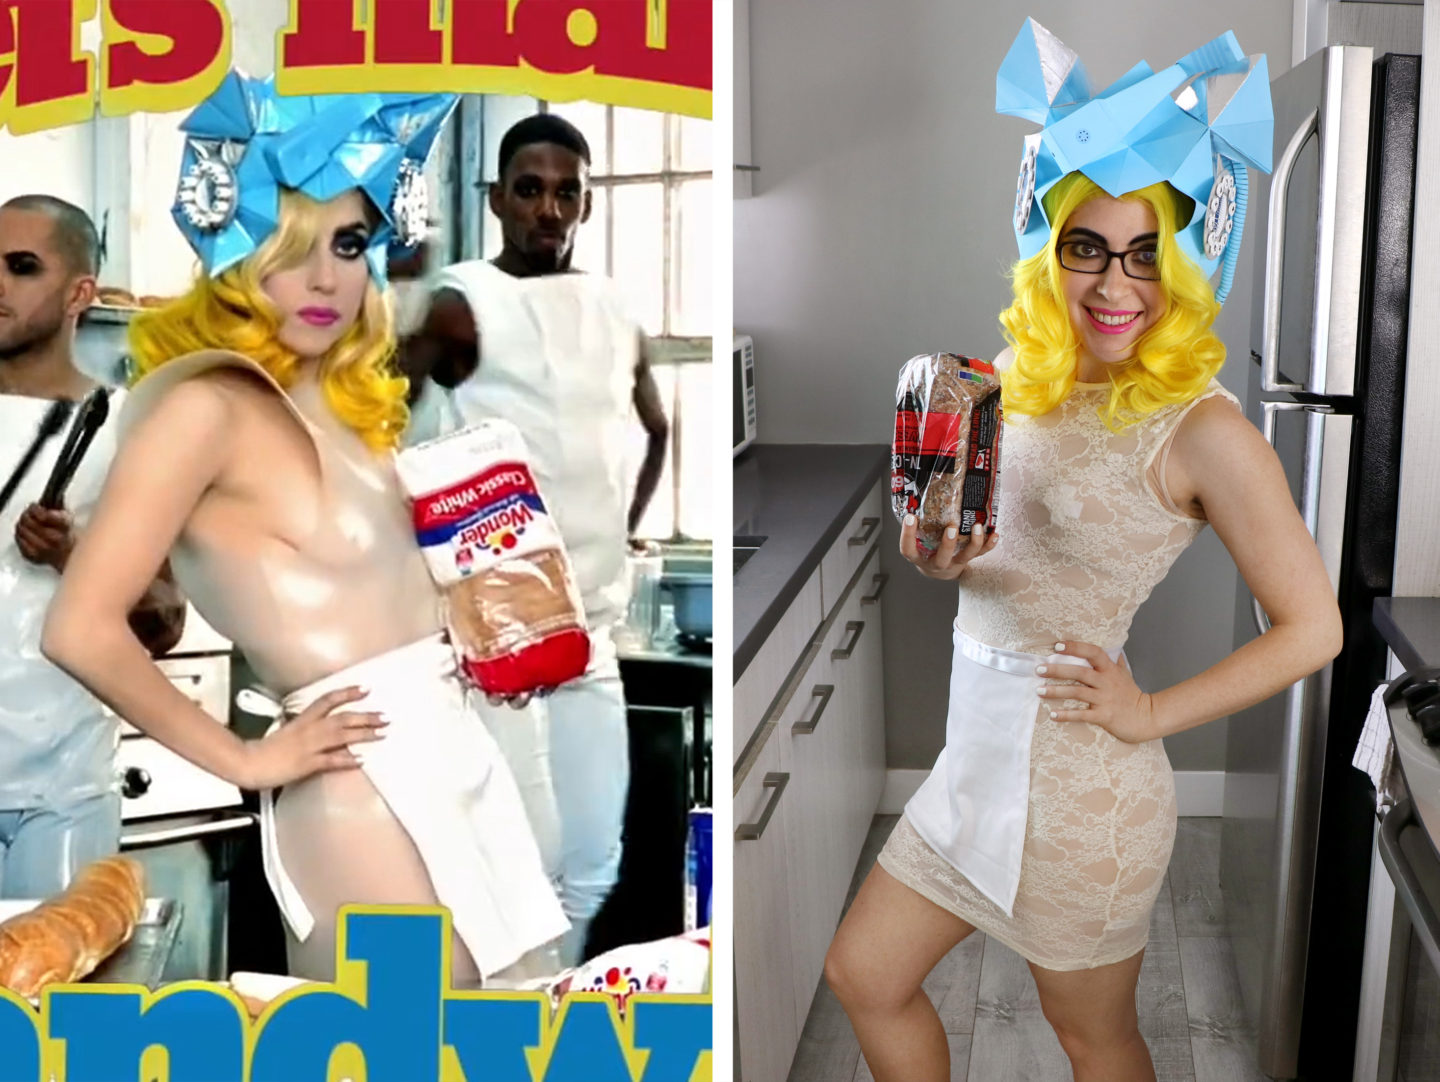
Moving on to the outfit, I initially was going to make the dress from a translucent shower curtain liner, and I did trace an existing dress and get something vaguely dress-like, but it just wasn’t very flattering. And, since it was plastic, it didn’t breathe at all, so my sweat was already beading up on the inside of it just from trying it on, which would have gotten way worse at an actual party. So instead, I cut the sleeves off a lace dress I already had (which I actually originally bought for this Topanga from Boy Meets World costume forever ago). It’s not a perfect match to Gaga, but it’ll do the job for Halloween.
I made the apron myself out of white fabric and white ribbon. I’m not a great seamstress, but I managed to cut a square of fabric, hem the edges, and add the ribbon as a waistband, and spending an hour on that definitely beat spending even more money on another piece of this costume.

Underneath the dress, I’m wearing skin-colored shorts and a bra that I bought at Target. I’m not bold enough to just wear the boob tape that Lady Gaga is rocking, so instead I cut plus signs out of white felt and sewed them to the bra, and I’ll be able to remove them after Halloween to reuse the bra as a normal undergarment.
I bought the wig off of Amazon (aflink), and at $47, it was the most expensive part of this outfit, but it was as close of a match that I could find to Lady Gaga’s hair. And it’s definitely much better quality than the $20 wigs I’ve bought in the past, so I would definitely recommend shelling out the extra money if you’re trying to recreate this look.
I’m really bad at makeup, so there’s not much to tell there, except that I filled in my eyebrows with black eyeshadow to really darken them. I hate wearing eye makeup and since I don’t have contacts, I can never see what I’m doing, so I just brushed on a bit of blue eyeshadow, black eyeliner, and black mascara. The lip gloss I’m wearing is the 302 Fuchsia Amnesia Infallible Pro Matte Gloss from L’oreal. I have no idea where I got this, but it was in my makeup drawer, and it actually has great staying power and didn’t dry my lips out too much.
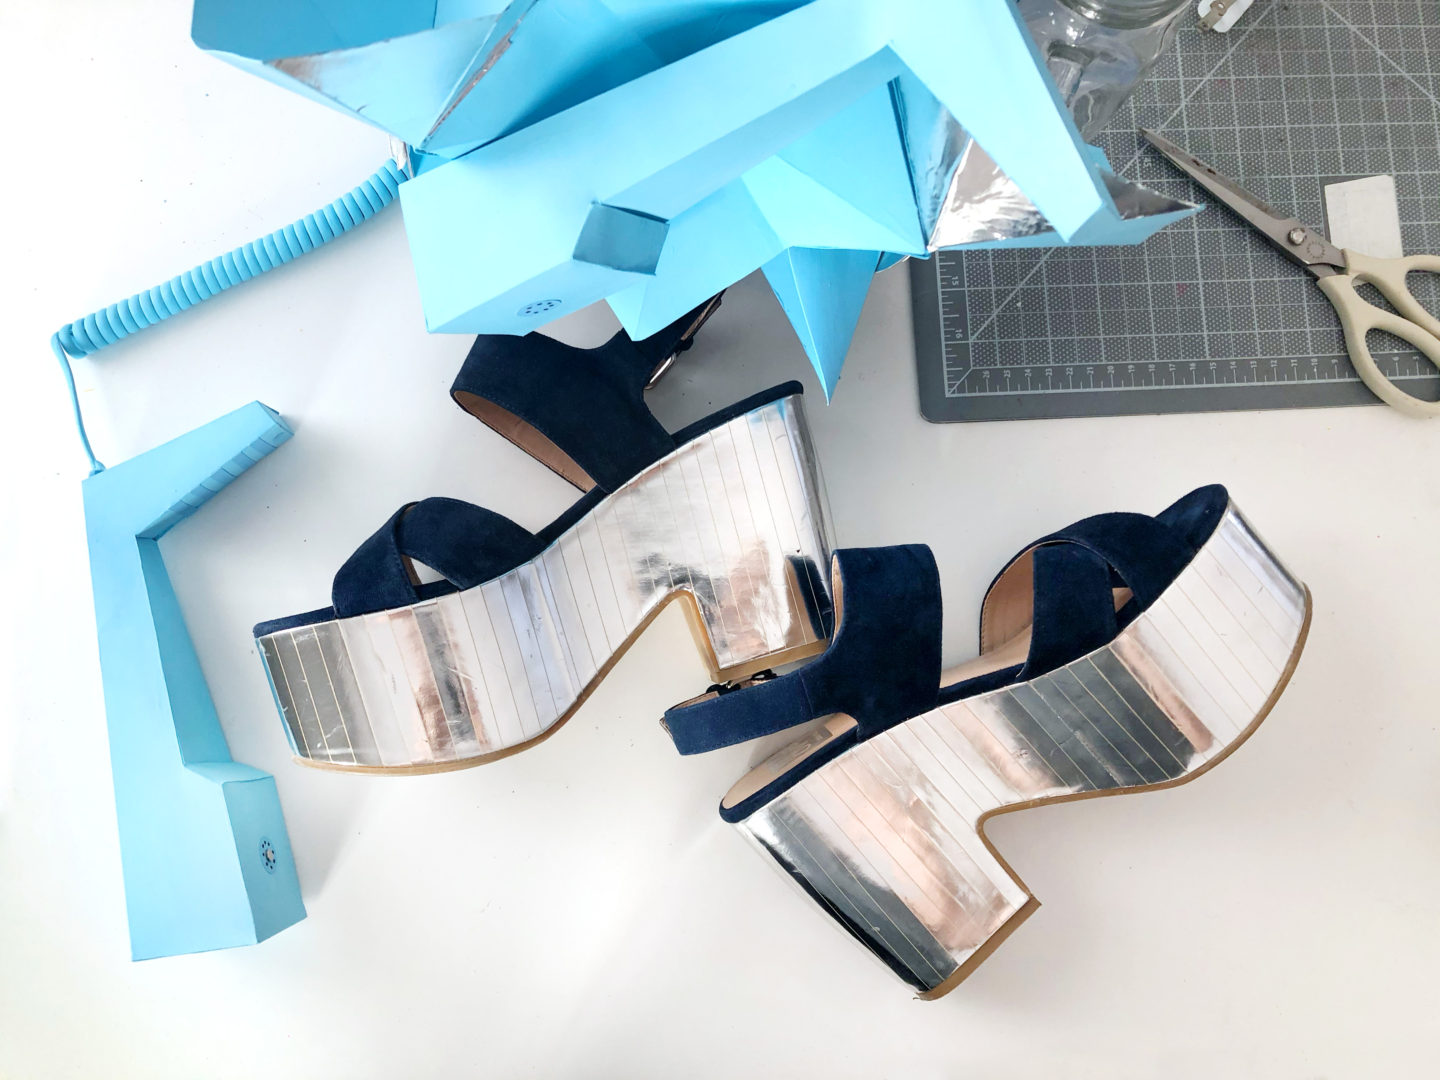
And finally, these are the shoes I wore with it, which I actually got at LF’s going out of business sale for $6. I would have loved to rock some white stiletto boots like Gaga wears in the video, but when I’m going out to parties and walking around, I think platforms are more practical, and the mirrors on them match the mirrors on the hat.


The fun part about this costume is that there’s a prop other people can pose with! I wore this out to my friend Doll’s drag show in West Hollywood with my friend Valentina Vee, and all of the drag queens and gay guys at the bar loved it. Most of the straight guys at the party I went to afterwards didn’t recognize me at all, but I did win the costume contest there!
And, that’s it! This is definitely one of the most ambitious costumes I’ve made yet, but I’m so happy with how it came out. I hope Lady Gaga’s stans will appreciate this throwback to one of her most iconic music videos!
And if you want to see more of my DIY costumes over the years, here are some of my other favorites:
Kelly Clarkson in From Justin to Kelly
Lizzie McGuire’s School Picture
Louise from Teen Witch
Starbucks Pink Drink/Chanel from Scream Queens
Lady Gaga-inspired Slytherin Student